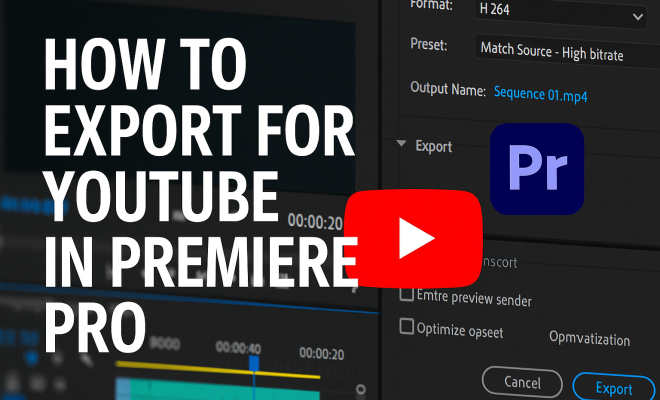
How to export for YouTube in Premiere Pro
“`html
Exporting video for YouTube Premiere Pro might seem daunting at first, but with the right guidance, you can master the process and ensure your content looks its best. As one of the leading video editing software programs, Adobe Premiere Pro offers a variety of tools and options specifically designed for YouTube creators. This comprehensive guide will walk you through every step of exporting your videos, ensuring they meet YouTube’s requirements while also retaining the quality that you worked hard to achieve.
1. Understanding YouTube’s Video Specifications
Before diving into the technicalities of how to export video for YouTube in Premiere Pro, it’s essential to understand YouTube’s video specifications. This platform has specific requirements that your videos must meet to ensure optimal playback quality. As of October 2023, YouTube recommends a minimum resolution of 1080p (1920 x 1080 pixels) for HD videos, with a frame rate of either 24, 25, 30, 48, 50, 60, or 120 fps. Additionally, videos can be uploaded in various formats including .MOV, .MP4, and .AVI, but .MP4 is the most widely used due to its balance of quality and file size.
Another critical factor to consider is the aspect ratio. YouTube’s standard is 16:9, which is perfect for widescreen devices. If your video is in a different aspect ratio, YouTube will automatically add black bars to either side of the video, affecting the overall viewer experience. Thus, ensuring your project settings align with these specifications from the outset can save you time and hassle in the export process.
2. Setting Up Your Project Correctly
To ensure a smooth exporting process, you need to set up your Adobe Premiere Pro project correctly. When you create a new project, select the appropriate settings that align with your intended video output. Start by choosing the correct sequence settings by navigating to File > New > Sequence. From here, select a preset that matches your desired resolution and frame rate, such as the Digital SLR preset for 1080p or 4K output.
It’s also crucial to ensure your sequence settings match your media. If you’re working with 4K footage but your sequence is set to 1080p, the export quality will be compromised. You can adjust these settings later, but starting with the right configurations can save time and help you avoid potential issues during the export process. YouTube's educational potential offers useful background here.
3. Editing Your Video for YouTube
Once your project is set up, it’s time to edit your video. Make sure to include engaging content that resonates with your audience. Remember, YouTube viewers have a limited attention span, so keeping your videos concise and visually appealing is crucial. When editing, consider using overlays, transitions, and captions to make your video more engaging.
Also, pay attention to your audio quality. YouTube emphasizes high-quality audio just as much as video. Utilize audio meters in Premiere Pro to ensure your audio levels are balanced and clear. Highlighting essential portions of your video with better audio can significantly improve retention rates, making your content more appealing to viewers.
4. Color Grading and Effects
Color grading can drastically enhance the visual appeal of your video. Use the Lumetri Color panel in Premiere Pro to adjust exposure, contrast, highlights, shadows, and saturation. It’s essential to find a consistent look across your videos, as this helps build a recognizable brand identity.
Furthermore, adding effects can also elevate your video content. Premiere Pro offers various effects you can experiment with, such as blurs, color adjustments, and transitions. Just be cautious not to overdo it; excessive effects can distract viewers from the message of your video. (See: CDC video specifications and guidelines.)
5. Preparing to Export Your Video
When you’re ready to export, it’s vital to double-check your project. Review your timeline for any mistakes, such as missed edits or audio sync issues. Taking the time to conduct a thorough review can prevent unnecessary redos and help ensure professional-quality output.
Next, navigate to File > Export > Media. This will open the export settings window, where you can choose the format and preset for your video. Selecting the H.264 format is essential for YouTube, as it provides a good balance between file size and quality. Premiere Pro also offers YouTube-specific presets that can simplify this process significantly.
6. Choosing the Right Export Settings
When it comes to exporting for YouTube, choosing the right settings is crucial. In the export settings window, you’ll see various options. For video coding, select H.264, which compresses your video file while maintaining high quality. This format is ideal for YouTube, as it ensures faster upload times without sacrificing quality.
Resolution is another critical factor. Ensure you choose the same resolution as your source footage, whether that’s 1080p or 4K. For bitrate settings, a target bitrate of around 16 Mbps for 1080p at 30 fps is recommended, while 4K videos should target around 35-45 Mbps. This will help your video maintain clarity and quality, especially during fast-moving scenes.
7. Exporting Your Video
After you’ve configured your export settings, the final step is to click the Export button. Depending on the length and complexity of your video, this process can take anywhere from a few minutes to several hours. While waiting, ensure you have a stable internet connection ready for uploading your video to YouTube.
If you prefer, you can also queue your export to Adobe Media Encoder by clicking the Queue button instead of Export. This allows you to continue working on other projects while the video exports. Once exporting is complete, check your video file to ensure everything looks as expected before uploading it to YouTube.
8. Uploading to YouTube
With your video exported, the next step is uploading it to YouTube. Navigate to your YouTube account, and click on the camera icon with a plus sign to start the upload process. You can drag and drop your video file or click to browse your files.
When uploading, you’ll have the opportunity to fill in metadata such as the title, description, and tags. Make sure to optimize this information for search engines to enhance your video’s discoverability. YouTube’s algorithm rewards videos with relevant keywords, so incorporate terms that your target audience is likely to use when searching for content like yours.
9. Setting Up Your Video’s Upload Settings
As you upload your video, pay close attention to the settings offered by YouTube. Choose the appropriate visibility setting (Public, Unlisted, or Private), and consider scheduling your video for a specific release time. YouTube’s analytics can help you determine the best time to publish based on your audience’s viewing habits.
Additionally, consider adding custom thumbnails, which can greatly impact click-through rates. A well-designed thumbnail can attract viewers and encourage them to click on your video. You can create thumbnails using graphic design tools or even within Premiere Pro if you export a still image from your video.
10. Post-Publishing: Monitoring Performance
Once your video is live, it’s essential to monitor its performance. YouTube Analytics provides valuable insights into how your video is performing, including view counts, watch time, and audience retention. Analyzing this data can help you understand what works and what needs improvement for future videos. (See: New York Times on YouTube video quality.)
Engage with your viewers through comments, and don’t hesitate to respond to feedback. Building a community around your content is key to long-term success on YouTube. Additionally, consider promoting your video on social media platforms to increase its reach and attract new viewers.
11. Extra Tips for Optimizing Your Videos for YouTube
Beyond the basic requirements for exporting video for YouTube in Premiere Pro, there are several advanced strategies you can employ to make your videos even more appealing and successful:
- Use End Screens and Cards: Utilize YouTube’s end screens and cards to promote other videos or encourage subscriptions. This keeps viewers engaged and helps grow your channel.
- Engage with Your Audience: During the editing phase, consider adding calls-to-action (CTAs) that encourage viewers to like, comment, and subscribe. This can be done verbally or through on-screen graphics.
- Custom Thumbnails: As mentioned earlier, a well-designed thumbnail can significantly affect your video’s click-through rate. Ensure your thumbnails are eye-catching and accurately represent your video content.
- SEO-Friendly Descriptions: Craft a detailed description for your video that includes relevant keywords. This not only helps with discoverability but also informs viewers about what they can expect from your content.
- Use Playlists: Organize your videos into playlists. This not only enhances viewer experience but also increases watch time as videos auto-play in sequence.
12. Common Exporting Issues and Solutions
Despite following the correct procedures, you might encounter issues during the export process. Here are some common problems and their solutions:
- Export Fails: If your export fails, check the error messages. Often, this is due to insufficient disk space. Ensure you have enough free space available and try exporting again.
- Low Quality Post-Export: If your video looks grainy or low quality, double-check your sequence settings and export bitrate. Ensure the settings match your source footage.
- Audio Issues: If your audio is out of sync or missing entirely, make sure your audio tracks are not muted and that they are properly aligned in the timeline. You may also want to check your export settings to ensure the audio codec is set correctly.
- Long Export Times: If exporting takes too long, you may want to reduce the resolution or bitrate settings. Alternatively, ensure your computer’s performance settings are optimized for video editing.
13. Frequently Asked Questions (FAQs)
What file format should I choose when exporting for YouTube?
The recommended file format for YouTube is H.264, which is widely accepted and provides a good balance of quality and file size.
What resolution should I export my video for YouTube?
YouTube recommends a minimum resolution of 1080p (1920 x 1080 pixels) for HD videos. If you have 4K footage, you can export in 4K resolution for better quality.
How do I know my export settings are right for YouTube?
You can use YouTube’s recommended export settings as a guideline. These include using the H.264 format, a target bitrate of 16 Mbps for 1080p, and ensuring your video is in 16:9 aspect ratio.
Can I upload videos longer than 15 minutes on YouTube?
Yes, users can upload videos longer than 15 minutes if their accounts are verified. Consider verifying your account by providing a phone number to unlock this feature.
How can I improve my video’s visibility on YouTube?
Improving your video’s visibility involves optimizing your title, description, and tags with relevant keywords. Engaging with viewers and promoting your video on social media also helps increase its reach.
14. Advanced Export Techniques
As you get more comfortable with exporting video for YouTube using Premiere Pro, you might want to explore some advanced techniques that can further enhance your workflow.
One of these techniques is using presets. Once you’ve found the perfect export settings for your YouTube videos, consider saving them as a custom preset. This will save you time when exporting future videos, allowing you to maintain consistency across your content. To create a preset, after setting your parameters in the export settings window, click the Save Preset button and give it a memorable name.
Additionally, consider using the Render and Replace feature for complex sequences. This function renders effects, nested sequences, and dynamic link clips so that your computer can handle more intensive edits more smoothly. It can be a game-changer if you’re working with high-resolution footage or multiple effects.
15. The Importance of Video Thumbnails
Your video thumbnail often serves as the first impression viewers have of your content. Effective thumbnails can significantly increase your click-through rate. Aim for bright, contrasting colors and readable text. Tools like Canva or Adobe Photoshop can help you design custom thumbnails that stand out. You might also consider A/B testing different thumbnails on your videos to find out which designs perform better with your audience.
16. Understanding YouTube Analytics
YouTube Analytics can provide you with insights that are invaluable for improving your video content and strategy. Key metrics to pay attention to include:
- Watch Time: This metric shows how much time people spend watching your video. Higher watch time improves your video’s ranking on YouTube.
- Audience Retention: This percentage indicates how much of your video people watch. Aim for a higher retention rate by crafting engaging early moments to hook viewers.
- Traffic Sources: Understanding where your viewers come from (e.g., search results, suggested videos, or external sources) helps you refine your promotional strategies.
17. Engaging with Your Community
Building a community around your YouTube channel is just as important as creating content. Responding to comments, creating community posts, and occasionally doing live Q&A sessions can deepen your connection with your audience. Engaging with your viewers encourages them to return and fosters a sense of loyalty that can significantly boost your channel’s growth over time.
Exporting video for YouTube in Premiere Pro doesn’t have to be a complicated process. By following these steps and best practices, along with utilizing advanced techniques and community engagement strategies, you can ensure your videos are optimized for performance and quality, setting your content up for success on the platform.
“`
Trending Now
Frequently Asked Questions
What are the best export settings for YouTube in Premiere Pro?
The best export settings for YouTube in Premiere Pro include selecting the H.264 format, setting the resolution to at least 1080p (1920 x 1080), and maintaining a frame rate of 24, 30, or 60 fps. Additionally, ensure your aspect ratio is 16:9 to avoid black bars on the sides.
How do I export a video in Premiere Pro for YouTube?
To export a video in Premiere Pro for YouTube, go to File > Export > Media. Choose the H.264 format, select the YouTube preset, adjust the resolution and frame rate, and click Export. This will ensure your video meets YouTube's specifications.
What resolution should I use for YouTube videos?
YouTube recommends a minimum resolution of 1080p (1920 x 1080 pixels) for HD videos. Higher resolutions like 4K (3840 x 2160) are also supported, providing better quality for viewers with compatible devices.
What video format is best for YouTube?
The best video format for YouTube is .MP4, as it offers a good balance between quality and file size. Other supported formats include .MOV and .AVI, but .MP4 is the most widely used by creators.
Why is my video not exporting correctly in Premiere Pro?
If your video is not exporting correctly in Premiere Pro, check your sequence settings to ensure they match your desired output. Also, verify that your export settings, such as format and resolution, align with YouTube's specifications.
Agree or disagree? Drop a comment and tell us what you think.