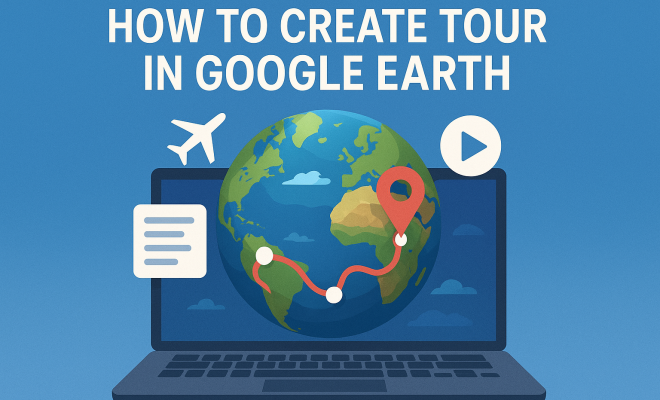
How to create tour in Google Earth
“`html
Google Earth has transformed the way we explore our planet, allowing users to traverse vast landscapes, experience landmarks up close, and even delve into the depths of the ocean, all from their screens. But did you know that you can create a custom tour in Google Earth? This feature not only enhances your geographical knowledge but also allows for creativity and storytelling. In this guide, we’ll walk you through how to create a tour in Google Earth, along with tips, tricks, and the potential applications of your virtual journey.
1. Understanding Google Earth
Before diving into the specifics of creating a tour, it’s important to understand what Google Earth is and what it offers. Launched in 2005, Google Earth is a geospatial application that provides a 3D representation of Earth based on satellite imagery. Users can navigate the globe, zoom into specific locations, and view detailed terrain features.
Since its inception, Google Earth has evolved significantly, introducing features like Google Earth Pro, which provides advanced tools for data visualization and geographic information systems (GIS) analysis. Whether you’re an educator, a traveler, or simply a curious explorer, Google Earth opens up a world of possibilities.
2. Preparing for Your Tour
Creating a successful tour in Google Earth starts with proper planning. First, identify the purpose of your tour: Is it for educational purposes, a travel itinerary, or perhaps a historical exploration? This clarity will guide the content you choose to include.
Next, gather your resources. Research the locations you want to feature in your tour, noting interesting facts, images, and stories that will enhance the viewer’s experience. It’s also helpful to sketch a rough outline of your tour’s path, deciding the order in which you’ll present each stop.
3. Accessing Google Earth
To create your tour, you’ll need access to Google Earth. You can use either the web-based version at earth.google.com or download the desktop application, Google Earth Pro. While the web version is convenient for quick access, the Pro version offers more robust tools, which can be particularly useful for creating detailed tours.
If you’re using Google Earth Pro, install the application and sign in with your Google account. This allows you to save your work and access it from any device. For the web version, simply navigate to the site, and you’re ready to start exploring.
4. Creating Your Tour
Once you’re in Google Earth, the first step to create your tour is to find your starting point. You can use the search bar to locate a specific destination or drop pins on the map manually. To add a location, right-click on the spot, and select ‘Add Place Mark.’ This will create a pin that you can customize.
Next, you can incorporate multimedia elements. Click on your place mark to bring up the editing window, where you can add a name, description, and even images or videos. This is where your research pays off—include interesting facts, historical context, or personal anecdotes to make the tour engaging.
5. Adding Multiple Locations
Your tour can feature multiple locations. To add more place marks, simply repeat the previous steps for each destination. Google Earth allows you to organize these place marks into a folder. To do this, click on ‘My Places’ in the left sidebar, right-click, and select ‘Add Folder.’ This organization helps manage your tour, especially if it covers a wide area or numerous sites.
As you add each location, consider how they connect to one another. A logical flow will make the tour more enjoyable and easier to follow. For instance, if you’re creating a historical tour, consider placing locations in a chronological order to tell a story. (See: Wikipedia page on Google Earth.)
6. Incorporating a Pathway
To guide viewers through your tour, you can create a pathway that connects your place marks. This feature is particularly useful for tours that involve travel routes, such as hiking trails, road trips, or historical routes. To add a path, go to the toolbar and select the ‘Add Path’ option.
Once selected, click on the map to start drawing your path. You can customize the appearance, including color and width, to make it visually appealing. After finishing the path, make sure to label it appropriately and provide context in the description about what the pathway signifies.
7. Using the Tour Recording Feature
One of the standout features of Google Earth is the ability to record your tour. This allows you to create a video walkthrough of your journey, which can be a powerful tool for presentations or sharing your adventures with others. To start recording, click on the ‘Record a Tour’ button in the toolbar.
As you move through your tour, Google Earth will capture your movements. Narrate along the way, providing insights and stories about each location to enhance the experience. Once finished, save your recorded tour, and you’ll have a video that captures your personalized journey across the globe.
8. Sharing Your Tour
Sharing your tour can expand its reach and impact. Once you’ve created and saved your tour, right-click on your folder in ‘My Places’ and select ‘Save Place As.’ This will create a .kmz file that can be shared via email or uploaded to cloud storage services.
Additionally, Google Earth provides options to share directly via social media platforms or by generating a link. Consider your audience when sharing—if it’s an educational tour, you might want to share it with a classroom or community group. For personal tours, sharing with friends and family could lead to some great discussions and reminiscing.
9. Exploring Other Users’ Tours
Before you finish, take a moment to explore tours created by others. Google Earth hosts a variety of user-generated content that can inspire your own creations. You can find these tours in the ‘Projects’ section on the platform. Whether you’re interested in famous landmarks, geological wonders, or travel guides, there’s a wealth of information out there.
By examining these tours, you can gather ideas on how to enhance your own tour, from multimedia presentation to storytelling techniques. Don’t hesitate to borrow concepts that resonate with you, making sure to add your personal flair to keep it unique.
10. Applications of Google Earth Tours
The applications for creating a tour in Google Earth are virtually limitless. Educators can use it to create interactive lessons, students can present research projects, and travelers can document their journeys. Additionally, businesses may use it for marketing purposes, showcasing locations or features of interest to potential clients.
Nonprofits and advocacy groups also benefit from Google Earth tours for awareness campaigns, highlighting environmental issues or historical sites in need of protection. By leveraging the power of visualization, you not only enhance the learning experience but also inspire action and engagement.
11. Tips for an Impactful Presentation
Creating a tour in Google Earth means you also have to think about how to present it. Here are some tips for crafting an impactful presentation:
- Engage Your Audience: Start with a compelling introduction that piques interest. Share a surprising fact or a personal story related to your tour theme.
- Use High-Quality Visuals: Incorporate high-resolution images and videos that enhance the storytelling aspect of your tour. Visuals should complement your narrative.
- Limit Text: Keep descriptions concise. Too much text can overwhelm viewers. Use bullet points for easy reading.
- Incorporate Interactive Elements: Encourage viewers to explore on their own by including questions or prompts that invite them to think about what they are witnessing.
- Practice Your Narrative: If you’re recording a voiceover, rehearse what you want to say to ensure a smooth delivery. Natural delivery can keep viewers engaged.
12. Examples of Creative Google Earth Tours
Looking for inspiration? Here are a few creative ideas for Google Earth tours that can be both fun and educational:
- Famous Historical Events: Create a tour that takes viewers through significant historical events, showcasing locations where they happened. Include narratives that describe the events and their impact.
- Environmental Changes: Document environmental changes over time, like deforestation, urban development, or climate change effects. Use before-and-after imagery to show the impact.
- Cultural Exploration: Highlight different cultures around the world. Include local landmarks, traditional foods, languages spoken, and customs.
- Travel Adventures: Record your travels as they happen! As you visit new places, document them on Google Earth, sharing insights and experiences with friends and family.
- Science and Nature: Focus on natural wonders, such as the Grand Canyon, Mount Everest, or the Great Barrier Reef. Discuss the geography, wildlife, and conservation efforts in the area.
13. Benefits of Creating Tours in Google Earth
There are numerous benefits to creating a tour in Google Earth. Here are just a few: (See: NASA Earth Science Division.)
- Enhanced Learning: Visual learning can often be more effective than traditional methods. Using Google Earth, you provide an immersive learning experience.
- Encourages Exploration: By creating a tour, you encourage others to explore new places and learn about geography and culture.
- Storytelling: Every trip or historical event has a story. With Google Earth, you can weave those stories beautifully into an engaging narrative.
- Collaboration: You can work with others to create a tour. Collaborating on a project can yield diverse perspectives and richer content.
- Easy Sharing: The ability to share your tour easily means you can reach a broader audience, whether for educational purposes or personal sharing.
14. Common Challenges and Solutions
While creating a tour in Google Earth can be an exciting project, there may be challenges along the way. Here are some common ones and ways to overcome them:
- Technical Issues: Sometimes the application may lag or crash. Ensure your software is updated and your device has sufficient resources. Restarting the app can also resolve temporary issues.
- Information Overload: It’s easy to get carried away with content. Stick to the most relevant and engaging material to keep your audience interested.
- Navigation Confusion: If your path is complex, viewers may get lost. Simplify your routes and provide clear descriptions to guide them.
- Time Management: Creating a comprehensive tour can be time-consuming. Set deadlines for each phase of the tour creation process to stay on track.
15. Frequently Asked Questions (FAQ)
How do I save my tour in Google Earth?
To save your tour, right-click on your project folder in ‘My Places’ and select ‘Save Place As.’ This allows you to store your work as a .kmz file on your computer.
Can I edit my tour after saving it?
Yes! You can reopen your saved .kmz file in Google Earth to make any edits or updates as needed.
Is Google Earth free to use?
Yes, the basic version of Google Earth is free for all users. Google Earth Pro, which includes additional features, is also now free to download and use.
Are there any limitations to Google Earth tours?
While Google Earth offers many features, there are some limitations, such as the maximum number of place marks and paths you can add to a single project. However, most users find these limits quite sufficient for creating engaging tours.
Can I embed my Google Earth tour on a website?
No, currently Google Earth does not support direct embedding of tours into websites. However, you can share the link to your tour if it’s hosted in Google Earth’s Projects section.
What types of media can I include in my tour?
You can include images, videos, text descriptions, and links in your Google Earth tour. This multimedia capability enhances the storytelling aspect of your tour.
Can I collaborate with others on a Google Earth tour?
Yes, you can share your tour with others who can then view or even edit it, depending on the permissions you set. This is great for group projects or collaborative storytelling.
16. Advanced Features of Google Earth for Tour Creation
For those looking to elevate their Google Earth tours, there are advanced features that can enhance the experience significantly. Understanding these features can not only improve the quality of your tour but also engage your audience on a deeper level.
Using KML and KMZ Files
When creating tours, you may want to familiarize yourself with KML (Keyhole Markup Language) and KMZ (the compressed version of KML) files. These formats allow for more complex data handling and can be used to include additional layers of information such as maps, routes, and even 3D models. If you’re comfortable with coding, you can manipulate these files to create custom markers, paths, and overlays that significantly enhance your tour. (See: CDC on the importance of geography.)
Integrating Real-Time Data
For a truly dynamic experience, consider integrating real-time data into your tour. Google Earth allows you to overlay real-time data layers that can show things like current weather patterns, traffic conditions, or even social media feeds related to the locations on your tour. This not only brings an element of immediacy but can also provide visitors with essential context and relevance.
Custom Overlays and Annotations
You can create custom overlays that present data or imagery directly on the map. This is particularly useful for historical tours, as you can show how a location has changed over time. You can use historical imagery or create a comparative overlay that fades between the past and present views. Similarly, annotations can be added to give context to certain locations, making your tour more informative and engaging.
17. The Future of Google Earth Tours
The future of Google Earth and its tour creation capabilities looks bright. As technologies evolve, we can expect improvements in virtual reality (VR) and augmented reality (AR) experiences integrated with Google Earth. Imagine being able to take a virtual tour that not only shows you the location but allows you to immerse yourself in the environment using VR headsets.
Additionally, developments in artificial intelligence might help automate some of the more tedious aspects of tour creation. AI could analyze user preferences and suggest locations and content, making it easier to develop personalized tours. This means that more people can create compelling tours without needing extensive knowledge of mapping or storytelling.
18. Case Studies: Successful Google Earth Tours
Looking at specific examples of successful Google Earth tours can provide useful insights into best practices and innovative ideas. Consider the following case studies:
- The World Heritage Tour: This tour showcases UNESCO World Heritage sites from around the globe, providing users with a stunning visual journey while educating them about the importance of conservation and cultural heritage.
- The Climate Change Tour: An initiative by environmental organizations, this tour documents the effects of climate change across different regions. It combines real-time data with location-based storytelling to highlight urgent environmental issues.
- The Historical Journey of Civil Rights: This tour takes viewers through pivotal locations in the civil rights movement, using photographs and narratives that enhance the understanding of the struggle for equality in the United States.
19. Potential for Community Engagement
Creating a tour in Google Earth can foster community engagement in various ways. Schools can collaborate on projects, allowing students to showcase their learning while parents and community members engage with the material. Local historians or cultural organizations can create tours that invite the community to explore their heritage, leading to greater appreciation and involvement.
Moreover, businesses can use Google Earth tours for local advertising, guiding potential customers through their services and offerings right on the map. This creates a unique interaction point where users can learn about local businesses in an engaging and informative way.
20. Conclusion
Creating a tour in Google Earth is not just a fun activity; it’s also a powerful tool for education, storytelling, and exploration. The possibilities are vast, whether you’re aiming to educate, entertain, or share personal experiences. So gather your ideas and start crafting your own virtual journey today!
“`
Trending Now
Frequently Asked Questions
How do I create a tour in Google Earth?
To create a tour in Google Earth, start by planning your tour's purpose and gathering resources about the locations you want to include. Access Google Earth, and then use the tools available to add locations, images, and narratives to enhance your virtual journey.
What are the benefits of using Google Earth for tours?
Using Google Earth for tours allows users to explore locations in 3D, making it an engaging way to learn about geography, history, or travel itineraries. It enhances storytelling through multimedia elements, such as images and descriptions, providing a richer experience.
Can I use Google Earth for educational purposes?
Yes, Google Earth is a powerful tool for educational purposes. Educators can create interactive lessons, showcase geographical features, and engage students in virtual field trips, making learning more dynamic and visually appealing.
What features does Google Earth offer for creating tours?
Google Earth offers various features for creating tours, including 3D representations of locations, the ability to add placemarks, images, videos, and text descriptions. Users can also create a path to guide viewers through the tour seamlessly.
Is Google Earth free to use?
Yes, Google Earth is free to use, with a web-based version available at earth.google. Users can access a wide range of features without any cost, making it accessible for personal, educational, and professional projects.
Have you experienced this yourself? We'd love to hear your story in the comments.