How to create split screen in Filmora?
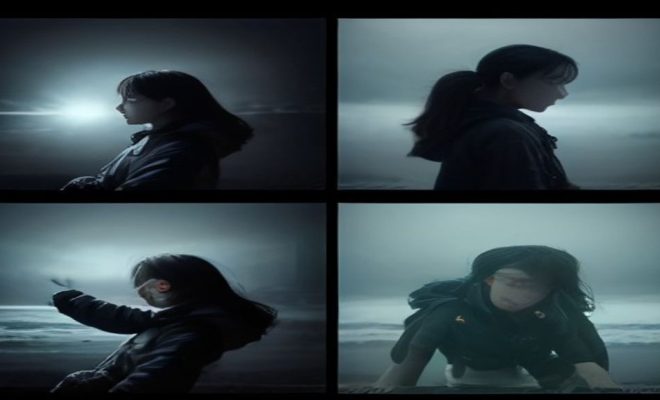
Ever watched a movie or a YouTube video where multiple scenes play out simultaneously, giving you a comprehensive view of different perspectives or actions? That, my friend, is the magic of split screen. It’s a powerful visual technique that can elevate your video projects from mundane to truly captivating. And if you’re a Filmora user, you’re in luck, because creating a dynamic split screen effect in Filmora is surprisingly straightforward, yet incredibly versatile. Forget those clunky, complicated editing suites; Filmora makes this advanced technique accessible to everyone, from budding YouTubers to seasoned indie filmmakers.
But why bother with a split screen at all? Well, it’s not just a fancy trick. A well-executed split screen can tell a more complex story, highlight comparisons, build suspense, or even inject a dose of humor. It’s about more than just putting two videos side-by-side; it’s about crafting a narrative that engages your audience on multiple levels. We’re going to dive deep into not just *how* to use the split screen Filmora feature, but *when* and *why* it can be a game-changer for your content. Get ready to transform your video editing.
1. The Basics of Split Screen Filmora: Getting Started with the Presets
Before we get too fancy, let’s cover the absolute essentials of making a split screen in Filmora. Wondershare has done an excellent job of providing a user-friendly interface that makes this process incredibly intuitive. You don’t need to be a professional editor to get a professional-looking result. The journey begins in the ‘Split Screen’ tab, usually found on the left-hand side of your interface, alongside ‘Media,’ ‘Audio,’ ‘Titles,’ and ‘Transitions.’
Once you click on ‘Split Screen,’ you’ll be presented with a gallery of pre-designed templates. These templates are your starting point, offering various layouts – from two-pane horizontal splits to more complex four-pane grids. Choosing the right template is crucial, as it dictates how many video clips you can use and their arrangement on screen. Simply drag and drop your chosen template onto your timeline. You’ll see placeholders appear, indicating where your videos will go. From there, it’s a matter of dragging your desired video clips from your media library directly into these placeholders. Filmora will automatically adjust their size and position to fit the layout. It’s genuinely that simple to get the ball rolling with a split screen Filmora project.
2. Comparing and Contrasting: Side-by-Side Analysis
One of the most powerful applications of the split screen Filmora feature is its ability to facilitate direct comparisons. Imagine you’re reviewing two different smartphones, demonstrating the before-and-after effects of a workout routine, or showcasing two distinct approaches to a creative project. A split screen allows your audience to see both elements simultaneously, making the comparison immediate and impactful.
For instance, a tech reviewer might place footage of a phone’s camera performance in bright light on one side and its low-light capabilities on the other. This visual juxtaposition is far more effective than simply cutting between two separate clips. When you use the split screen Filmora feature for comparison, you’re not just showing; you’re highlighting differences and similarities in a way that static imagery or sequential clips simply can’t achieve. It’s a fantastic way to add depth and clarity to your explainer videos or product reviews.
3. Showing Multiple Perspectives: Enhancing Narrative Depth
In storytelling, perspective is everything. A split screen can be an incredible tool for showing different characters’ reactions to the same event, or revealing what’s happening in two different locations simultaneously to build tension or clarify a situation. Think about a phone call scene in a movie: instead of cutting back and forth, a split screen can show both callers’ faces, capturing their individual emotions and reactions in real-time, enriching the emotional impact.
This technique is particularly effective in documentaries or interviews where you might want to show both the interviewer and the interviewee, or even a subject matter expert reacting to a piece of footage. By leveraging the split screen Filmora option, you create a more immersive and informative viewing experience. It allows your audience to absorb multiple layers of information and emotional cues simultaneously, making your narrative much richer and more engaging.
4. Action and Reaction: Dynamic Storytelling
Building on the idea of multiple perspectives, ‘action and reaction’ is a specific narrative technique that truly shines with a split screen. Imagine a sports highlight reel: one panel shows the spectacular goal, while another concurrently displays the crowd’s ecstatic reaction, or perhaps the coach’s triumphant fist pump. This simultaneous display amplifies the emotional resonance of the moment.
Beyond sports, consider a cooking tutorial where one panel shows the chef performing a delicate technique, and the other shows a close-up of the ingredients transforming. This dual view provides both context and detail, making the instructional content much clearer and more dynamic. The split screen Filmora tool, in this context, isn’t just a layout; it’s a narrative device that heightens the drama and impact of your video. (See: Overview of video editing techniques.)
5. Creating Montages and Collages: Visual Storyboards
Sometimes you want to convey a lot of information or emotion in a short amount of time, showcasing a collection of moments or ideas. This is where the split screen Filmora feature can be incredibly useful for creating visually rich montages or collages. Instead of a rapid-fire sequence of cuts, which can sometimes feel jarring, a split screen allows several related clips to play out concurrently.
Think about a travel vlog documenting a trip: one panel might show a panoramic landscape, another a close-up of local cuisine, and a third a candid interaction with locals – all playing at once. This creates a vibrant, multi-faceted impression of the experience. It’s a fantastic way to summarize an event, showcase a variety of products, or present a mood board visually, giving viewers a comprehensive snapshot without overwhelming them.
6. Adding Text and Graphics: Enhancing Information
While the visual aspect of split screen is powerful, don’t forget the added layer of information you can provide with text and graphics. When you utilize the split screen Filmora tool, you’re not just limited to video. You can dedicate one panel to a video clip and another to static text, bullet points, or even an infographic that provides context, statistics, or explanations.
For educational content, this is a goldmine. Imagine a tutorial where one side shows the step-by-step process, and the other side displays key terms, definitions, or tips. Or, in a news report, one panel could show live footage while another presents breaking text updates or relevant data. This integration of visuals and text makes your content more accessible and informative, catering to different learning styles and ensuring your message is clear.
7. Picture-in-Picture (PiP) Variations: Subtler Split Screens
While traditional split screens involve distinct, often equal-sized panels, Filmora also allows for more fluid and subtle variations, particularly through its Picture-in-Picture (PiP) capabilities, which can be seen as a form of flexible split screen. Instead of a rigid grid, you might have a dominant main video with smaller overlay videos strategically placed within it.
This is commonly used in gaming videos, where the gameplay fills the main screen and a smaller webcam feed of the gamer’s reaction sits in a corner. Or, in a tutorial, the main video could be a screen recording, with a smaller video of the presenter explaining a concept. Filmora’s flexibility with scaling and positioning these PiP elements means you can create a ‘soft’ split screen effect, where one element is clearly primary but others provide important supplementary information without taking over the entire frame. Mastering this nuanced split screen Filmora approach adds another layer to your editing repertoire.
8. Customizing Your Split Screen: Beyond the Presets
The beauty of Filmora lies not just in its ease of use, but also in its depth. While the presets are a fantastic starting point, you’re not confined to them. Once you’ve dragged a split screen template onto your timeline and added your clips, you can dive into further customization. This is where your creative vision truly comes to life.
You can adjust the size and position of each individual video within its panel. Want one clip to be larger and more prominent? No problem. You can also apply individual effects, color corrections, and even transitions to each clip within the split screen arrangement. Furthermore, you can adjust the border lines between the panels – changing their color, thickness, or even removing them entirely for a more seamless look. Don’t forget about audio; you might want one clip’s audio to be dominant, or perhaps a blend of all. Filmora gives you granular control over these elements, allowing you to tailor your split screen Filmora layout precisely to your artistic needs.
9. Creative Transitions Between Split Screens: Smooth Flow
Just like any other segment of your video, the transitions into and out of a split screen sequence matter. Abrupt cuts can be jarring. Filmora offers a wide array of transitions that can make your split screen appear or disappear gracefully, or even transition between different split screen layouts fluidly. Imagine a scene where a single video expands into a two-panel split, or a four-panel grid collapses back into a single frame, revealing a new scene.
Experiment with push, wipe, or dissolve transitions to introduce your split screen sections. You can even use more stylized transitions that reveal the split screen panels one by one. The key is to think about the narrative flow. Does the transition enhance the story? Does it guide the viewer’s eye? A well-chosen transition can make your split screen Filmora work feel polished and professional, rather than just a sudden change in layout. (See: Video editing tips and techniques.)
10. Audio Management for Split Screens: The Unsung Hero
While we often focus on the visual aspects, effective audio management for your split screen Filmora projects is absolutely crucial. Multiple videos playing simultaneously mean multiple audio tracks, and if not handled correctly, this can lead to a chaotic and unpleasant listening experience. Filmora provides robust audio editing tools that are essential here.
You’ll need to decide which audio track (or tracks) should be prominent. Do you want the audio from all clips to play, perhaps mixed at different levels? Or should one clip’s audio dominate, while others are muted or significantly lowered? For instance, in a ‘before and after’ comparison, you might only want the ‘after’ audio to be heard, or perhaps a single piece of background music to tie both visuals together. Use Filmora’s volume keyframing to smoothly adjust audio levels as your split screen plays out. You can also apply audio effects like noise reduction or equalization to individual tracks to ensure clarity. Remember, a visually stunning split screen can be undermined by poor audio, so give it the attention it deserves.
11. Leveraging Color Grading and Effects within Split Screens: Visual Harmony
Once you’ve arranged your clips in a split screen Filmora layout, don’t forget about the power of color grading and visual effects. While each clip plays simultaneously, they should ideally work together to create a cohesive visual experience. Applying consistent color grading across all panels can help unify the different shots, especially if they were filmed under varying conditions.
For example, if you’re comparing two different products, you might want to ensure both videos have a similar white balance and exposure so the comparison is fair and visually balanced. Alternatively, you might use contrasting color grades to emphasize differences – perhaps a warm, inviting tone on one side and a cool, clinical look on the other to highlight a thematic contrast. Filmora lets you apply effects and color adjustments to individual clips within the split screen. You can add subtle vignettes, sharpen details, or even use creative filters to enhance the mood of each segment. The goal is to make each part of your split screen work contribute to the overall visual story, not distract from it.
12. Advanced Storytelling Techniques with Split Screen Filmora: Beyond the Obvious
The split screen Filmora feature isn’t just for basic comparisons; it can be a tool for truly sophisticated storytelling. Think about using it for parallel narratives, where two distinct storylines unfold simultaneously, eventually converging or diverging. This can build incredible suspense or reveal crucial plot points in a dynamic way that a single-frame narrative couldn’t achieve as effectively.
Consider a mystery where one panel shows a detective investigating a crime scene, while another shows the suspect’s alibi playing out in real-time. The audience gets a privileged view of both events, creating dramatic irony or heightening the tension as discrepancies emerge. Another advanced use is for depicting internal monologue or abstract concepts. One panel could show a character’s external actions, while another, perhaps stylized with effects, visualizes their thoughts or memories. This adds a psychological layer to your narrative, making your characters and their experiences much richer. Don’t be afraid to experiment with these more complex applications to elevate your video projects.
13. Optimizing for Different Platforms: Aspect Ratios and Readability
When creating a split screen Filmora video, it’s crucial to consider where your content will be viewed. Different platforms have different optimal aspect ratios and viewing habits. A split screen designed for a widescreen YouTube video (16:9) might look cramped or have important details cut off when viewed on a vertical Instagram Reel (9:16) or a square Facebook post (1:1).
Before you start, decide on your primary distribution platform. Filmora allows you to easily adjust project settings for various aspect ratios. If you’re targeting multiple platforms, you might need to create different versions of your split screen sequence. For vertical platforms, a two-panel vertical split might be more effective than a horizontal one, allowing each video to maintain more of its original framing. Always preview your split screen on the target device or aspect ratio to ensure all critical information and visual elements are clearly visible and legible. A well-designed split screen takes into account not just how it looks, but how it’s consumed.
14. Performance Considerations and Export Settings: Keeping it Smooth
While Filmora makes split screen creation easy, having multiple video tracks playing simultaneously can be demanding on your computer’s resources. If you notice choppiness during editing, try reducing the preview quality in Filmora’s player settings. This won’t affect your final export but will make the editing process smoother. (See: Scientific insights on video editing.)
When it comes time to export your masterpiece, choose your settings wisely. A split screen video inherently contains more visual information, so a higher bitrate might be necessary to maintain quality, especially if your individual clips are high resolution (4K, for instance). However, balancing quality with file size is key, especially for web uploads. Filmora offers various export presets for popular platforms like YouTube and Vimeo, which are usually a good starting point. Experiment with these, paying attention to resolution, frame rate, and bitrate to find the sweet spot that delivers a crisp, clear split screen Filmora video without unnecessarily large file sizes. You want your audience to enjoy the visual complexity, not struggle with buffering.
FAQs about Split Screen Filmora
Q1: Can I use different video lengths within a single split screen layout?
Absolutely! When you drag clips into your split screen Filmora template, they’ll initially play for the duration of the template itself. However, you can then trim or extend each individual clip within its panel on the timeline. If one clip is shorter than the others, it will simply end, and the panel will display a black screen or hold the last frame, depending on your settings and the template. You can also duplicate shorter clips to fill the space, or simply adjust the overall duration of your split screen segment to match your shortest important clip. Filmora gives you the flexibility to manage each video’s length independently.
Q2: How do I remove the borders between the split screen panels?
Once you’ve applied a split screen template and added your clips, select the split screen segment on your timeline. In the preview window, you should see options appear to customize the layout. Look for settings related to ‘Border’ or ‘Line.’ You’ll typically find options to change the border color, thickness, and often an option to set the thickness to zero or completely disable the border. This creates a more seamless, collage-like effect, which can be great for certain visual styles or montages where you want the images to blend more subtly.
Q3: Can I animate the split screen layout itself, like having panels slide in?
Yes, but it requires a bit of a workaround or more advanced techniques. Filmora’s built-in split screen templates don’t typically offer animated entrances for the panels themselves as part of the preset. However, you can achieve this effect by using keyframes. You can create your own custom split screen using multiple video tracks and the ‘Transform’ tool. Place each video on a separate track, then use keyframes to animate their position, scale, and rotation to slide them into place, creating a dynamic split screen reveal. Another method is to use a transition effect on the entire split screen segment as it appears on the timeline, which will affect how the whole layout enters or exits the frame.
Q4: What’s the maximum number of videos I can have in a split screen with Filmora?
Filmora offers split screen templates with up to 6 or even 7 panels, depending on the version and any installed effect packs. While you can technically create a custom layout with more individual video tracks using PiP (Picture-in-Picture) effects and manual resizing, the pre-designed split screen Filmora templates typically cap out around 6-7. Keep in mind that cramming too many videos onto the screen can make your content look cluttered and hard to follow, so always prioritize clarity and readability over the sheer number of clips.
Q5: Can I add different background music to each panel of a split screen?
While you can have multiple audio tracks playing simultaneously, assigning *different* background music to *each individual panel* of a split screen in a way that truly isolates it to that visual area is complex and generally not recommended for a good listening experience. The human ear struggles to process multiple distinct music tracks at once. What you can do is have a primary background music track for the entire split screen segment, and then, if necessary, layer in specific sound effects or dialogue from individual clips. If you absolutely need distinct audio per visual, consider having one dominant audio track while others are heavily ducked (volume lowered) or muted. Filmora’s audio mixing tools are powerful, but good audio design for split screens usually means choosing one clear audio focus.
Mastering the split screen Filmora feature isn’t just about knowing where the buttons are; it’s about understanding the storytelling potential it unlocks. From comparing products to building suspense, or simply adding a dynamic visual flair, the split screen is a versatile tool in any video editor’s arsenal. So go ahead, experiment with these techniques, push the boundaries of your creativity, and start telling richer, more engaging stories with your videos. Your audience will thank you for it.
Trending Now
Frequently Asked Questions
How do you create a split screen in Filmora?
To create a split screen in Filmora, start by navigating to the 'Split Screen' tab in the interface. Choose from a variety of pre-designed templates that suit your project. Once you select a template, you can customize the clips to fit your desired layout, making it easy to showcase multiple perspectives or actions simultaneously.
What is the purpose of using a split screen in videos?
Using a split screen in videos allows you to tell complex stories, highlight comparisons, build suspense, and add humor. It enhances viewer engagement by presenting multiple viewpoints or actions side-by-side, making your content more dynamic and interesting.
Can beginners use Filmora for split screen effects?
Absolutely! Filmora is designed with a user-friendly interface that makes it easy for beginners to create split screen effects. You don't need professional editing skills to achieve a polished look; the intuitive tools and templates guide you through the process.
What types of split screen layouts are available in Filmora?
Filmora offers a range of split screen layouts, from simple two-pane horizontal splits to more complex four-pane grids. You can choose a layout that best fits your narrative needs and customize it further to enhance your video project.
Why should I use Filmora for video editing?
Filmora is an excellent choice for video editing because it combines powerful features with an accessible interface. It caters to all skill levels, making advanced techniques like split screen easy to implement, which can significantly enhance the quality and storytelling of your videos.
What's your take on this? Share your thoughts in the comments below — we read every one.