How to change eye color in Photoshop
“`html
Changing eye color in Photoshop is a popular technique among photographers and digital artists alike. Whether you’re looking to enhance a model’s portrait, create a fantasy character, or simply experiment with your own photos, knowing how to manipulate eye color can drastically alter the mood and impact of an image. In this guide, we’ll explore various methods for changing eye color, along with practical tips and techniques to achieve stunning results.
1. Understanding the Basics of Eye Color Change
Before diving into the techniques, it’s crucial to understand why and when you might want to change eye color in Photoshop. Eye color can evoke different emotions and convey various messages in a portrait. For instance, blue eyes might suggest calmness and serenity, while green eyes can add a sense of mystery and allure. By altering the eye color, you can enhance these feelings or even create a particular narrative in your artwork.
Furthermore, changing eye color isn’t just about aesthetics. In some cases, it may be used for correcting poor lighting or to fix discoloration caused by reflections or shadows. Understanding these factors can help guide your decisions as you work on your images.
2. Preparing Your Image
The first step to successfully change eye color in Photoshop is to prepare your image properly. Start by opening the photo you want to edit. Make sure the resolution is high enough, as this will yield better results when applying changes.
Next, consider cropping the image to focus more on the subject’s face. This can help improve the overall composition and make the eye color change more impactful. Use the Crop Tool to frame the face appropriately, ensuring that the eyes remain the focal point of the portrait.
3. Selecting the Eyes
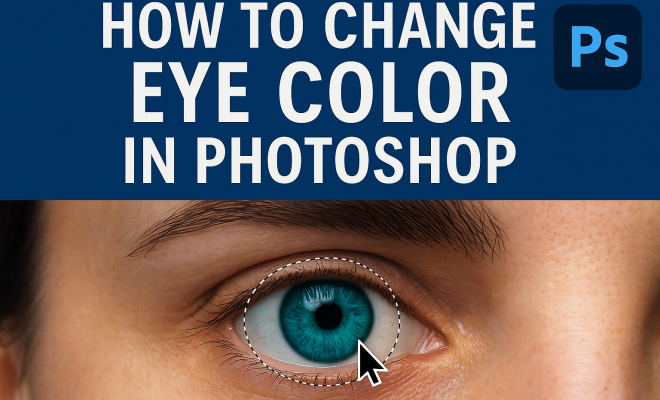
Once your image is ready, the next step is selecting the eyes. This is crucial for a natural-looking color change. There are several selection tools in Photoshop, but one of the most effective for this purpose is the Elliptical Marquee Tool.
To use this tool, select it from the toolbar, then carefully draw an ellipse around the iris. It’s important to avoid including the whites of the eyes to maintain realism. If you accidentally select too much, use the Subtract from Selection option by holding down the Alt key (Option key on Mac) and refining your selection.
4. Using Adjustment Layers
Adjustment layers are one of the most powerful features in Photoshop, allowing you to make changes without permanently altering the original image. To change eye color, you’ll want to create a new Hue/Saturation adjustment layer.
With the eye selection active, go to the Layers panel, click on the Adjustment Layer icon, and choose Hue/Saturation. This will create a new layer that only affects the selected area. By adjusting the sliders, you can manipulate the hue, saturation, and lightness to achieve the desired eye color. For example, moving the hue slider will cycle through different colors, allowing you to preview various options in real-time.
5. Fine-Tuning the Color
After selecting the initial color, fine-tuning is key to making the change look natural. Start by adjusting the Saturation slider to maintain a realistic appearance; overly saturated colors can appear unrealistic. It’s often best to keep saturation levels lower for natural colors like blues, greens, and browns. (See: changing eye color in photography.)
Using the Lightness slider can help with achieving the right intensity. Sometimes, giving the eyes a slight increase in brightness can enhance their appeal. Additionally, if the eye color seems too uniform, consider adding a new layer with a soft brush set to a low opacity to paint in highlights or shadows to add depth and dimension.
6. Working with Layer Masks
Layer masks are invaluable when it comes to making precise edits. If there are areas outside the iris that have been accidentally altered during the color change, you can easily rectify this using a layer mask. Click on the layer mask thumbnail next to your adjustment layer. Then, using a soft brush with black selected as the foreground color, gently paint over areas that need to be hidden. White will reveal adjustments, while black will hide them.
This technique allows for non-destructive editing, ensuring you can revert any unwanted changes or refine your work further down the line. Remember to zoom in closely to ensure you’re working accurately and maintaining the integrity of the image.
7. Combining Colors for Unique Effects
If you’re feeling adventurous, why not combine colors for a unique eye color effect? Photoshop allows you to play with multiple adjustment layers. For instance, you can create one layer for a base color and another to overlay a different hue or effect.
To do this, create another Hue/Saturation layer above your initial one. Change the blending mode of this layer to Overlay or Soft Light for more creative effects. Experimenting with opacity levels can also yield fascinating results, producing an eye color that is both vibrant and captivating.
8. Final Touches: Enhancing Realism
After you’ve changed the eye color, it’s time to add final touches to enhance realism. Consider adding reflections if the eyes look too flat. You can duplicate the original eye layer, reduce its opacity, and adjust its position to match the original reflection. Use a soft eraser to blend the edges for a seamless transition.
Furthermore, adjusting the overall contrast and brightness of the portrait can help to bring the eyes to the forefront. The key is to make sure the eyes stand out without looking artificially placed. Pay attention to the lighting in the rest of the image and try to match the eye color changes accordingly.
9. Exporting Your Finished Image
Once you’re satisfied with the changes, it’s time to export your work. Go to File > Export > Export As or Save for Web, depending on how you plan to use the image. Choose the appropriate file format; JPEG is typically best for photographs, while PNG is great for images requiring transparency.
Before finalizing your export, double-check that the quality settings are set high enough to preserve the details that you’ve worked hard to achieve. Whether for social media sharing or printing, ensuring the best quality will showcase your skill in changing eye color in Photoshop.
As you practice these techniques, don’t be afraid to experiment and develop your own style. Changing eye color in Photoshop offers incredible creative possibilities, so unleash your imagination!
10. Advanced Techniques for Eye Color Change
For those looking to take their Photoshop skills to the next level, exploring advanced techniques can yield even more impressive results. Consider using the following methods to achieve unique eye colors: (See: impact of eye color on perception.)
10.1 Using Color Lookup Tables
Color Lookup Tables (LUTs) can significantly modify the look of your images. By applying a LUT specifically designed for eye color, you can achieve unexpected and artistic results. To do this, create a new adjustment layer and select Color Lookup. Choose a LUT that emphasizes the hue you’re after or create your own by adjusting the color settings to your liking.
10.2 Exploring Blend Modes
Experimenting with different blend modes can also enhance the eye color manipulation process. Try applying a Soft Light or Multiply blend mode to your adjustment layers. These modes can provide more depth and complexity to the eye color, making it blend more naturally with the surrounding skin tones.
10.3 Creating a Gradient Overlay
Adding a gradient overlay can lend a unique touch to eye color changes. Create a new layer above your eye adjustment layers, set it to Soft Light, and fill it with a gradient that complements the chosen eye color. This can create a more dynamic look, as it adds a subtle multi-dimensional aspect to the eyes.
11. Understanding Color Theory
Grasping basic color theory can greatly enhance your ability to change eye color effectively. By knowing how colors interact, you can make better choices when selecting hues. For instance, colors opposite each other on the color wheel, like blue and orange, tend to stand out when paired, creating stunning visual contrasts. This can be especially useful when creating fantasy or dramatic portraits.
Additionally, consider the psychological aspects of color. Different colors can evoke various feelings; blue often represents peace, green symbolizes growth, and brown conveys stability. Experimenting with these associations can lead to more powerful imagery.
12. Common Mistakes to Avoid
When changing eye color in Photoshop, it’s easy to make a few mistakes that can detract from the final image. Here are some common pitfalls to watch out for:
- Over-Saturation: While bright colors can be eye-catching, they can also appear unnatural. Aim for subtlety, especially in natural portraits.
- Ignoring Lighting Conditions: Always consider the lighting in your image when changing eye colors. The eyes should reflect the same light conditions as the rest of the image.
- Not Using Layer Masks: Forgetting to use layer masks can lead to harsh edges and unnatural transitions. Always refine your selections and utilize masks for smooth adjustments.
- Neglecting the Whites of the Eyes: Altering the eye color without considering the sclera can lead to a disjointed look. Make sure the whites of the eyes remain natural and bright.
13. Frequently Asked Questions
13.1 Can I change eye color in Photoshop Elements?
Yes, you can change eye color in Photoshop Elements using similar techniques as in Photoshop. Use the selection tools to isolate the eyes, then apply Hue/Saturation adjustment layers.
13.2 How do I ensure a natural look when changing eye color?
To achieve a natural look, pay attention to saturation and lightness. Avoid overly bright colors and make sure to reflect existing lighting conditions in your adjustments.
13.3 What are some creative ways to use altered eye colors in my art?
Consider using altered eye colors to convey emotions or tell a story. For instance, changing eye color to match a character’s mood, or using fantasy colors in creative portraits can add depth to your artwork.
13.4 Is it possible to change eye color in a batch of photos?
Yes, if you’re working with multiple images, consider using actions in Photoshop to automate the eye color change process. This can save a lot of time when dealing with large numbers of photos. (See: emotional impact of eye color.)
13.5 Can I change the eye color in a video using similar techniques?
While the techniques differ slightly, similar principles apply in video editing software like Adobe After Effects. You can use color correction tools and masks to change eye color in videos.
14. Additional Techniques for Unique Eye Color Effects
Exploring alternative methods to change eye color can bring a whole new dimension to your editing toolkit. Here are some additional techniques that you might find useful:
14.1 Using the Brush Tool
If you’re looking for a more hands-on approach, you can manually paint the eye color using the Brush Tool. First, create a new layer above your original image. Select a soft brush and pick the color you want to apply. Set the layer to Color mode, and carefully paint over the iris. This method provides more control over how the color is applied and allows for intricate detailing.
14.2 Using the Dodge and Burn Tools
Enhancing the depth of the eyes can further enrich the color change. The Dodge Tool can lighten areas of the iris to create a highlight, while the Burn Tool can darken areas to add depth. This combination can make the eye color pop and seem more three-dimensional. Just remember to use these tools sparingly to avoid an unnatural appearance.
14.3 Utilizing Filters for Artistic Effects
Sometimes, applying a filter can create a dramatic effect that complements your new eye color. For example, using the Gaussian Blur filter can soften the edges of the iris, making the transition less noticeable. Alternatively, filters like Oil Paint or Watercolor can evoke a different mood, perfect for fantasy or creative portraits.
15. Inspiration and Examples
Inspiration plays a significant role in the creative process. Here are a few examples of how changing eye color can enhance an image:
- Fantasy Characters: In many fantasy artworks, eye colors are altered to reflect supernatural abilities or traits. For example, a character with fiery red eyes might suggest anger or a fierce personality, while a character with violet eyes might appear ethereal and mystical.
- Dramatic Portraits: Changing eye color dramatically can help convey a specific emotion. For instance, switching brown eyes to bright green can give a sense of vitality or freshness, useful in fashion photography.
- Before and After Comparisons: Showcasing before and after images where eye colors have been changed can highlight the power of this technique. It serves as a great way to demonstrate your skills to potential clients or on your portfolio.
16. Conclusion
Changing eye color in Photoshop can open up an array of creative possibilities. By mastering the techniques outlined in this guide and exploring advanced options, you can enhance your portraits or create fantasy imagery that captures the imagination. With practice, you’ll develop your unique style and confidently manipulate eye colors, bringing your artistic vision to life.
“`
Trending Now
Frequently Asked Questions
How do I change the color of eyes in Photoshop?
To change eye color in Photoshop, start by selecting the eyes using selection tools like the Lasso or Quick Selection Tool. Then, create a new adjustment layer, such as Hue/Saturation, to alter the color. Adjust the sliders until you achieve the desired eye color, and make sure to refine the selection for a natural look.
What tools do I need to change eye color in Photoshop?
Essential tools for changing eye color in Photoshop include the Lasso Tool for selection, the Hue/Saturation adjustment layer for color changes, and the Brush Tool for refining selections. Additionally, using the Zoom Tool can help you work more precisely on the eyes.
Can I change eye color in Photoshop without affecting the rest of the image?
Yes, you can change eye color in Photoshop without affecting the rest of the image by using selection tools to isolate the eyes. Once selected, apply adjustments only to the eye area using layers, ensuring the rest of the image remains unchanged.
What are the best practices for changing eye color in Photoshop?
Best practices for changing eye color in Photoshop include using high-resolution images, making precise selections of the eyes, and applying adjustments with layers. It's also important to experiment with different colors and opacities to achieve a realistic effect that fits the overall mood of the photograph.
Is it possible to change eye color in Photoshop for portraits?
Absolutely! Changing eye color in Photoshop is especially popular for portraits. By selecting the eyes and using adjustment layers, you can enhance or completely alter the eye color, adding depth and emotion to the portrait while ensuring a natural appearance.
Agree or disagree? Drop a comment and tell us what you think.