How to boot from USB
“`html
In today’s tech-savvy world, booting from USB has become an essential skill for anyone looking to troubleshoot an operating system, install new software, or revive an aging computer. Whether you’re a seasoned IT professional or a casual user, learning how to boot from USB is invaluable. This guide will walk you through everything you need to know about this process, covering its background, practical applications, and step-by-step instructions.
1. Understanding USB Booting
Booting from USB refers to the process of starting a computer using a USB flash drive as the primary boot device instead of the traditional hard drive. This method allows users to run operating systems or diagnostic tools directly from the USB drive. The ability to boot from USB has become increasingly important, especially with the decline of optical drives in modern computers.
USB booting leverages the Universal Serial Bus (USB) technology, which enables fast data transfer rates and widespread compatibility across devices. The benefits of this method include quicker load times, portability, and the flexibility to use multiple operating systems on a single drive. It’s a technique that not only enhances performance but also increases the utility of your USB drives.
2. When to Consider Booting from USB
There are several scenarios where booting from USB can be particularly useful. For instance, if your computer’s operating system has crashed or become corrupted, using a USB drive with a recovery tool can help restore functionality. Similarly, tech enthusiasts often boot from USB to test new operating systems, like various distributions of Linux, without altering their existing setup.
Another common use case is for system installations. When installing a new operating system, USB drives have largely replaced DVDs due to their convenience and speed. With a USB drive, you can have the latest version of an OS ready to go, allowing for a smoother installation process. These scenarios highlight the importance of knowing how to boot from USB, as it can save time and resources.
3. Preparing Your USB Drive
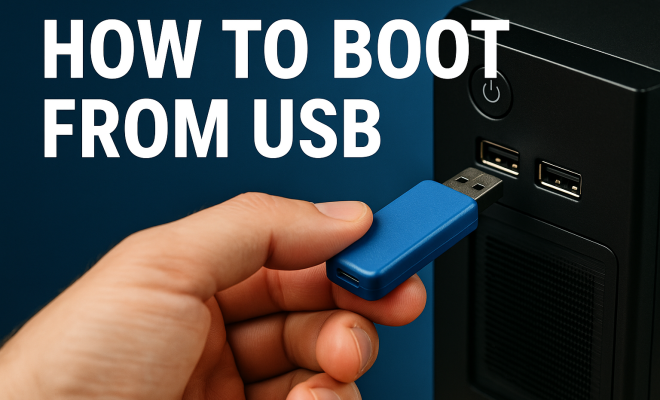
Before you can boot from USB, you’ll need to prepare your USB drive. This process involves formatting the drive and creating a bootable image. First, you’ll want to back up any important data on the USB drive, as formatting will erase all existing files. Use either FAT32 or NTFS file systems, depending on the size of the files you plan to store.
Once formatted, you need to create a bootable drive. There are various tools available for this, such as Rufus, UNetbootin, or the built-in Windows Media Creation Tool. The steps generally include selecting your USB drive, choosing the desired ISO file, and starting the process. Make sure to verify the integrity of the bootable image to avoid issues during booting.
Additionally, it’s a good idea to check whether your USB drive is compatible with the operating system you intend to boot. For example, if you’re creating a Windows installation USB, formatting the drive in NTFS is recommended due to its ability to handle larger files. On the other hand, FAT32 is often preferred for Linux distributions, as it is widely supported across different systems.
4. Changing BIOS/UEFI Settings
After preparing your USB drive, you’ll need to adjust your computer’s BIOS/UEFI settings to prioritize booting from USB. To access the BIOS or UEFI settings, restart your computer and press the designated key (often F2, F10, DEL, or ESC) during the boot process. Look for the boot order settings, which dictate the sequence of devices the computer will attempt to boot from.
In the boot order menu, move your USB device to the top of the list. Remember to save your changes before exiting. Some systems may also have a quick boot menu (accessible via a different key) that allows you to select the USB drive for a one-time boot without changing the boot order permanently.
Keep in mind that the terminology used in BIOS/UEFI can vary significantly between manufacturers. Some may label the USB devices as “removable devices” or list them by the name of the USB drive itself. Familiarizing yourself with your system’s specific BIOS/UEFI interface can save you time and frustration during this step. (See: Understanding the booting process.)
5. Booting from USB on Windows
Booting from USB on a Windows machine is a straightforward process once you’ve set your BIOS/UEFI settings correctly. After restarting your computer, if the USB drive is properly connected and configured, it should be detected, and the boot process will begin from the USB drive. Depending on the content of the drive, you may see the installation menu for your operating system or recovery options.
It’s important to follow any on-screen prompts carefully. If you’re installing a new operating system, you’ll generally need to partition your hard drive, select your language, and agree to licensing agreements. The installation process might take some time, so patience is key. If you encounter issues, double-check your BIOS settings and the integrity of the USB drive.
One significant advantage of booting from USB in Windows is the option for Windows To Go, which allows you to run a full version of Windows from a USB drive. This is particularly useful for users who need to work on multiple machines without altering the main operating system on those devices. However, it is essential to note that this feature is only available in certain versions of Windows 10 and higher.
6. Booting from USB on macOS
Mac users also have the ability to boot from USB, typically for OS installations or recovery purposes. To do this, you’ll need to create a bootable USB installer using macOS’s Disk Utility and Terminal. Once your USB drive is ready, restart your Mac and hold down the Option (⌥) key during startup. This will bring up the Startup Manager, where you can select your USB drive.
After you select the USB drive, the Mac will begin the boot process. Similar to Windows installations, follow the on-screen instructions to install macOS. The Mac will guide you through the steps, including disk utility options and user account preferences. Knowing how to boot from USB can be a lifesaver for Mac users looking to recover or reinstall their operating systems.
Another helpful feature for Mac users is the ability to use a USB drive to run a diagnostic tool. If you’re experiencing issues with your Mac, a bootable USB with the macOS recovery tools can allow you to troubleshoot or even erase and reinstall the operating system if necessary.
7. Troubleshooting Boot Issues
Even with the best preparations, you may run into issues when trying to boot from USB. Common problems include the USB drive not being recognized, boot errors, or file corruption. If your system isn’t detecting the USB drive, check the physical connection and ensure that the drive is formatted correctly and contains a valid bootable image.
Another frequent issue could be related to BIOS/UEFI settings. Ensure that secure boot is disabled, as it may prevent booting from non-certified devices. If you continue to encounter problems, consider using a different USB port or trying another USB drive entirely. Sometimes, simply re-creating the bootable drive can resolve underlying issues.
If you’re still facing difficulties, consulting the documentation for your specific hardware can provide insight into any unique settings or requirements. Additionally, community forums or tech support can be invaluable resources for troubleshooting specific boot issues related to USB drives.
8. The Future of Booting from USB
As technology evolves, the methods for booting from USB are also advancing. With the introduction of USB-C and increased data transfer speeds, users can expect faster installation times and improved performance. Moreover, as cloud computing and virtualization continue to rise, the relevance of USB booting might shift. However, USB drives will still remain a crucial tool for system recovery and installations due to their portability and ease of use.
Developers are also working on improving bootable software, making it easier for users to create bootable USB drives with minimal hassle. The future may see even more seamless integration between USB drives and operating systems, allowing for smoother transitions and improved user experiences.
In addition to hardware advancements, we may also see enhancements in the software that allows for booting from USB. For example, the rise of portable applications means that users can run powerful software from USB drives without needing to install them on the host machine. This not only saves time but also ensures that personal settings and configurations can travel with the user.
9. Practical Applications Beyond OS Installation
Booting from USB isn’t just for operating system installations; it has numerous practical applications. For example, IT technicians often use bootable USB drives to run diagnostics or recovery tools on malfunctioning computers. Some individuals create portable versions of software that they can run on any computer without installation. This can include antivirus tools, partition management applications, and data recovery software. (See: USB drives and data safety.)
Additionally, for developers and testers, USB booting allows for testing applications in various environments without affecting the main operating system. This versatility makes booting from USB a powerful tool in both personal and professional settings.
One particularly interesting application in the realm of education is the use of bootable USB drives to run specialized software in classrooms. In environments where security is paramount, educators can create a controlled operating environment that students can boot into without affecting the machines’ primary operating systems. This method ensures that students have access to the tools they need while maintaining the integrity of the main system.
10. FAQ: Booting from USB
Q1: Can I boot from any USB drive?
A1: While most USB drives can be used for booting, it’s best to use one that has a minimum capacity of 8GB. Additionally, some operating systems may require specific formats (like FAT32 or NTFS), so be sure to check compatibility.
Q2: What if my computer doesn’t recognize the USB drive?
A2: If your computer fails to recognize the USB drive, double-check that it is properly formatted and contains a valid bootable image. You may also want to try a different USB port or PC to rule out hardware issues.
Q3: Is booting from USB safe?
A3: Booting from USB is generally safe, but ensure that you only use trusted images and software to create your bootable drives. Using unverified sources can expose your system to malware or other risks.
Q4: Can I use a USB-C drive to boot from older computers?
A4: Many older computers don’t have USB-C ports. However, you can use a USB-C to USB-A adapter to connect your USB-C drive to the older machine, provided the computer supports booting from USB.
Q5: Can I create a bootable USB from a different operating system?
A5: Yes! You can create a bootable USB drive for any operating system using the appropriate tools. Just ensure that the method you use is compatible with the OS you’re targeting, whether it’s Windows, macOS, or a Linux distribution.
11. Expanding Your Knowledge
Understanding how to boot from USB opens up a world of possibilities for users across all levels of experience. Along with the technical steps outlined in this guide, exploring forums, tech blogs, or video tutorials can provide more insight and hands-on examples. Communities like Reddit or specialized tech forums often share experiences, tips, and tools that can enhance your understanding further.
Consider experimenting with different operating systems and tools to find what best suits your needs. Whether you’re looking to revamp a system, troubleshoot issues, or simply enjoy a different environment, mastering USB booting can significantly enhance your computing experience.
12. Mastering USB Booting: Tips and Best Practices
To make the most of your experience with booting from USB, keep these tips in mind: (See: Recent trends in USB booting.)
- Use Quality USB Drives: Invest in reliable USB drives from reputable brands. This can prevent failures and ensure longevity.
- Keep Your Drives Organized: Label your USB drives, especially if you have multiple bootable options. This can save time and confusion later.
- Regularly Update Your Bootable Images: Operating systems and tools are frequently updated. Make it a habit to refresh your bootable images to ensure you have the latest features and security patches.
- Backup Your Data: Always back up important data before creating bootable drives, as formatting can erase existing files.
- Practice Safe Eject: When using USB drives, make sure to eject them properly to prevent data loss or corruption.
13. Common Myths About Booting from USB
As with many technology practices, booting from USB comes with its share of myths and misconceptions. Here are a few of the most common ones:
Myth 1: Booting from USB is only for advanced users.
This couldn’t be further from the truth. While there are technical aspects involved, many tools simplify the process, allowing novice users to create bootable USB drives without needing deep technical knowledge.
Myth 2: All USB drives can boot any operating system.
Not all USB drives support booting every operating system. Each OS has specific requirements, and some older drives may not meet those standards. Always check compatibility for the best results.
Myth 3: Booting from USB slows down my system.
Generally, booting from USB does not inherently slow down a system. In fact, it can be faster than using an optical drive, depending on the USB standard (USB 2.0 vs. USB 3.0) and the operating system being run.
14. Using Bootable USB Drives for System Recovery
Creating a bootable USB drive isn’t just about installations; it’s also an essential tool for recovery. If your operating system crashes or your computer fails to boot, having a recovery USB on hand can be a lifesaver. Many operating systems come with built-in tools that create recovery environments, allowing you to troubleshoot and fix issues without needing an additional computer.
For instance, Windows offers a recovery drive tool that can create a bootable USB to restore your system or perform a factory reset. Linux distributions often include live versions that you can run directly from USB, providing access to data recovery tools, file system checks, and more.
15. Conclusion: Mastering USB Booting
Understanding how to boot from USB opens up a world of possibilities for users across all levels of experience. From recovering a failing system to installing new software, USB drives have proven to be essential in modern computing. By following the steps outlined in this guide, you can master the art of booting from USB and make the most of your technology.
In an age where efficiency and convenience are paramount, knowing how to effectively use USB drives can significantly enhance your computing experience. So, equip yourself with this knowledge and take control of your tech journey!
“`
Trending Now
Frequently Asked Questions
How do I boot my computer from a USB drive?
To boot from a USB drive, insert the USB flash drive into the computer, then restart it. During startup, access the BIOS or boot menu (usually by pressing F2, F12, ESC, or DEL). Select the USB drive as the primary boot device and save the changes. Your computer should now boot from the USB.
What do I need to boot from a USB?
To boot from a USB drive, you need a USB flash drive with a bootable operating system or recovery tool installed on it. You also need to access your computer's BIOS or boot menu to set the USB drive as the primary boot device.
Why would I want to boot from a USB?
Booting from a USB allows you to run operating systems or diagnostic tools directly from the USB drive. It's useful for troubleshooting a crashed OS, testing new operating systems, or installing software without needing optical drives, which are becoming less common.
Can I install an operating system from a USB drive?
Yes, you can install an operating system from a USB drive. Many modern operating systems, including various Linux distributions and Windows, can be loaded onto a USB drive, making installations faster and more convenient compared to using DVDs.
Is booting from USB faster than booting from a hard drive?
Booting from a USB drive can be faster than booting from a traditional hard drive, especially if the USB drive supports USB 3.0 or higher. USB drives generally offer quicker load times and improved data transfer rates, enhancing overall performance.
Have you experienced this yourself? We’d love to hear your story in the comments.