Master CapCut Effects: Transform Your Videos Today!
“`html
CapCut has quickly become a go-to video editing app for creators around the globe, whether you’re making TikToks, Instagram Reels, or other engaging video content. One of its standout features is the ability to add effects that can transform your videos from ordinary to extraordinary. In this comprehensive guide, we’ll explore how to effectively add effects in CapCut, along with tips, tricks, and creative ideas to elevate your video editing game.
1. Understanding CapCut’s Interface
Before diving into the nitty-gritty of adding effects, it’s crucial to familiarize yourself with CapCut’s interface. Upon opening the app, you’re greeted with a user-friendly layout that allows for seamless navigation. The main screen features various icons: from creating a new project to accessing your past videos. On the right, you’ll find the editing tools, including the option to add effects.
The timeline at the bottom is where your video clips will be displayed, allowing you to edit them in sequence. Understanding this layout will make it easier to find where to add effects in CapCut. Spend a few minutes exploring the features available in the app; doing so will significantly enhance your editing experience.
2. Selecting Clips for Effect Application
Once you’re comfortable navigating the interface, the next step is selecting the clips you want to enhance. Adding effects can change the mood, emphasize a point, or simply make your video more visually appealing. As you add clips to the timeline, consider which parts of your video would benefit the most from effects. For instance, dramatic moments may call for transitions or overlays, while simpler scenes might only need basic enhancements.
To select a clip, just tap it on the timeline. Once highlighted, you’re ready to apply effects. Remember, it’s wise to preview your clips and think strategically about where you want to place effects to avoid overwhelming your audience.
3. Exploring Basic Effects
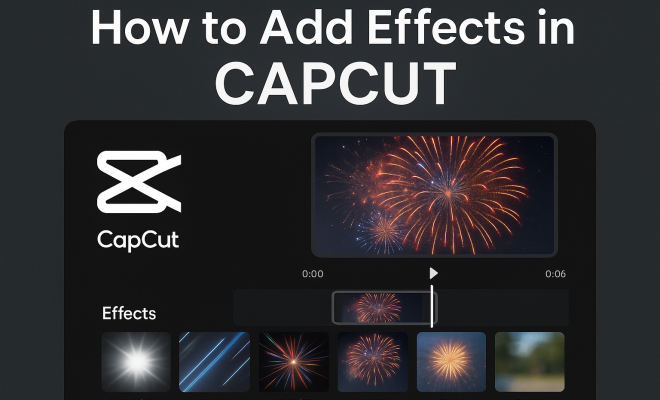
CapCut has an extensive library of basic effects that you can use to enhance your clips. To access these, simply click on the “Effects” section in the editing toolbar. Here, you’ll find options ranging from filters to color corrections and speed adjustments. Popular effects like “Blur” or “Brightness” can significantly change the aesthetic of your video.
When you add effects in CapCut, it’s essential to consider the context of your video. For example, if you’re editing a travel vlog, warm filters can enhance the visual appeal of sunny destinations, while cool tones might suit urban landscapes. Don’t hesitate to play around with these effects; CapCut allows you to preview changes in real time, making it easy to experiment.
4. Utilizing Advanced Effects
If you’re ready to take things up a notch, CapCut offers advanced effects that can add flair to your videos. These include animations, overlays, and special transitions. For instance, the “Reverse” effect lets you play clips backward, creating a unique perspective. Overlays can introduce text, images, or other videos into your main clip, adding depth and information.
To use advanced effects, locate them within the “Effects” menu. After selecting an effect, you can adjust various parameters, such as duration and intensity, allowing for a personalized touch. Don’t forget to view your edits multiple times to ensure that the effects complement rather than distract from the content. (See: Video editing overview on Wikipedia.)
5. Adding Text and Graphics
Text and graphics can significantly enhance storytelling in your videos. CapCut lets you easily add text overlays for titles, captions, or annotations. To do this, click on the “Text” option in the editing toolbar. Choose from various fonts and styles to convey your message effectively. Incorporating text can help convey necessary information quickly, especially in short-form videos.
Moreover, CapCut permits you to animate your text, creating engaging entry and exit effects. This feature is particularly useful for maintaining viewer attention; a good animated title can draw viewers in right at the start. As you add effects in CapCut, think about how text can accentuate your visuals.
6. Experimenting with Sound Effects and Music
No video is complete without sound. CapCut comes equipped with a library of sound effects and music options to enhance your clips’ emotional impact. You can upload your own audio files or select from the app’s existing library, which includes various genres and styles. Pairing the right sound with your visuals is crucial; it can elevate the mood and energy of your video.
To add sound effects, navigate to the “Audio” section. Here, you can layer multiple audio tracks, balance their volumes, and adjust timing to synchronize with your video transitions. This feature is especially valuable when you’re looking to create a cohesive narrative or theme throughout your video.
7. Final Touches: Filters and Color Grading
After adding effects and audio, don’t overlook the importance of filters and color grading. CapCut offers various filters that can unify the look of your video. A consistent color theme can enhance the overall aesthetic and make your content feel more professional.
To apply filters, go to the “Filters” menu and select one that matches your desired style. You can adjust the intensity of the filter to suit your vision. For more precise control over colors, use the “Adjust” feature to configure brightness, contrast, saturation, and more. Finalizing your video with a cohesive look can make a world of difference.
8. Exporting and Sharing Your Masterpiece
Once you’re satisfied with your edited video, it’s time to export it. CapCut allows you to choose the resolution and format best suited for your intended platform, whether it’s for social media or personal use. To do this, click on the export button, where you can also preview your video one last time.
After exporting, sharing your video has never been easier. CapCut integrates with various platforms, allowing you to upload directly to TikTok, Instagram, or save it to your device. Remember, the final product reflects your creativity, so take pride in sharing your work with the world!
9. Creative Ideas for Using Effects in CapCut
Now that you know how to find and use the various tools in CapCut, it’s time to get creative! Here are some unique ways to use effects in your videos: (See: CapCut video editing app article by NY Times.)
- Fast Motion: Consider using the speed adjustment effect to create fast-motion sequences. This can be particularly effective in cooking tutorials or travel videos, where you can condense a lengthy process into a quick overview.
- Transition Effects: Use various transition effects like fades, wipes, or slides to create a seamless viewing experience. For instance, transitioning between different locations or scenes can keep your audience engaged.
- Freeze Frame: The freeze-frame effect can be used to highlight a key moment in your video. This is especially useful in sports highlights or storytelling where you want to emphasize an important detail or reaction.
10. Statistics on Video Engagement
Understanding the impact of effects on video engagement can motivate you to experiment more in CapCut. According to recent studies, videos that utilize effects and editing techniques can see a significant increase in viewer engagement. For instance:
- Videos with engaging transitions tend to have up to 30% more views compared to those without.
- Adding music or sound effects can increase viewer retention by an average of 25%.
- Content creators who regularly use text overlays report a 50% increase in viewer interaction, as they help clarify messages and maintain attention.
11. Feedback from CapCut Users
Many users of CapCut have found incredible success with its easy-to-use interface and diverse range of effects. Here’s what some creators have to say:
“I love how intuitive CapCut is. The ability to add effects effortlessly has taken my TikTok videos from average to extraordinary!” – Jamie, TikTok Creator
“As a beginner, the effects in CapCut are simple to use, and the results look professional. It really allows my storytelling to shine.” – Alex, YouTube Vlogger
12. FAQs about Adding Effects in CapCut
How can I access the effects library in CapCut?
To access the effects library in CapCut, open your project, tap the “Effects” option on the editing toolbar, and browse through the categories available, including Basic and Advanced effects.
Can I customize the effects after applying them?
Absolutely! Once you select an effect, you can adjust its duration, intensity, and other parameters to fit your video’s needs.
Are there any limitations to the effects I can use in CapCut?
While CapCut offers a wide array of effects, some users may find limitations based on their device’s capabilities or the specific version of the app. Always ensure you have the latest version for the best experience.
Can I use CapCut for longer videos?
Yes, CapCut allows you to edit videos of various lengths. However, keep in mind that more complex effects may require more processing power, which could affect performance on lower-end devices. (See: Video editing topics on ScienceDirect.)
What can I do if my effects aren’t working as expected?
If you encounter issues with effects, try restarting the app or your device. If problems persist, checking for updates or reinstalling CapCut may help resolve the issue.
13. Common Mistakes When Adding Effects in CapCut
As with any creative endeavor, mistakes can happen—especially when you’re experimenting with different effects. Here are some common errors to avoid:
- Overusing Effects: It’s easy to get carried away and use too many effects, which can distract viewers. Always prioritize clarity and storytelling over flashy visuals.
- Ignoring Audio Levels: Forgetting to adjust audio levels when adding sound effects or music can lead to an unbalanced audio mix. Ensure voiceovers and background music complement rather than compete with each other.
- Neglecting to Preview: Always preview your video after adding effects. Failing to do so may lead to unpleasant surprises when you export your final product. Take the time to review transitions and effects in context.
14. Inspiration: Famous Uses of Effects in Video Editing
Looking for some inspiration? Here are a few examples of how professional filmmakers and content creators use effects to elevate their storytelling:
- Quick Cuts in Action Films: Directors often use rapid cuts and transitions to create a sense of urgency during action sequences. Think of movies like Mad Max: Fury Road, where the editing style keeps viewers on the edge of their seats.
- Color Grading in Documentaries: Documentaries often use color grading to evoke specific emotions. For instance, warm tones can make a scene feel nostalgic, while cooler tones convey a sense of detachment.
- VFX in Music Videos: Music videos frequently utilize special effects to enhance the song’s mood. A great example is Billie Eilish’s videos, where surreal overlays and animations complement her unique style.
15. Advanced Editing Tips for Pro Users
If you’re comfortable with the basics and want to take your edits further, here are some advanced tips to consider:
- Layering Effects: Don’t be afraid to combine multiple effects for a unique look. For example, you can apply a color filter while also adding an overlay texture to create depth.
- Using Keyframes: Keyframes allow you to control the timing of effects. You can make an object fade in and out gradually, creating a more polished and dynamic presentation.
- Experimenting with Speed Ramping: Speed ramping lets you change the speed of a clip at certain points. This technique is particularly effective in creating dramatic moments in your storytelling.
16. Resources and Tutorials for Learning CapCut
If you’re eager to deepen your knowledge about CapCut and learn new skills, a plethora of resources are available: For more on this, see CapCut app safety.
- YouTube Tutorials: Many creators share comprehensive guides and tutorials on specific effects and techniques within CapCut. Channels dedicated to video editing often cover everything from the basics to advanced editing tricks.
- Online Courses: Websites like Skillshare or Udemy offer courses focused on mobile video editing, including CapCut. These structured lessons can help you master the app more effectively.
- Community Forums: Joining online forums or social media groups focused on video editing can provide you with tips, inspiration, and feedback from other users who share your passion.
In summary, CapCut offers an impressive range of tools to add effects in CapCut and enhance your video editing skills. Whether you’re a novice or an experienced editor, mastering these features can significantly elevate your content. So, dive into CapCut, experiment with its many options, and let your creativity shine!
“`
Trending Now
Frequently Asked Questions
How do you add effects in CapCut?
To add effects in CapCut, open the app and select the clip on the timeline you want to enhance. Navigate to the editing tools on the right, choose the effects option, and browse through the available effects. Simply tap on your desired effect to apply it to the selected clip.
What types of effects can you use in CapCut?
CapCut offers a variety of effects including transitions, overlays, filters, and visual enhancements. These effects can change the mood of your video, emphasize key moments, or simply make the content more visually engaging. Explore the effects library to find the ones that best suit your video.
Can you preview effects in CapCut before applying?
Yes, CapCut allows you to preview effects before applying them. After selecting an effect from the editing tools, you can see how it looks on your clip in real-time. This feature helps you make informed decisions on which effects enhance your video best.
Is CapCut easy to use for beginners?
CapCut is designed with a user-friendly interface, making it accessible for beginners. The layout is intuitive, and the tools for adding effects and editing clips are straightforward. With a bit of exploration, new users can quickly learn how to create engaging videos.
What tips can help improve video editing in CapCut?
To improve your video editing in CapCut, familiarize yourself with the interface, strategically select clips for effects, and don’t overwhelm your audience with too many effects at once. Preview your edits frequently and be creative with the effects to enhance your video storytelling.
Agree or disagree? Drop a comment and tell us what you think.