How to desolder components
“`html
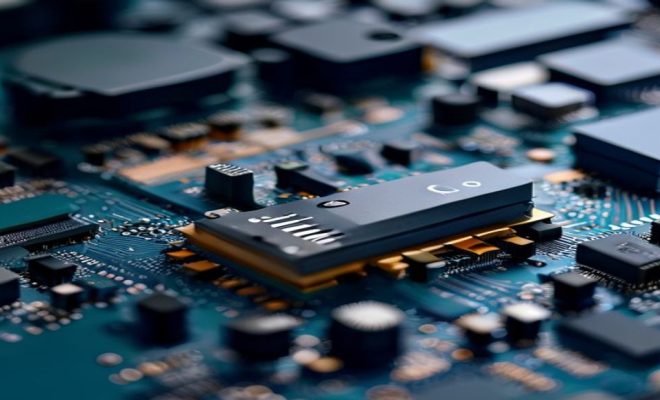
Desoldering components is a vital skill for anyone involved in electronics repair or hobbyist projects. Whether you’re looking to fix a malfunctioning device, upgrade components on a circuit board, or salvage parts for future projects, knowing how to desolder components effectively can save time and resources. With the right tools, techniques, and a bit of practice, you can become proficient in this essential task. In this guide, we’ll explore the key aspects of desoldering components, providing you with insights and tips to enhance your skills.
1. Understanding Desoldering
Desoldering is the process of removing solder from electronic components on a circuit board. This is often necessary for repairs, upgrades, or modifications. The solder used in electronics is typically composed of tin and lead, which melts at a specific temperature, allowing components to be attached to the board. Understanding the composition and properties of solder can be crucial for successful desoldering.
When components need to be replaced or re-positioned on a circuit board, the solder must be melted and removed, which requires precise techniques. The process can vary depending on the type of component, the soldering method used, and the board’s design. The ability to desolder components accurately can minimize damage to the board and prolong the life of the components.
2. Essential Tools for Desoldering
To master how to desolder components, having the right tools is essential. Here’s a list of the most important items you should consider:
- Soldering Iron: A good quality soldering iron with a fine tip is crucial for precision. Look for one that heats quickly and allows temperature control.
- Desoldering Pump: This tool helps suck up melted solder quickly, preventing it from hardening again.
- Desoldering Braids: A copper braid can be used to absorb solder by placing it over the joint and using a soldering iron on top.
- Flux: Using flux increases the effectiveness of solder removal by improving heat transfer and preventing oxidation.
- Tweezers: A pair of fine-tipped tweezers can assist in maneuvering components while desoldering.
- Safety Glasses: Protect your eyes from solder splatter and any possible fumes.
Investing in quality tools not only makes the process easier but also affects the outcome. Cheap tools may lead to frustration and damage to components.
3. Safety Precautions
Before you start desoldering, safety should be your top priority. Here are some essential precautions:
- Work in a Well-Ventilated Area: Solder fumes can be harmful when inhaled, so ensure good airflow.
- Wear Protective Gear: Safety glasses are vital to protect against solder splashes, and gloves can prevent burns.
- Be Mindful of Heat: The soldering iron can reach very high temperatures. Always place it in a stand when not in use and avoid touching the tip.
- Handle Components with Care: Some components are sensitive to heat and can be damaged easily. Always be gentle in your handling.
By taking the necessary precautions, you’ll create a safer environment for both you and your electronic components.
4. Preparing the Work Area
Your workspace plays a significant role in your desoldering success. Here’s how to prepare it:
- Clear the Work Surface: Ensure you have enough space to work on the circuit board without clutter.
- Organize Tools: Keep all tools within easy reach to minimize distractions and maintain focus.
- Use a Heat-Resistant Mat: A silicone mat can protect your work surface from heat and solder spills.
- Good Lighting: Ensure your work area is well-lit so you can clearly see small components and solder joints.
Setting up an efficient workspace can significantly enhance your desoldering experience, making it quicker and more effective.
5. Technique: How to Desolder Components
Now that you’re equipped with the right tools and preparations, let’s explore the step-by-step technique on how to desolder components:
- Heat the Soldering Iron: Plug in your soldering iron and set it to the appropriate temperature, usually around 350°C (662°F).
- Apply Flux: Apply flux to the solder joint to enhance the melting process.
- Heat the Solder Joint: Place the tip of the soldering iron against the solder joint and allow it to heat up. Wait until the solder is fully liquid.
- Use the Desoldering Pump: Quickly position the desoldering pump over the melted solder and press the button to suck it away.
- Inspect the Joint: Check if all solder has been removed. If not, repeat the process.
- Use Desoldering Braid (if necessary): If the pump didn’t do the trick, place a desoldering braid over the joint, then apply the soldering iron. The solder will soak into the braid.
- Remove the Component: Once all solder is removed, gently pull the component out using tweezers.
Practicing this technique will help you become more efficient and precise when desoldering components. (See: Understanding solder composition and properties.)
6. Common Mistakes to Avoid
Learning how to desolder components involves a learning curve. Avoid these common mistakes:
- Overheating: Applying too much heat can damage the circuit board and the components. Always monitor the time the soldering iron is in contact with the solder joint.
- Not Using Flux: Neglecting to use flux can lead to poor solder removal and make the process more difficult.
- Forgetting Safety Precautions: Skipping safety gear or working in an unsafe environment can lead to accidents and injuries.
- Rushing the Process: Taking your time is essential. Rushing can lead to mistakes and damage.
By being aware of these pitfalls, you can avoid frustration and improve your desoldering skills more swiftly.
7. Advanced Techniques for Difficult Components
Some components are trickier to desolder than others. Here are advanced techniques for handling challenging situations:
- Through-Hole Components: For components with multiple pins, apply heat to each pin individually while gently pulling the component from the board.
- Surface Mount Devices (SMD): Desoldering SMD parts requires more finesse. Use a hot air rework station for even heating across multiple pads.
- Using a Soldering Station: A soldering station with a temperature-controlled iron and a vacuum desoldering tool can provide better precision for complex tasks.
- Reflow Techniques: For stubborn solder joints, consider using a reflow technique with a rework station, heating the entire area simultaneously.
These advanced methods can greatly enhance your desoldering capabilities, especially as you tackle more intricate electronic projects.
8. Testing After Desoldering
Once you’ve successfully desoldered components, it’s essential to test the circuit board to ensure everything is functioning properly. Here’s how:
- Visual Inspection: Check for any damage to the circuit board or surrounding components.
- Continuity Testing: Use a multimeter to check for continuity in traces that were near the desoldered component.
- Functional Testing: If possible, power up the board and observe if it operates correctly, monitoring for any anomalies.
Proper testing can save you a lot of time and trouble, ensuring that your desoldering efforts have not introduced new issues.
9. Practical Applications of Desoldering Skills
Knowing how to desolder components opens up a range of practical applications. Here are a few:
- Repairing Electronics: Whether it’s a broken phone, a gaming console, or old audio equipment, desoldering can help you replace faulty components.
- Upgrading Hardware: You can enhance the performance of your devices by replacing outdated parts with newer ones.
- Learning and Experimentation: For hobbyists and students, desoldering offers a hands-on approach to learning electronics and circuit design.
- Recycling Components: Salvaging parts from old boards can be a cost-effective way to gather components for future projects.
These applications demonstrate the importance of desoldering skills in the electronics field, making it a valuable asset for enthusiasts and professionals alike.
10. Resources and Communities for Further Learning
Finally, if you’re looking to deepen your understanding of how to desolder components, there are plenty of resources and communities to tap into:
- Online Tutorials: Websites like YouTube have a wealth of video tutorials demonstrating various desoldering techniques.
- Forums and Communities: Engaging with platforms like Reddit’s r/electronics or specialized forums can provide insights and answers from experienced practitioners.
- Books and Guides: Many books about electronics repair include chapters dedicated to desoldering techniques and best practices.
- Workshops and Classes: Local maker spaces or community colleges often offer courses where you can learn hands-on skills, including desoldering.
Connecting with others and accessing various learning materials will enhance your skills and knowledge in desoldering, making you a more adept technician.
11. Understanding Different Types of Solder
When you’re learning how to desolder components, it’s essential to understand the various types of solder available. The two most common types are leaded and lead-free solder, each with distinct characteristics.
- Leaded Solder: Composed of tin and lead (typically 60% tin and 40% lead), this type melts at a lower temperature, making it easier to work with. However, due to health concerns associated with lead, its use is increasingly regulated.
- Lead-Free Solder: This type often contains mixtures of tin, silver, and copper. It has a higher melting point, which can present challenges during desoldering, as overheating can cause damage to components and circuit boards.
Understanding the type of solder used on a circuit board will help you adapt your techniques and ensure safer, more effective desoldering. (See: Health effects of lead in solder.)
12. Choosing the Right Temperature Settings
The temperature of your soldering iron can significantly affect your desoldering process. Here’s a breakdown of how to choose the right settings:
- Low Temperature (250-300°C / 482-572°F): Ideal for sensitive components that can be damaged by heat. Use this setting when working with delicate electronics.
- Medium Temperature (300-350°C / 572-662°F): This range is suitable for most general desoldering tasks, especially with leaded solder.
- High Temperature (350-400°C / 662-752°F): Useful for lead-free solder, but be cautious as prolonged exposure can damage surrounding components and the PCB.
Finding the right balance in temperature settings can facilitate better solder flow and make your desoldering process smoother.
13. Desoldering Techniques for Unique Circumstances
Desoldering may require adaptation based on specific circumstances. Here are some unique scenarios and techniques to consider:
- Desoldering Multi-Layer PCBs: For boards with multiple layers, you might need to use a thermal camera to identify which parts are heating, ensuring you apply heat only where necessary.
- Removing Components from Vintage Equipment: Older electronics may use different solder types and techniques. Applying a small amount of additional solder before removing can help improve the desoldering process.
- Using a Hot Air Gun: For larger components, using a hot air gun can help evenly heat multiple solder joints at once, making it easier to remove larger parts.
Adapting your approach based on the situation can help you tackle even the most challenging desoldering tasks.
14. Frequently Asked Questions (FAQ)
Here are some common questions people have when they’re learning how to desolder components:
What is the best way to remove solder from a circuit board?
The best method often depends on the component type. For through-hole components, use a desoldering pump or braid after heating the solder. For surface mount devices, a hot air rework station is often best.
Can I use a regular soldering iron for desoldering?
Yes, a regular soldering iron can be used for desoldering, but having a desoldering pump or braid will make the process much easier and cleaner.
How can I tell if the solder is lead-free or leaded?
Lead-free solder often appears brighter and more silvery than leaded solder, which has a duller appearance. If you’re unsure, you can check the manufacturer’s documentation or consult the circuit board specifications.
What should I do if I damage a trace while desoldering?
If you damage a trace, you can repair it by using a small piece of wire to bridge the gap or using conductive paint or a repair kit specifically designed for circuit board repairs.
Is it safe to desolder components at home?
Yes, as long as you follow safety precautions, such as working in a ventilated area and using protective gear. Always be cautious of the heat and fumes generated during the process. (See: Technical aspects of soldering and desoldering.)
15. Understanding the Thermal Properties of Components
When desoldering, it’s essential to consider the thermal properties of the components involved. Different components have varying tolerances to heat, which can affect their integrity during desoldering. For instance, integrated circuits (ICs) can be particularly sensitive to heat. Prolonged exposure to high temperatures can lead to degradation or failure of the component.
To minimize heat exposure:
- Use Heat Sinks: Attaching a heat sink to the lead can help dissipate heat away from the component.
- Limit Heating Time: Use a timer or count in your head to ensure you don’t leave the soldering iron on a joint for too long.
- Consider Soldering Time: The total time the soldering iron is on the joint should ideally be under 5 seconds for sensitive components.
Being mindful of the thermal properties of components will help preserve their functionality while allowing you to perform desoldering tasks more effectively.
16. How to Clean Up After Desoldering
Once you’ve finished desoldering, it’s important to clean up your workspace and the circuit board itself. Residual flux and solder can create problems in future repairs or when re-soldering components. Here are some tips for cleaning up:
- Use Isopropyl Alcohol: Apply isopropyl alcohol to a lint-free cloth or brush to clean surfaces, removing flux residue.
- Inspect the Board: After cleaning, check for any leftover solder balls or debris that might short-circuit components.
- Store Components Safely: Place any removed components in a labeled container for future use.
Cleaning properly will help ensure that your next project goes smoothly and maintains the integrity of the circuit board.
17. Building a Desoldering Practice Board
For those just starting out, building a desoldering practice board can be a great way to hone your skills. Here’s how you can create one:
- Gather Various Components: Use old circuit boards or buy a variety of cheap components to practice on.
- Design Random Placement: Place components in random configurations on your board. This will simulate real-world scenarios where components might be tightly packed.
- Create Different Solder Joints: Use different types of solder to create various solder joints, including leaded and lead-free, to experience the differences in desoldering techniques.
Practicing on a dedicated board will give you the chance to make mistakes without any repercussions, allowing you to improve your technique and become more confident.
18. Conclusion
Desoldering components is not just a useful skill; it’s an art that combines precision, technique, and a bit of creativity. Whether you’re repairing, upgrading, or salvaging, mastering this skill will open new doors in your electronics projects. By understanding the tools, techniques, and precautions involved, you can greatly enhance your proficiency in desoldering and broaden your capabilities in electronics repair and design.
“`
Trending Now
Frequently Asked Questions
What tools do I need to desolder components?
To desolder components effectively, you'll need a quality soldering iron with a fine tip, a desoldering pump to suck up melted solder, desoldering braids for absorption, and flux to improve solder flow. These tools are essential for precision and efficiency during the desoldering process.
How do I desolder without damaging the circuit board?
To desolder without damaging the circuit board, ensure your soldering iron is properly heated and use a desoldering pump or braid to quickly remove the melted solder. Work gently and avoid excessive heat to minimize the risk of damaging the board or surrounding components.
What is the process of desoldering components?
Desoldering components involves heating the solder to its melting point using a soldering iron, then removing the melted solder with a desoldering pump or braid. This process allows for the safe removal or repositioning of electronic components on a circuit board.
Can I reuse components after desoldering?
Yes, you can reuse components after desoldering, provided they are not damaged during the process. Carefully remove the solder and inspect the components for any signs of wear or damage before reusing them in new projects or repairs.
What are common mistakes to avoid when desoldering?
Common mistakes to avoid when desoldering include applying too much heat, which can damage the circuit board, and not using enough flux, which can hinder solder removal. Additionally, rushing the process can lead to mistakes, so take your time to ensure precision.
What's your take on this? Share your thoughts in the comments below — we read every one.