How to clean laptop fan
“`html
Maintaining the performance and longevity of your laptop is crucial, and a significant part of this is ensuring that your laptop fan is clean and functioning properly. Dust and debris can accumulate over time, causing the fan to work less efficiently and leading to overheating issues. In this article, we’ll explore how to clean your laptop fan effectively, ensuring your device runs smoothly for years to come. Let’s dive deep into the best practices for keeping your laptop fan in tip-top shape.
1. Why Cleaning Your Laptop Fan Matters
The laptop fan plays an essential role in preventing your device from overheating. When your laptop processes heavy tasks, the internal components generate heat, which the fan helps dissipate. If the fan becomes clogged with dust and debris, its ability to cool your laptop diminishes significantly. This can lead to several issues, including:
- Overheating: If the laptop fan is obstructed, the heat generated by the CPU and GPU can cause overheating, leading to erratic performance or even hardware failure.
- Reduced Performance: Overheating can cause the laptop to throttle its performance to cool down, resulting in slower speeds and increased lag during tasks.
- Shortened Lifespan: Consistent overheating not only affects performance but can also reduce the overall lifespan of your laptop components.
In essence, regularly cleaning your laptop fan is a preventative measure that saves you from costly repairs and ensures your machine runs efficiently.
2. Gather Your Tools
Before you begin the cleaning process, it’s vital to gather all the necessary tools to ensure a smooth operation. You won’t need a lot, but certain items are essential:
- Screwdriver: A precision screwdriver set will help you remove screws from the laptop casing.
- Compressed Air Canister: This is essential for blowing out dust and debris from hard-to-reach areas.
- Soft Brush: A small brush can help dislodge stubborn dust from the fan blades.
- Microfiber Cloth: This is useful for wiping down surfaces and ensuring there’s no residual dust.
- Static-Free Mat: If you have one, it’s recommended for working on electronic components to avoid static discharge.
Having these tools ready will make the cleaning process more efficient and help you avoid any accidental damage to your laptop.
3. Prepare Your Laptop
Preparation is key before diving into the cleaning process. Start by turning off your laptop and disconnecting it from any power source. If your laptop has a removable battery, take it out. This step is critical as it ensures safety during the cleaning process. Additionally, ensure you’re working in a clean, dust-free environment to avoid inhaling dust particles or introducing more debris into your laptop.
Next, ground yourself to prevent static electricity buildup. You can do this by touching a metal object or using an anti-static wrist strap if you have one. This precaution helps protect your laptop’s internal components.
4. Accessing the Laptop Fan
Depending on your laptop’s make and model, accessing the fan may vary. Most laptops have a removable back panel that grants access to the internal components. Here’s a general procedure:
- Locate the Screws: Use your screwdriver to remove screws securing the back panel. Keep these screws organized, so you don’t lose them.
- Remove the Back Panel: Carefully lift the panel off, taking care not to apply excessive force. Some panels may clip in place, so gently wiggle them free if necessary.
- Identify the Fan: Once the panel is off, locate the fan. It’s usually situated near the heat sink and can be identified by the fan blades.
Opening the laptop can be intimidating, but taking your time and being gentle will help avoid any damage. (See: computer safety and maintenance.)
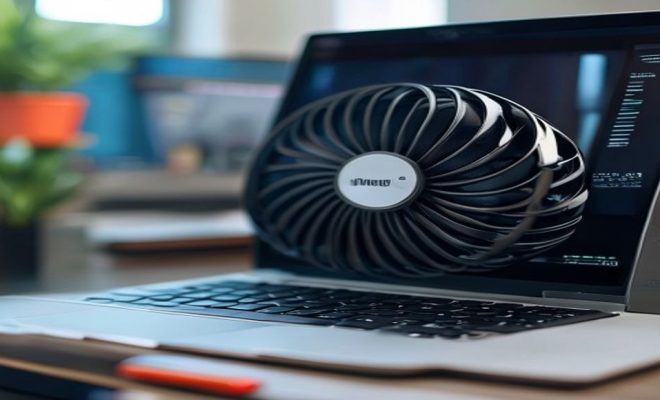
5. Cleaning the Fan and Vents
With access to the fan, it’s time for the main event: cleaning. Start with the compressed air canister. Hold it upright and use short bursts of air to blow dust off the fan blades and surrounding areas. It’s essential to avoid spinning the fan with compressed air, as this can potentially damage it. Instead, you should hold the fan in place while you clean.
Next, take your soft brush and gently wipe away dust that may have settled in hard-to-reach spots. Be careful not to apply too much pressure, as you could inadvertently damage the fan or its components. Once you’ve cleaned the fan, turn your attention to the laptop’s vents. Use the compressed air here as well, blowing out any dust buildup that may be obstructing airflow.
6. Reassembling Your Laptop
Once you’re satisfied that the fan and vents are clean, it’s time to put everything back together. Carefully replace the back panel, ensuring that all clips are secured and the panel sits flush against the laptop body. Then, replace the screws, tightening them gently. Avoid overtightening, as this can strip the screws or damage the laptop casing.
After reassembling, reconnect the battery (if you removed it) and plug the laptop back into the power source. Before you power it on, double-check your work to ensure everything is in place. Once you’re sure, turn the laptop on and listen for the fan. It should run smoothly and quietly, a sign that your cleaning was successful.
7. Establishing a Regular Cleaning Schedule
Cleaning your laptop fan shouldn’t be a one-time task. Establishing a regular cleaning schedule will help maintain optimal performance. Depending on your usage and environment, consider cleaning your laptop fan every three to six months. If you live in a particularly dusty area or use your laptop heavily for gaming or graphic-intensive tasks, you might want to clean it more frequently.
Additionally, be proactive in maintaining cleanliness. Use your laptop on a hard, flat surface rather than on soft surfaces like beds or couches, which can block airflow. Keeping your laptop in a well-ventilated area can also help minimize dust accumulation.
8. Signs Your Laptop Fan Needs Cleaning
Being aware of the signs that indicate your laptop fan needs cleaning can prevent potential issues. Common symptoms include:
- Excessive Noise: If your laptop fan starts to make unusual noises (like grinding or whirring), it’s a sign that dust buildup could be affecting its performance.
- Overheating: If your laptop is running hotter than usual or shuts down unexpectedly, the fan may not be functioning effectively due to clogged vents.
- Performance Drops: Noticeable slowdowns during tasks can indicate that your laptop is throttling performance to manage heat caused by a dirty fan.
If you notice any of these symptoms, don’t delay in cleaning your laptop fan. Addressing these issues promptly can save you from more serious problems down the line.
9. When to Seek Professional Help
While cleaning your laptop fan is a task you can undertake yourself, there may be times when it’s best to consult a professional. If you’re uncomfortable opening your laptop or if your cleaning doesn’t resolve overheating or performance issues, it’s wise to seek help. Additionally, if your laptop is still under warranty, opening it could void that warranty, so check the terms before proceeding. (See: impact of overheating on electronics.)
Professional service can also be beneficial if you suspect hardware failure or if your laptop shows signs of serious overheating beyond dust accumulation. Technicians have the expertise and tools necessary to diagnose and address any underlying issues that may be affecting your device.
10. Additional Tips for Maintaining Your Laptop
Besides cleaning the laptop fan, there are other maintenance tasks that can help you keep your laptop in good shape. Here are some additional tips to consider:
- Keep Software Updated: Regularly update your operating system and software. Updates can improve performance and security, addressing any potential issues before they become serious.
- Monitor System Temperatures: Use software tools to keep an eye on your laptop’s internal temperature. This can help you identify overheating issues early.
- Manage Power Settings: Optimize power settings to enhance battery life and reduce heat generation, particularly during lighter usage.
- Use Laptop Stands: Investing in a laptop stand can improve airflow underneath your laptop, reducing heat buildup while you’re working or gaming.
- Limit Background Processes: Regularly check for unnecessary background applications that can consume resources and generate additional heat.
11. Common Myths About Laptop Fans
As with many areas of technology, there are several myths surrounding laptop fans that can lead to confusion or improper care. Let’s debunk a few:
- Myth 1: You Can’t Clean Your Laptop Fan Yourself: While it’s recommended to be cautious, many laptop users can successfully clean their fans at home with the right tools and guidance.
- Myth 2: All Laptops Overheat: Overheating isn’t a universal problem for all laptops. With proper maintenance, many laptops can function efficiently without high temperatures.
- Myth 3: A Noisy Fan is Normal: While some noise is expected, a fan that suddenly becomes loud can indicate that it needs cleaning or replacement.
- Myth 4: Compressed Air Can Damage the Fan: When used correctly, compressed air is a safe way to clean out dust and debris without causing damage.
12. FAQ: Cleaning Your Laptop Fan
Q1: How often should I clean my laptop fan?
A1: It’s generally recommended to clean your laptop fan every three to six months, but this may vary based on your environment and usage. Heavier usage or dusty conditions might necessitate more frequent cleanings.
Q2: Is it safe to use compressed air to clean my laptop fan?
A2: Yes, using compressed air is one of the safest methods to clean your laptop fan as long as you hold the can upright and use short bursts to avoid damaging the fan.
Q3: Can I use a vacuum to clean my laptop fan?
A3: It’s not advisable to use a vacuum as it can create static electricity, which could damage electronic components. Compressed air is safer for this purpose.
Q4: What if my laptop fan still makes noise after cleaning?
A4: If the fan continues to make noise after cleaning, it may be a sign of wear and tear or a need for replacement. In that case, you might want to consult a professional technician.
Q5: Will cleaning my fan fix overheating issues?
A5: Cleaning the fan can help reduce overheating, but if the issue persists after cleaning, it could indicate other problems, such as thermal paste degradation or hardware failure. Further diagnostics may be necessary. (See: how overheating affects laptops.)
13. Additional Tools and Techniques for Fan Maintenance
While the basic cleaning of your laptop fan requires simple tools, there are additional equipment and techniques that can aid in maintaining a clean laptop fan. Here are some advanced tools and methods:
- Anti-Static Brush: Consider using an anti-static brush for cleaning, as it helps minimize static discharge and protects delicate components.
- Vacuum with HEPA Filter: If you need to clean the surroundings of your laptop, a vacuum with a HEPA filter can help remove dust from the environment without blowing it around.
- Thermal Paste Reapplication: Over time, the thermal paste between your CPU/GPU and the heatsink can dry out, diminishing heat transfer efficiency. If you’re comfortable doing so, consider reapplying thermal paste during fan cleaning.
14. Advanced Troubleshooting for Fan-Related Issues
Sometimes, despite your best efforts, you might still encounter issues with your laptop fan. Here are some advanced troubleshooting steps to consider:
- Check for BIOS Updates: Occasionally, fan control issues can stem from BIOS settings. Check if your laptop manufacturer has released updates that can resolve fan control problems.
- Use Hardware Monitoring Software: Tools like HWMonitor or SpeedFan can help you keep an eye on fan speeds and temperatures. If you notice irregular readings, it might indicate a hardware issue.
- Inspect the Fan Physically: After cleaning, if the fan still doesn’t function properly, inspect it for any physical damage or obstructions. Sometimes, debris can get lodged in spots that are hard to see.
- Consider Upgrading Fans: If your laptop consistently overheats and cleaning doesn’t help, consider aftermarket fan upgrades that can offer better cooling performance.
15. Understanding Laptop Cooling Systems
To better appreciate the importance of a clean laptop fan, it’s helpful to understand the laptop’s cooling system as a whole. Laptop cooling systems typically consist of several components:
- Heat Pipes: These are metal tubes containing liquid that transfers heat away from the CPU/GPU to the heatsink.
- Heatsinks: Typically made of aluminum or copper, heatsinks disperse heat into the air, which is then carried away by the fan.
- Fans: Fans draw air in and push it over the heatsinks, facilitating the heat exchange process.
When any part of this system, especially the fan, is compromised, it can lead to reduced efficiency and overheating. Regular cleaning ensures that air can flow freely, allowing the cooling system to function optimally.
16. Preventive Measures to Avoid Dust Accumulation
Preventing dust accumulation in the first place is an effective strategy for maintaining your laptop’s cooling system. Here are some tips:
- Use a Laptop Cooler: An external laptop cooler can assist in keeping temperatures down and reducing the burden on the internal fan.
- Filter Usage: Use air filters in your workspace to reduce the amount of dust that settles on and inside your laptop.
- Regular Cleaning Schedule: Establish a routine cleaning schedule, not just for your laptop, but for your entire workspace, to minimize dust buildup.
- Avoid Using on Soft Surfaces: Using your laptop on soft surfaces such as beds or couches can block vents. Always place it on a hard, flat surface.
17. Conclusion: The Importance of a Clean Laptop Fan
In summary, cleaning your laptop fan is an essential maintenance task that enhances performance and prolongs the life of your device. By understanding the significance of this process and following the steps outlined above, you can ensure your laptop remains in great shape for years to come. Don’t overlook this small yet impactful aspect of laptop care—it makes all the difference!
“`
Trending Now
Frequently Asked Questions
How often should I clean my laptop fan?
It's recommended to clean your laptop fan every 3 to 6 months, depending on your usage and environment. If you notice your laptop overheating or the fan running loudly, it may be time for a cleaning. Regular maintenance helps prevent dust buildup, ensuring optimal performance and extending your laptop's lifespan.
What tools do I need to clean my laptop fan?
To clean your laptop fan effectively, you'll need a precision screwdriver set to remove the casing, a compressed air canister to blow out dust, and a soft brush to dislodge stubborn debris. Having these tools ready will make the cleaning process smoother and more efficient.
Can I clean my laptop fan without opening it?
While it’s possible to clean your laptop fan without opening it by using compressed air through the vents, this method may not remove all dust and debris. For a thorough cleaning, it’s best to open the laptop and access the fan directly, ensuring better airflow and performance.
What happens if I don't clean my laptop fan?
Neglecting to clean your laptop fan can lead to overheating, reduced performance, and even hardware failure. Dust buildup restricts airflow, causing the fan to work harder and potentially shortening the lifespan of your laptop. Regular cleaning helps maintain optimal performance and prevents costly repairs.
Is it safe to use compressed air to clean my laptop fan?
Yes, using compressed air is a safe and effective method to clean your laptop fan. It helps blow out dust and debris from hard-to-reach areas without damaging components. Just be sure to hold the canister upright and avoid excessive force to prevent any potential harm.
What did we miss? Let us know in the comments and join the conversation.