How to hang curtain rod
“`html
Are you ready to transform your space with some stylish curtains? A well-hung curtain rod can make a room feel polished and inviting. In this comprehensive guide, we’ll explore how to hang a curtain rod effectively, covering everything from tools and materials to design tips and installation techniques.
1. Understanding Curtain Rod Types
Before diving into the installation process, it’s essential to understand the various types of curtain rods available. Curtain rods come in different materials, such as metal, wood, and plastic, each offering unique aesthetic and functional benefits.
Metal rods are durable and often come in sleek designs, making them a popular choice for modern homes. Wooden rods, on the other hand, provide warmth and a traditional feel, perfect for classic interiors. Finally, plastic rods are lightweight and budget-friendly, suitable for lighter drapes or temporary setups. Knowing the type of rod that suits your space will guide your installation process.
2. Tools and Materials Needed
Gathering the right tools and materials is crucial for a successful installation. Here’s what you’ll need:
- Measuring tape
- Level
- Drill
- Screwdriver
- Stud finder (optional)
- Wall anchors (if not drilling into studs)
- Curtain rod and brackets
- Marking pencil
Having everything on hand will not only save time but also minimize the hassle once you start the hanging process. Ensure that your curtain rod matches the width of your window for optimal coverage and aesthetics.
3. Choosing the Right Height and Width
One of the most critical aspects of hanging a curtain rod is selecting the correct height and width. Typically, the curtain rod should be positioned 4-6 inches above the window frame. This height creates an illusion of taller ceilings and makes the window appear larger.
As for width, aim to extend the rod 3-6 inches beyond the window on either side. This setup not only allows for more light but also helps your curtains to stack back neatly without blocking the view.
4. Measuring Accurately
Accurate measuring is the backbone of a successful installation. Start by measuring the width of your window, then add the extra inches for the desired rod extension. Next, measure the height from the intended rod position to the floor, ensuring you account for the curtain length.
It’s best to double-check all measurements before making any marks or drilling. Remember, a small miscalculation can lead to uneven rods or curtains that are too short. Use a level during measurements to ensure everything is straight and aligned.
5. Finding the Right Bracket Placement
Once you’ve got your measurements, the next step is to determine where to place the brackets. Most curtain rods come with at least two brackets, and their installation is crucial for supporting the rod’s weight. (See: Curtain rod types and materials.)
For proper support, place the brackets approximately 3-4 inches from each end of the rod. If you’re using a longer rod, consider adding a center bracket for additional support. Mark the positions with a pencil, ensuring they’re level before you proceed.
6. Installing Wall Brackets
Now it’s time to install the wall brackets. Using a drill, create holes at your marked locations. If you’re drilling into drywall, make sure to use wall anchors to prevent the brackets from pulling out of the wall. If you find a stud behind the drywall, you can secure the brackets directly into it for added strength.
Once the holes are prepared, align the brackets with the screws provided, and secure them tightly. A level can help confirm that they’re straight, giving your curtain rod a professional appearance.
7. Hanging the Curtain Rod
With the brackets in place, it’s time to hang the curtain rod. Begin by placing the rod onto the brackets, ensuring it’s secure. Depending on the design, some rods may require additional screws or clips to hold them in place.
After the rod is mounted, it’s a good idea to add your curtains before finalizing everything. This way, you can check if the height and width are just right. Adjust as necessary before fully securing the rod.
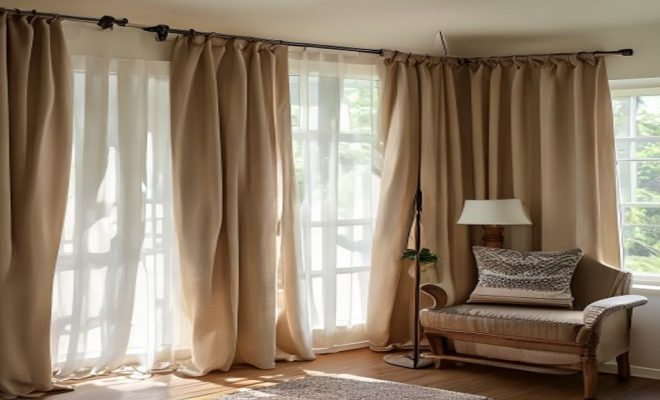
8. Styling Your Curtains
Once your curtain rod is hung and the curtains are in place, it’s time to style them. Whether you prefer a casual or formal look, the way you hang your curtains can significantly affect the room’s ambiance.
Consider using curtain tiebacks to hold the fabric off to the sides during the day. This not only allows more natural light into the room but also showcases the texture and color of your curtains. Additionally, layering different window treatments, such as sheer curtains behind thicker drapes, creates depth and interest in your design.
9. Maintenance and Adjustments
After the installation, regular maintenance is crucial to keep your curtains looking great. Dust and dirt can accumulate on fabric, so consider periodic cleaning based on the material of your curtains. Follow the care label instructions for washing or spot cleaning.
Over time, you may find that adjustments are necessary, especially if your curtains tend to sag or if the rod becomes loose. A quick tightening of screws or brackets will usually solve these issues and keep your window treatments looking crisp and fresh.
10. Choosing the Right Curtains for Your Rod
Once your curtain rod is installed, selecting the right curtains is key to achieving the desired look. You’ll want to consider the fabric, pattern, and, importantly, the weight of the curtains. Heavier fabrics may require sturdier rods and brackets, so ensure that your selections are compatible.
For a more dramatic effect, opt for floor-length curtains that touch the ground. This style adds elegance and height to the room. Light, airy fabrics can create a breezy feel, especially in casual spaces. If privacy is a concern, consider blackout curtains to block out light while maintaining a stylish appearance.
11. Common Mistakes to Avoid
Even the most seasoned DIYers can make mistakes when learning how to hang a curtain rod. Here are some common pitfalls to watch out for: (See: Safety tips for home installations.)
- Incorrect Measurements: Always measure twice before cutting or drilling. A miscalculation can result in uneven hanging or wasted materials.
- Ignoring Weight Limits: Each curtain rod has a weight capacity. Using curtains that exceed this limit can cause sagging or breakage.
- Not Using a Level: Skipping the leveling step can lead to crooked rods, which can be frustrating and visually unappealing.
- Neglecting Wall Types: Different wall types require different mounting techniques. Make sure to know if you’re drilling into drywall, plaster, or brick, as this will affect your installation method.
12. Expert Tips for a Flawless Finish
Want your curtain rod installation to look as professional as possible? Here are some expert tips:
- Choose Quality Materials: Invest in a good-quality curtain rod and brackets to ensure longevity and sturdiness. Cheap materials can lead to issues down the line.
- Consider Decorative Elements: Finials (the decorative ends of the rod) can add a personal touch and enhance your décor. Choose styles that complement your room’s theme.
- Use a Helper: Having someone assist you can make measuring and holding the rod much easier, especially if you’re working with longer rods.
- Think About Curtain Movement: If you plan to frequently open and close your curtains, consider using a curtain rod with a smooth gliding mechanism to make this process easier.
13. Frequently Asked Questions (FAQ)
How high should I hang my curtain rod?
A common guideline is to hang the rod 4-6 inches above the window frame. This height can create the illusion of taller ceilings.
How wide should my curtain rod be?
The rod should extend 3-6 inches beyond the window on either side. This allows the curtains to be drawn back without blocking light.
What if my windows are not standard sizes?
If you have non-standard windows, you can have custom rods made or opt for adjustable rods that can fit various widths. Just measure carefully to ensure a proper fit.
Can I install curtain rods without drilling?
If you prefer not to drill into your walls, consider adhesive hooks or tension rods for lighter curtains. However, these may not provide the same level of support as traditional installations.
How do I clean my curtains?
Cleaning depends on the fabric type. Many curtains can be machine washed, while others may require dry cleaning. Always check the care label for specific instructions.
Can I use multiple curtain rods for layering?
Yes! Layering with multiple rods allows you to combine sheer and thick curtains for both style and functionality. Just ensure that the rods are compatible and adequately supported.
14. Creative Ways to Use Curtain Rods Beyond Windows
Curtain rods aren’t just for hanging curtains! You can find creative uses for them throughout your home. Here are some ideas:
- Closet Organization: Install a curtain rod inside your closet to hang scarves, belts, or accessories. This keeps them visible and easily accessible.
- Art Display: Use a curtain rod to display artwork or photographs. Attach clips to the rod, allowing you to easily change out pieces as your style evolves.
- Kitchen Storage: In the kitchen, a curtain rod can hold mugs or utensils. It’s a stylish way to keep your kitchen organized.
- Room Dividers: For open spaces, a curtain rod can be used with curtains to create temporary room dividers or to separate spaces for privacy.
15. Calculating the Right Size for Your Curtain Rod
Choosing the correct size for your curtain rod is essential to achieve a balanced look. Here’s how to calculate the size:
1. **Measure Your Windows:** Measure the width of your window frame. For optimal coverage, add an extra 6-12 inches to each side. This allows curtains to fully cover the window when drawn closed. (See: Expert tips on hanging curtains.)
2. **Determine the Rod Length:** The total length of your curtain rod should equal the width of your window plus the added inches on either side. For example, if your window is 48 inches wide and you add 12 inches total, your curtain rod should be 60 inches long.
3. **Consider the Finials:** If you’re using finials, remember to account for their length in your total rod measurement, as they add to the overall length of the installed curtain rod.
16. Enhancing Your Curtain Rod with Accessories
Adding accessories to your curtain rod can enhance its functionality and aesthetic appeal. Here’s a look at some popular options:
- Ring Clips: These clips allow for easy opening and closing of curtains while adding a decorative touch. They come in various colors and finishes to match your decor.
- Holdbacks: Look for stylish holdbacks to keep your curtains open during the day. They can be found in many designs, from simple hooks to intricate patterns.
- Sheer Panels: Pairing sheer panels with heavier curtains can add depth and dimension to your window treatment.
- Valances: A valance can add an extra layer of style and is great for hiding curtain hardware.
17. How to Choose Curtain Rod Finials
Finials are the decorative ends of your curtain rod, and they play a significant role in your overall design. Here are a few tips to choose the right finials:
- Match Your Style: Finials come in various styles, from modern metal to vintage glass. Choose a style that complements your curtains and room decor.
- Consider Size and Scale: Ensure the finials are proportionate to the size of your curtain rod and curtains. Oversized finials can overwhelm a small rod and vice versa.
- Material Matters: The material of the finials should match or complement your curtain rod. For instance, if your rod is wood, opt for wooden finials for a cohesive look.
18. Tips for Hanging Curtains in Difficult Spaces
Sometimes, hanging curtains can be a challenge due to unique architectural features or space constraints. Here are some helpful tips:
- Arched or Specialty Windows: For arched windows, custom rods may be necessary. Consider using a flexible curtain rod that can curve with the window’s shape.
- High Ceilings: If you have high ceilings, consider using a motorized curtain rod system for ease of use. This can make managing your curtains much simpler.
- Skylights: Use tension rods or specialized hardware to create custom solutions for managing light and privacy in rooms with skylights.
19. Final Thoughts on Curtain Rod Installation
Knowing how to hang a curtain rod can dramatically enhance your interior design and create a more inviting atmosphere in your home. With the right tools, measurements, and techniques, you can achieve professional-looking results.
So, whether you’re dressing a cozy bedroom or a spacious living room, don’t underestimate the power of a well-hung curtain rod. By following the steps outlined in this guide, you’ll not only elevate your space but also enjoy a sense of accomplishment with your DIY skills.
“`
Trending Now
Frequently Asked Questions
What tools do I need to hang a curtain rod?
To hang a curtain rod effectively, you'll need a measuring tape, level, drill, screwdriver, stud finder (optional), wall anchors (if not drilling into studs), curtain rod and brackets, and a marking pencil. Having these tools ready will streamline your installation process.
How high should I hang my curtain rod?
For optimal aesthetics, the curtain rod should be positioned 4-6 inches above the window frame. This height creates an illusion of taller ceilings and enhances the overall look of your room.
What are the different types of curtain rods?
Curtain rods come in various materials, including metal, wood, and plastic. Metal rods offer durability and modern designs, wooden rods provide warmth for traditional interiors, and plastic rods are lightweight and budget-friendly for lighter drapes.
How far should a curtain rod extend beyond the window?
Aim for the curtain rod to extend 3-6 inches beyond the window on either side. This not only allows for more natural light but also creates a more spacious appearance for your windows.
Do I need to use wall anchors when hanging a curtain rod?
Wall anchors are necessary if you are not drilling into studs. They provide additional support to ensure your curtain rod can hold the weight of the curtains without pulling out of the wall.
Have you experienced this yourself? We’d love to hear your story in the comments.