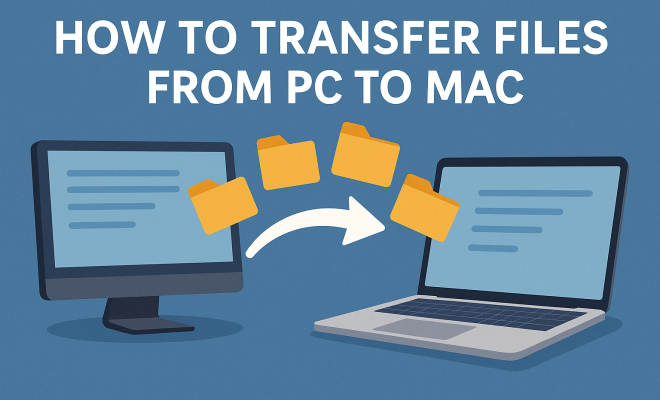
How to transfer files from PC to Mac
“`html
Switching from a PC to a Mac can be an exciting yet daunting experience, especially when it comes to transferring your important files. Whether you’re moving documents, photos, music, or even applications, knowing how to transfer files from PC to Mac efficiently can save you a lot of headaches. In this article, we’ll explore seven essential methods that make this transition smoother.
1. Using Apple’s Migration Assistant
One of the most straightforward ways to transfer files from PC to Mac is by using Apple’s built-in Migration Assistant. This tool helps you move your files, applications, and user accounts seamlessly to your new Mac. To use it, ensure both your PC and Mac are connected to the same network.
First, download the Windows Migration Assistant on your PC from Apple’s official website. Once downloaded, open the application and follow the prompts. On your Mac, open the Migration Assistant (found in the Utilities folder), and select the option to transfer data from a Windows PC. The systems will communicate, prompting you to select which files to transfer. It’s as simple as that!
2. Transferring via External Hard Drive
If you have a considerable amount of data, using an external hard drive can be a practical solution. With this method, you can easily transfer large files without worrying about network speed or reliability. Begin by connecting the external hard drive to your PC. Copy the desired files onto the drive, ensuring it’s formatted in a way that both Windows and macOS can read—FAT32 or exFAT is recommended.
Once the files are copied, safely eject the hard drive and connect it to your Mac. Open the drive, and simply drag and drop the files to your desired location on your Mac. This method is not only efficient but also allows you to keep a backup of your important data.
3. Using Cloud Storage Services
Cloud storage services like Google Drive, Dropbox, and OneDrive offer a convenient way to transfer files from PC to Mac without any physical hardware. If you already have an account with one of these services, you’re halfway there.
Simply upload the files to your cloud storage from your PC. Once they are uploaded, access the same account on your Mac and download the files to your local drive. This method is particularly useful for smaller files or when you’re on the go, as you can access your cloud storage from any device with internet connectivity.
4. Emailing Files to Yourself
While it might not be the most glamorous option, emailing files to yourself is a quick and easy way to transfer smaller documents or photos from PC to Mac. Simply attach the files to an email, send them to your own email address, and then open the email on your Mac. From there, you can download the attachments directly to your Mac.
This method works best for smaller files, as most email services have attachment size limits. If your files exceed that limit, consider one of the other methods mentioned here.
5. Using a File Transfer Cable
For users who prefer a wired connection, a file transfer cable can be a practical solution. This specialized cable connects your PC and Mac directly, allowing for fast data transfer. It usually comes with software that guides you through the process of moving files between the two systems.
Once you’ve connected the cable, install the provided software on both the PC and Mac. Follow the on-screen instructions, select the files you want to transfer, and initiate the transfer process. This is an excellent option if you have a lot of data that you need to transfer quickly.
6. Utilizing Network File Sharing
If both your PC and Mac are networked, you can use file sharing to transfer files. On your PC, navigate to the folders containing the files you want to share, right-click, and select ‘Properties.’ Under the ‘Sharing’ tab, click on ‘Share’ and follow the prompts to allow access to your Mac.
On your Mac, open Finder, click on ‘Go’ in the menu bar, and select ‘Connect to Server.’ Enter the IP address of your PC, which you can find under the ‘Network’ settings in Windows. Once connected, you can access the shared files from your Mac and drag them to your local drive.
7. Third-Party Transfer Software
If you’re looking for a more robust solution, consider using third-party file transfer software. Tools like EaseUS Todo PCTrans, Wondershare Dr.Fone, and AnyTrans offer features specifically designed to assist in transferring files from PC to Mac. These applications often come with user-friendly interfaces and step-by-step guides that make the process seamless.
After downloading and installing the software on both devices, follow the prompts to select files and initiate the transfer. Many of these programs offer additional features like data recovery and system backup, making them worthwhile investments for users making the switch.
8. Transfer Files via Bluetooth
If you’re only transferring a few small files, using Bluetooth can be a handy option. To do this, enable Bluetooth on both your PC and Mac. On your PC, open the Bluetooth settings and make sure it’s discoverable. On your Mac, go to System Preferences, click on Bluetooth, and ensure it’s turned on.
Once both devices can see each other, select the files you want to transfer on your PC, right-click, and choose the option to send via Bluetooth. On your Mac, you’ll receive a prompt to accept the incoming files. This method is less common for large file transfers but can be effective for quick, small moves.
9. Using an SD Card or USB Flash Drive
If an external hard drive seems like overkill for your data transfer needs, you might consider using a USB flash drive or an SD card. Similar to the external hard drive method, this process is simple and effective for transferring files from PC to Mac. Insert the flash drive or SD card into your PC and copy the files you want to transfer.
Once you’ve finished, safely eject the drive and insert it into your Mac. The Mac should recognize the drive automatically, allowing you to access the files you’ve transferred. This method is particularly useful for students or professionals who need to frequently transfer files between devices.
10. Frequently Asked Questions
What file types can I transfer from PC to Mac?
You can transfer virtually any file type from PC to Mac, including documents, images, audio files, and applications. Just keep in mind that some Windows applications may not be compatible with macOS.
Is there a limit to how much data I can transfer?
Limits depend on the method you choose. For example, email services often have attachment size limits (usually around 25 MB), while cloud storage services may have free storage limits. External drives and direct connections typically don’t have strict limits other than the capacity of the storage device itself.
Can I transfer applications from PC to Mac?
While you can transfer files associated with applications, you usually cannot transfer Windows applications directly to macOS due to compatibility issues. You’ll need to download the macOS versions of software separately.
What should I do if I encounter issues during the transfer?
If you face any issues, ensure both devices are on the same network and that your software is up to date. For third-party software, consult the user manual or support forums for troubleshooting. If using a network connection, check your firewall settings, as they can sometimes block file sharing.
11. Tips for a Smooth Transition
To ensure your transition from PC to Mac is as smooth as possible, consider the following tips:
- Plan Ahead: Before transferring, take some time to organize your files on your PC. Delete anything you no longer need to make the process easier.
- Check Compatibility: Some files may need to be converted for macOS compatibility. Check the types of files you’ll be transferring and prepare accordingly.
- Backup Your Data: Always have a backup of your important files before starting any transfer process. This can save you from potential data loss.
- Familiarize Yourself with macOS: Spend some time learning about the Mac interface, as it differs from Windows. Knowing where things are can help ease the transition.
12. Maintaining Your Files Post-Transfer
After you’ve successfully transferred your files from PC to Mac, it’s essential to maintain them properly. Organize your files into folders that make sense to you, and consider utilizing macOS features such as Tags and Smart Folders for better organization.
Additionally, regularly back up your new Mac using Time Machine or another backup solution. This practice will ensure that you don’t lose any important files in the future and will make any subsequent transitions even smoother.
13. Dealing with File Format Differences
When you transfer files from PC to Mac, you may encounter different file formats that require conversion. Some common formats such as .docx (Word documents) or .xlsx (Excel spreadsheets) are compatible with macOS applications like Pages and Numbers, but others may not be. For instance, certain proprietary file formats from software used on Windows may not open on Mac.
To handle these differences, you can use software like Zamzar or CloudConvert that allows you to convert files online to a format that’s compatible with macOS. It’s also a good idea to check if the applications you use on Windows have Mac versions or alternatives that can open the files created on Windows.
14. Transferring Larger Files Efficiently
If you have large files or datasets to transfer, you might want to consider additional strategies for efficiency. For instance, compressing your files into a .zip format can reduce their size, making them quicker to transfer and easier to handle. After putting your files in a .zip folder, you can use any of the methods mentioned above to transfer the compressed file, which can speed up the process significantly.
It’s also useful to check the upload and download speeds of your internet connection if you’re using cloud storage. High speeds can greatly reduce the time it takes to transfer large amounts of data.
15. Using Home Sharing Features
If you’re an Apple user and already have other Apple devices such as an iPhone or iPad, you can use features like Home Sharing to manage your media files more seamlessly. Home Sharing allows you to share music, movies, and TV shows across multiple devices using your iTunes Library, which can also include content stored on your Mac.
To set up Home Sharing, ensure that you’re signed in with the same Apple ID on all devices. You can enable Home Sharing in the iTunes or Music app preferences on your Mac and then share your libraries with your PC. This method is particularly beneficial if you want to transfer large media libraries without physically moving files around.
16. What to Expect After the Transfer
Once you’ve completed transferring your files from PC to Mac, you might notice differences in how macOS handles files and applications. For instance, Mac uses a different file system (APFS) compared to Windows (NTFS). This change can affect how files are stored, accessed, and backed up. Familiarize yourself with the Finder, as it’s the Mac equivalent of Windows Explorer and allows you to navigate through your files easily.
Also, keep in mind that some settings and preferences from your PC applications will not carry over. It’s a good opportunity to set up your apps afresh, adopting new features and functionalities available on macOS to improve your workflow.
17. Final Thoughts on Transitioning
Transitioning from a PC to a Mac can feel overwhelming at first, but with the right strategies, you can make the process as seamless as possible. Whether you’re relying on Migration Assistant or choosing to use an external hard drive, take the time to understand each option. Remember to give yourself some grace as you learn the new system. With ongoing use, macOS will become second nature, and you’ll find that the initial effort you put into transferring files will pay off in productivity and enjoyment.
Conclusion: Choosing the Right Method for You
When it comes to transferring files from PC to Mac, the best method depends on your individual needs. Whether you prefer the simplicity of cloud storage, the reliability of a direct cable connection, or the ease of Migration Assistant, there’s a solution that fits your situation. Take the time to assess the volume of data you have and the tools at your disposal, and choose the method that will make your transition as smooth as possible.
Remember, the key to a successful transfer lies in planning and understanding the options available. With the right approach, you can easily bring all your important files with you to your new Mac, making the switch less overwhelming and more exciting.
“`
Trending Now
Frequently Asked Questions
How do I use Migration Assistant to transfer files from PC to Mac?
To use Migration Assistant, first download the Windows Migration Assistant on your PC from Apple's website. Ensure both devices are on the same network. Open Migration Assistant on your Mac, select the option to transfer data from a Windows PC, and follow the prompts to choose which files to transfer.
Can I transfer files using an external hard drive?
Yes, you can transfer files using an external hard drive. Connect the drive to your PC, copy the desired files, and ensure it's formatted as FAT32 or exFAT. After safely ejecting the drive, connect it to your Mac and drag and drop the files to your desired location.
What are some cloud storage options for transferring files?
You can use cloud storage services like Google Drive, Dropbox, or OneDrive to transfer files from PC to Mac. Simply upload your files to the cloud from your PC and then access them on your Mac by logging into the same cloud service.
Is it possible to transfer applications from PC to Mac?
While you can transfer files easily, transferring applications from PC to Mac isn't straightforward due to different operating systems. You may need to reinstall compatible applications on your Mac instead of transferring them directly.
What file formats should I use for compatibility between PC and Mac?
For compatibility between PC and Mac, it's recommended to use file formats like FAT32 or exFAT when using external drives. These formats allow both operating systems to read and write files without issues.
Have you experienced this yourself? We’d love to hear your story in the comments.