How to clean mechanical keyboard
“`html
Mechanical keyboards are beloved for their tactile feedback, durability, and customizable features. However, they can also collect dust, grime, and debris between the keys, diminishing their performance and aesthetics. Whether you’re a gamer, programmer, or someone who spends long hours typing, knowing how to clean a mechanical keyboard is essential for maintaining its functionality and longevity.
1. Understanding the Importance of Cleaning
Cleaning your mechanical keyboard is more than just a matter of aesthetics. Over time, dirt and oils from your fingers accumulate, leading to sticky keys and decreased responsiveness. Moreover, these contaminants can harbor bacteria and allergens, which could pose health risks, especially for those with respiratory issues. Regular cleaning helps ensure that your keyboard remains in optimal condition, enhancing your typing experience.
Additionally, maintaining a clean mechanical keyboard can extend its lifespan. Mechanical switches are built to last, but neglecting regular maintenance can lead to wear and tear. A clean keyboard not only looks better but also functions more reliably, preventing potential issues down the road.
2. Gathering Your Cleaning Supplies
Before diving into the cleaning process, gather all necessary supplies. Here’s what you’ll need:
- Keycap puller: This tool allows you to safely remove the keycaps without damaging the switches.
- Microfiber cloth: A soft cloth is ideal for wiping down surfaces without scratching them.
- Compressed air canister: This helps blow away dust and debris from hard-to-reach areas.
- Cotton swabs: Useful for cleaning between keys and other small crevices.
- Cleaning solution: Use a diluted mixture of isopropyl alcohol and water or a dedicated electronics cleaner.
- Small container: To keep your keycaps organized while cleaning.
Having everything ready will streamline the cleaning process and prevent any interruptions.
3. Preparing to Clean: Step-by-Step
Before you start cleaning, it’s essential to prepare your mechanical keyboard properly. First, unplug it from your computer to avoid any accidental keystrokes. If your keyboard is wireless, ensure that it’s turned off. Next, take a picture or make a note of your keyboard layout. This will help you remember where each key goes when it’s time to reassemble.
Once you’re prepared, use the keycap puller to gently remove the keycaps. Start with the larger keys before moving to the smaller ones, as they can sometimes require more force to remove. Place the keycaps in a small container to avoid losing any pieces during the cleaning process.
4. Cleaning the Keycaps
Once the keycaps are off, it’s time to clean them. Fill a bowl with warm water and add a few drops of mild dish soap. Submerge the keycaps in the soapy water and let them soak for about 30 minutes. This will help loosen any grime and dirt that has built up over time.
After soaking, use a microfiber cloth or a soft brush to gently scrub the keycaps. Pay special attention to the surface where your fingers rest, as this area tends to accumulate the most dirt. Rinse the keycaps thoroughly with clean water to remove any soap residue. Allow them to air dry completely before reattaching them to your keyboard. (See: Cleaning keyboards and hygiene practices.)
5. Cleaning the Keyboard Base
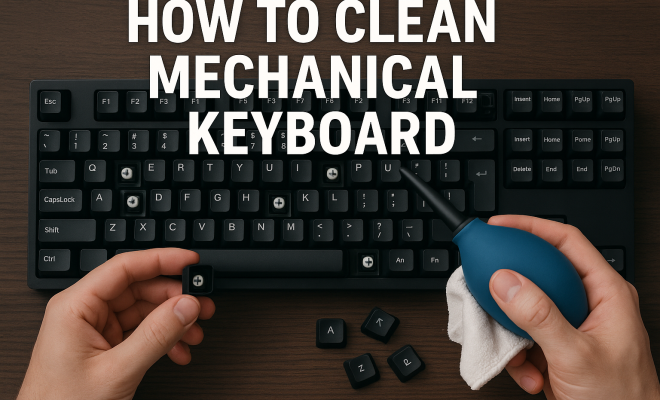
While the keycaps are drying, focus on cleaning the keyboard base. Start by using a can of compressed air to blow out dust and debris from between the switches. Hold the keyboard at an angle to help the debris escape. Be careful not to use too much pressure, as this could damage the switches.
After blowing away the loose debris, take a microfiber cloth dampened with your cleaning solution and wipe down the surface of the keyboard. Focus on areas around the switches and any spots that appear particularly dirty. For stubborn grime, use a cotton swab dipped in the cleaning solution to get into tight spaces.
6. Reattaching the Keycaps
Once everything is dry and clean, it’s time to put the keycaps back on your mechanical keyboard. Revisit the photo or notes you took earlier to ensure you place each keycap in its correct position. Start with the larger keycaps, and then work your way towards the smaller ones. Apply gentle pressure until you hear a click, indicating that the keycap is securely in place.
After reattaching all the keycaps, take a moment to check for any misaligned keys. If everything looks good, connect your keyboard back to the computer and test it out. You should notice a difference in feel and sound!
7. Regular Maintenance Tips
To keep your mechanical keyboard in prime condition, incorporate regular maintenance into your routine. A good rule of thumb is to clean your keyboard every month or every few weeks, depending on usage. If you’re in a particularly dusty environment or have pets, you may want to clean it more frequently.
Additionally, consider using a keyboard cover to protect against dust and spills. These covers can act as a barrier, making it easier to maintain cleanliness. Also, be mindful of your typing habits; eating or drinking near your keyboard can introduce crumbs and spills that are difficult to clean.
8. Advanced Cleaning Techniques
For those who want to take their cleaning to the next level, there are advanced techniques to consider. For instance, you can fully disassemble the keyboard to clean each switch individually. This is particularly useful if you notice that some keys feel sticky or unresponsive even after regular cleaning. However, disassembling your keyboard may void the warranty, so be cautious and ensure you’re comfortable with the process.
Another advanced method is using ultrasonic cleaners. These machines can clean keycaps and other components thoroughly without the risk of damaging electronics. However, they tend to be an investment, so weigh the pros and cons before deciding to purchase one.
9. Common Mistakes to Avoid
When cleaning your mechanical keyboard, it’s easy to make mistakes that could lead to damage or ineffective cleaning. Here are some common pitfalls to avoid:
- Using abrasive materials: Avoid steel wool or rough scrubbers, as these can scratch the surface of your keycaps and damage the keyboard.
- Skipping the keycap removal: Just wiping the keyboard without removing the keycaps may leave dirt and grime trapped underneath.
- Over-saturating your cloth: When cleaning, make sure your cloth is damp, not dripping wet, to prevent moisture from seeping into the switches.
- Neglecting to let keycaps dry: Ensure that the keycaps are completely dry before reattaching them to avoid damaging the switches.
10. Understanding Different Switch Types
Mechanical keyboards come with a variety of switch types, each offering unique tactile feedback and sound. Understanding your switch type can affect how you clean and maintain your keyboard. Here’s a quick overview: (See: How to clean your keyboard effectively.)
- Cherry MX: These are among the most popular switches, known for their reliability and durability. They come in different variants, such as Red (linear), Blue (tactile), and Brown (quiet tactile).
- Razer: Razer switches are designed for gaming, providing fast actuation and a distinctive sound, especially in their Green version, which is tactile and clicky.
- Gateron: These switches are similar to Cherry MX but are often smoother. They are available in various colors, each representing different characteristics.
- Topre: A hybrid switch combining mechanical and rubber dome technologies, Topre switches offer a unique feel and sound that some users swear by.
Understanding which type of switch you have can help you determine the best cleaning methods, as well as how often you should perform maintenance on your keyboard.
11. Comparing Cleaning Methods: DIY vs. Professional Services
While many people prefer to clean their mechanical keyboards themselves, there are professional cleaning services available. Here’s a comparison to help you decide which route might be best for you:
| Aspect | DIY Cleaning | Professional Cleaning |
|---|---|---|
| Cost | Generally low; just the cost of supplies. | Can be expensive, depending on the service. |
| Time | Can take a few hours, depending on your thoroughness. | Usually a quick turnaround, often within a day or two. |
| Skill Required | Basic skills with tools and cleaning methods. | Trained professionals who know how to handle various keyboard types. |
| Customization | You can choose your cleaning methods and products. | Limited to the services offered by the cleaning company. |
Consider your budget, time constraints, and how comfortable you are with DIY tasks when deciding which cleaning option is best for you.
12. Frequently Asked Questions (FAQ)
How often should I clean my mechanical keyboard?
It’s recommended to clean your keyboard at least once a month. If you use your keyboard heavily or eat/drink near it, consider increasing the frequency to every couple of weeks.
Can I use water to clean my keyboard?
While you can use water, it’s best to use a diluted cleaning solution to avoid moisture damaging the switches. Always ensure that keycaps are completely dry before reattaching them.
What’s the best way to clean keycaps with legends?
If your keycaps have legends (labels), avoid soaking them for too long, as this could lead to fading. Instead, clean them quickly and ensure they dry thoroughly.
Is it safe to use cleaning wipes?
Cleaning wipes can be convenient, but ensure they are alcohol-based and do not contain any harsh chemicals. Always do a spot test on a small area first.
What if a key is stuck?
If a key feels stuck, it might need more thorough cleaning. Remove the keycap and ensure there’s no debris underneath. You can also lubricate the switch with a safe lubricant designed for mechanical keyboards.
13. Tips for Choosing the Right Cleaning Products
When it comes to selecting cleaning solutions for your mechanical keyboard, it’s essential to choose products that are effective yet safe for electronics. Here are some tips to help you make the best choice: (See: Impact of cleanliness on health.)
- Look for isopropyl alcohol: A solution with at least 70% isopropyl alcohol is typically safe for cleaning electronic devices. It evaporates quickly, reducing the risk of moisture damage.
- Avoid harsh chemicals: Stay away from bleach or ammonia-based cleaners, as these can cause damage to plastics and finishes over time.
- Consider eco-friendly options: There are many eco-friendly cleaning solutions available that are safe for electronics and the environment. These can be a great alternative if you’re concerned about chemical exposure.
- Test before full application: Always test a small area of the keyboard or keycap with your chosen cleaning product to ensure it doesn’t cause any discoloration or damage.
14. The Impact of Dust and Debris on Performance
Dust and debris can have a significant impact on the performance of your mechanical keyboard. Over time, these particles can settle in and around the switches, leading to a variety of issues:
- Reduced tactile feedback: A buildup of grime can dampen the feel of the switches, making them less responsive and enjoyable to use.
- Key chatter: When dirt interferes with the switch mechanism, it can lead to key chatter, where a single key press registers multiple times.
- Sticky keys: If oils and debris accumulate, keys may become sticky, making typing frustrating and less efficient.
Regularly cleaning your keyboard can help mitigate these issues, ensuring that you maintain a high level of performance and a satisfying typing experience.
15. Why Investing in a High-Quality Mechanical Keyboard is Worth It
Investing in a high-quality mechanical keyboard not only enhances your typing experience but can also save you time and money in the long run. Here are some reasons to consider:
- Durability: Mechanical keyboards are known for their longevity, with many switches rated for 50 million keystrokes or more. A well-maintained keyboard can last for years.
- Customizability: Many mechanical keyboards allow users to customize keycaps, switches, and even lighting, giving you a personalized setup that can enhance your workflow.
- Typing comfort: The tactile feedback from mechanical switches can reduce typing fatigue and improve typing speed, especially for those who spend long hours at their keyboards.
- Resale value: High-quality mechanical keyboards, especially limited editions or popular brands, tend to retain their value better than standard keyboards, making them a smart investment.
16. Additional Resources for Keyboard Care
For those looking to dive deeper into mechanical keyboard maintenance and care, several resources can provide valuable insights:
- Online Communities: Websites like Reddit’s r/MechanicalKeyboards or dedicated forums offer a wealth of knowledge, tips, and support from fellow enthusiasts.
- Video Tutorials: YouTube hosts numerous tutorial videos that demonstrate cleaning techniques, switch replacements, and modding options.
- Manufacturers’ Guidelines: Many manufacturers provide specific cleaning and maintenance guidelines for their keyboards. Check the website or product manual for best practices.
- Blogs and Articles: Tech blogs often feature guides and reviews that can help you understand more about the best cleaning methods and products available.
17. Conclusion: The Benefits of a Clean Mechanical Keyboard
Maintaining a clean mechanical keyboard has numerous benefits, from enhancing your typing experience to prolonging the life of the device. Following the steps outlined in this guide will help ensure that your keyboard remains in optimal shape, allowing you to enjoy its performance for years to come.
So, whether you’re gearing up for your next gaming session or working on an important project, take a few moments to clean your mechanical keyboard. Your fingers (and your keyboard) will thank you!
“`
Trending Now
Frequently Asked Questions
How often should I clean my mechanical keyboard?
It's recommended to clean your mechanical keyboard every few months, depending on usage. If you use it frequently for gaming or long typing sessions, consider cleaning it more often to prevent buildup of dust, oils, and debris.
What supplies do I need to clean a mechanical keyboard?
To clean a mechanical keyboard, you'll need a keycap puller, microfiber cloth, compressed air canister, cotton swabs, a cleaning solution (like diluted isopropyl alcohol), and a small container to keep your keycaps organized.
Can I use water to clean my mechanical keyboard?
While you can use water, it's best to use a diluted mixture of isopropyl alcohol and water or a dedicated electronics cleaner. Avoid using excessive water directly on the keyboard to prevent damage to the switches.
How do I clean the keys on a mechanical keyboard?
To clean the keys, use a keycap puller to remove the keycaps, then clean them with a microfiber cloth and a cleaning solution. Use compressed air to blow out dust from the switches and the keyboard base before reattaching the keycaps.
Is it safe to remove keycaps from a mechanical keyboard?
Yes, it is safe to remove keycaps from a mechanical keyboard using a keycap puller. This tool helps prevent damage to the switches while allowing you to clean the keys and the area beneath them effectively.
What did we miss? Let us know in the comments and join the conversation.