How to create repository on GitHub
“`html
Creating a repository on GitHub can seem daunting at first, especially for those who are new to version control or coding in general. However, understanding the fundamentals of this process is crucial for anyone looking to collaborate on projects or share their code. In this comprehensive guide, we’ll walk you through the essential steps to create GitHub repository, along with tips and insights to help you make the most of this powerful platform.
1. Understanding GitHub and Repositories
Before diving into the specifics of how to create a GitHub repository, it’s important to grasp what GitHub is and why repositories matter. GitHub is a web-based platform that uses Git, a version control system that lets multiple people work on the same project without overwriting each other’s work. A repository, often abbreviated as ‘repo’, is essentially a project folder that contains all the files and their version history.
The structure of a repository is essential for organizing your project effectively. Each repository can include various types of files, including code, documentation, images, and more. This makes it a versatile option for developers, data scientists, designers, and anyone else who needs a collaborative space to work on digital projects.
2. Setting Up Your GitHub Account
To start your journey in creating a GitHub repository, the first step is to sign up for a GitHub account. Navigate to github.com and click on the ‘Sign up’ button. You’ll be prompted to provide a username, email, and password. It’s advisable to choose a username that is professional, especially if you plan to showcase your work to potential employers.
After creating your account, you might want to familiarize yourself with the GitHub interface. This includes understanding the dashboard, where you can see your activity, repositories, and notifications. Taking the time to explore the platform will give you a head start in creating and managing your repositories effectively.
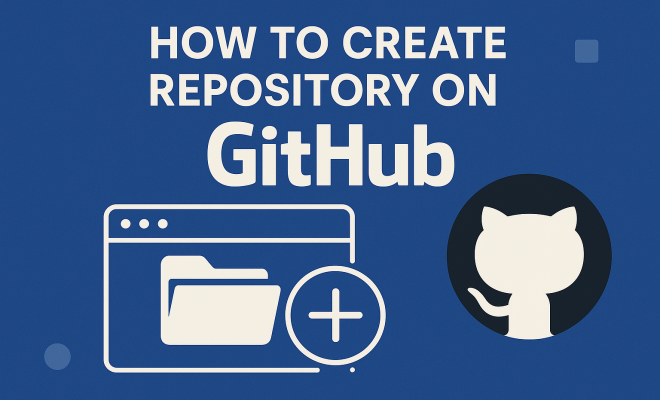
3. Creating Your First Repository
Now it’s time for the main event: creating your first GitHub repository. Once you’re logged into your GitHub account, locate the ‘+’ sign in the upper right corner of the page. Click on it and select ‘New repository’ from the dropdown menu. You will then be taken to a page where you can fill in the details of your new repository.
You’ll need to provide a repository name, which should be descriptive of your project. Optionally, you can add a description to explain the purpose of the repository. This is helpful for other users who might come across your project. Additionally, you’ll choose whether to make the repository public or private. A public repository is open to everyone, while a private one restricts access to selected collaborators.
4. Choosing the Right License
When you create GitHub repository, selecting a license is an important step that many users overlook. A license dictates how others can use, modify, and distribute your code. GitHub offers various licenses, such as the MIT License, Apache License 2.0, and GNU General Public License (GPL).
Each license has its own stipulations, so it’s worth taking the time to read through them. If you’re unsure about which license to choose, consider the MIT License for its simplicity and permissiveness, making it a popular choice among open source developers. Including a license file in your repository not only protects your work but also encourages collaboration.
5. Initializing Your Repository with a Readme File
A Readme file is an essential component of any GitHub repository, serving as the first point of contact for anyone viewing your project. When creating your repository, check the box to initialize it with a README. This file typically contains a brief description of your project, installation instructions, usage guidelines, and any other relevant information.
By providing a well-structured Readme, you enhance the visibility and usability of your repository. This makes it easier for other developers to contribute to your project or use your code in their applications. Don’t forget to update the Readme as your project evolves!
6. Adding a .gitignore File
Another critical step when you create GitHub repository is adding a .gitignore file. This file specifies intentionally untracked files that Git should ignore. For instance, you may not want to include temporary files, logs, or sensitive information such as API keys in your repository.
GitHub provides templates for various programming languages that can help you create a .gitignore file suited for your project. Including this file ensures that your repository remains clean and that irrelevant files do not clutter your project space, making it easier to maintain and collaborate with others. (See: GitHub overview on Wikipedia.)
7. Committing Changes to Your Repository
Once your repository is set up, you’ll likely want to start adding code or other files. This is where the concept of ‘committing’ comes in. A commit is a snapshot of your project at a specific point in time, allowing you to track changes and revert to previous versions if necessary.
To make a commit, you can either use the GitHub interface directly or the command line if you have Git installed locally. If using the command line, navigate to your repository folder and use commands such as `git add .` to stage your changes and `git commit -m ‘your message here’` to create a commit with a message that describes the changes made. These commits create a history of your project that can be incredibly valuable during development.
8. Collaborating with Others
GitHub shines in its ability to facilitate collaboration among developers. After you create a GitHub repository, you can invite collaborators to contribute to your project. Simply navigate to the ‘Settings’ tab of your repository, select ‘Manage access’, and invite users by their GitHub usernames or email addresses.
Once collaborators are added, they can fork your repository, make changes, and submit pull requests for you to review. This process encourages collective input and improves the overall quality of the project. It’s also a chance to learn from others, making GitHub not just a hosting platform but a community for developers.
9. Maintaining Your Repository
After setting up and collaborating on your GitHub repository, maintaining it is key to its long-term success. Regularly updating your codebase, responding to issues and pull requests, and keeping your documentation current are all essential practices. Monitoring your repository activity helps you stay in touch with contributions from others, track bugs, and implement new features.
Remember, a well-maintained repository is not only a reflection of your skills but also increases the likelihood that others will use or contribute to your project. Engaging with your community, whether through GitHub issues or discussions, fosters a collaborative environment that benefits everyone involved.
10. Utilizing Branches for Feature Development
One of the most powerful features of Git and GitHub is the ability to use branches. Branching allows you to create a separate line of development, enabling you to work on new features without affecting the main codebase. This is particularly useful when you want to experiment with new ideas or make significant changes.
To create a new branch, you can use the GitHub interface or Git commands. In the GitHub interface, navigate to your repository, click on the branch dropdown (usually showing “main” or “master”), type a new branch name, and click “Create branch.” This process separates your work into a dedicated space, making it easier to manage changes and collaborate.
When your new feature is complete, you can create a pull request to merge the changes back into the main branch. This is an opportunity for code review, where collaborators can comment, suggest changes, or approve the merge. This review process helps maintain code quality and ensure that any new features align with the project’s goals.
11. Understanding Issues and Project Boards
GitHub includes built-in tools for tracking tasks and managing projects through Issues and Project Boards. Issues are a way to report bugs, request features, or discuss improvements. You can create a new issue by navigating to the ‘Issues’ tab in your repository and clicking on ‘New issue’. Provide a descriptive title and detailed explanation to ensure clarity.
Project Boards, on the other hand, provide a visual way to manage tasks. They use a kanban-style layout, allowing you to move tasks through different stages of development. You can create columns for different phases, such as “To Do,” “In Progress,” and “Done.” This visual representation helps teams stay organized and focused, ensuring that everyone knows what tasks need attention.
Using Issues and Project Boards together enhances collaboration and keeps your team aligned, making it easier to manage larger projects or contributions from multiple collaborators.
12. Integrating Continuous Integration and Deployment (CI/CD)
As your project grows, you might want to implement Continuous Integration and Continuous Deployment (CI/CD) practices to streamline your development process. CI/CD allows you to automate testing and deployment, ensuring that changes are integrated smoothly and reliably into the main codebase.
Many tools integrate with GitHub to facilitate CI/CD, such as GitHub Actions, Travis CI, CircleCI, and Jenkins. These tools can automatically test your code whenever you push changes or create a pull request, providing immediate feedback on whether your changes break the build or pass tests.
Setting up CI/CD can significantly improve your workflow by reducing the manual effort required for testing and deployment. It also enhances code quality, as automated tests catch issues early in the development cycle. To get started with GitHub Actions, you can explore the ‘Actions’ tab in your repository, where you can set up workflows tailored to your project needs.
13. Statistics and Usage Trends
Understanding GitHub’s impact on software development can be enlightening. As of 2023, GitHub has over 85 million developers and hosts more than 200 million repositories. This makes it the largest platform for version control and collaboration in the world. The exponential growth of GitHub reflects the increasing reliance on open-source software and collaborative coding practices. (See: Centers for Disease Control and Prevention.)
Moreover, recent statistics show that repositories with a clear README file receive 56% more views than those without, which underscores the importance of documentation in attracting users and collaborators. Open-source projects that leverage GitHub also tend to see increased contributions, with community involvement rising by up to 50% when good project management practices, like utilizing issues and pull requests, are followed.
14. Common Mistakes to Avoid
As you navigate your GitHub journey, being aware of common pitfalls can save you time and frustration. One major mistake is not regularly committing your changes. Frequent commits help maintain a detailed history of your project’s evolution, making it easier to track what changes were made and why.
Another common error is neglecting to provide adequate documentation. A lack of clear instructions can deter potential contributors and make it difficult for others to understand your project. Always aim for clarity in your README and other documentation files.
Security is another critical aspect; failing to secure sensitive data, such as API keys or passwords, can lead to vulnerabilities. Make sure to utilize a .gitignore file effectively and educate yourself on best practices for keeping your code safe.
15. FAQ: Creating a GitHub Repository
What is a GitHub repository?
A GitHub repository is a central location where your project files and their version history are stored. It allows for collaboration, tracking changes, and managing code effectively.
How do I make my repository public or private?
When creating a new repository, you can choose its visibility settings by selecting either ‘Public’ or ‘Private’. Public repositories are visible to everyone, while private repositories are only accessible to selected collaborators.
Can I change a repository from private to public later?
Yes, you can change the visibility of your repository from private to public at any time through the repository settings. However, be cautious about exposing any sensitive information that might have been included in the repository.
What is the purpose of a README file?
A README file serves to inform users about your project, including its purpose, installation instructions, usage guidelines, and how to contribute. An effective README is crucial for attracting and onboarding contributors.
How can I collaborate with others on GitHub?
You can collaborate on GitHub by inviting others to your repository as collaborators, allowing them to contribute directly. Alternatively, others can fork your repository, make changes, and submit pull requests for you to review.
What should I include in my .gitignore file?
A .gitignore file should list specific files or directories that you want Git to ignore, such as temporary files, logs, personal notes, or sensitive data. This keeps your repository clean and focused on the essential project files.
How can I keep my repository organized?
To maintain an organized repository, utilize branching for different features, separate issues for tasks, keep documentation updated, and follow a consistent naming convention for files and folders. Regular maintenance and clear communication with collaborators are also key.
Can I undo a commit in Git?
Yes, you can undo a commit using the `git revert` command, which creates a new commit that undoes the changes made in a previous commit. Alternatively, if you’re working locally and haven’t pushed your changes, you can use `git reset` to discard the last commit. (See: New York Times technology section.)
What tools can I use for CI/CD with GitHub?
Popular tools for implementing CI/CD with GitHub include GitHub Actions, Travis CI, CircleCI, and Jenkins. These tools help automate the testing and deployment process, improving efficiency and code quality.
16. Exploring Advanced Features of GitHub
Once you’re comfortable with the basics of creating a GitHub repository, you may want to explore some of the more advanced features that GitHub has to offer. These features can significantly enhance your development workflow and collaboration efficiency.
Using GitHub Actions
GitHub Actions is a powerful feature that allows you to automate workflows within your GitHub repositories. With Actions, you can create custom workflows that run on specific events, such as pushes, pull requests, or issues being opened. For instance, you can set up actions to run tests automatically whenever code is pushed to the repository, ensuring that your main branch remains stable.
To get started with GitHub Actions, you can either create a new workflow file in the `.github/workflows` directory of your repository or use pre-built actions from the GitHub Marketplace. The flexibility of GitHub Actions makes it a versatile tool for various CI/CD tasks, and it can be tailored to fit the unique needs of your project.
Exploring GitHub Packages
GitHub Packages is another advanced feature that integrates package management directly into GitHub. This feature allows you to host and manage packages alongside your source code. For projects that rely on dependencies, GitHub Packages provides a seamless way to publish and consume packages, making it easier to manage versions.
For instance, if you’re working on a library, you can publish it as a package in GitHub Packages, allowing others to easily install it using package managers like npm, Maven, or RubyGems. This integration simplifies the process of managing dependencies and versioning, which is crucial for maintaining project stability and usability.
17. Community Engagement and Contribution
Engaging with the GitHub community can open up new opportunities and enhance your project’s visibility. Participating in other projects, contributing to open-source repositories, and following industry leaders can help you grow your network and improve your skills.
Consider contributing to popular open-source projects that align with your interests. This not only helps you gain experience but also allows you to showcase your work to potential employers. Many developers have transitioned into full-time roles after making significant contributions to notable projects on GitHub.
18. Best Practices for Creating a GitHub Repository
To ensure your GitHub repository is effective and inviting for collaborators, follow these best practices:
- Clear Naming Conventions: Choose descriptive names for your repository, branches, and files. This makes it easier for others to understand your project’s purpose.
- Regular Updates: Commit changes frequently and keep your repository updated. This reflects active maintenance and encourages others to contribute.
- Engage with Contributors: Respond to issues, pull requests, and feedback promptly. A collaborative environment fosters better contributions and community spirit.
- Document Everything: Use comments in your code and maintain up-to-date documentation. Clear instructions and code comments enhance understanding and usability.
19. Conclusion: The Power of GitHub
In summary, knowing how to create GitHub repository and utilize its features can dramatically impact your coding journey. GitHub is not just a version control system; it’s a vibrant community and a powerful tool that fosters collaboration, innovation, and learning. Whether you’re working alone or with a team, leveraging GitHub effectively can help you achieve your project goals and enhance your software development skills.
“`
Trending Now
Frequently Asked Questions
How do I create a repository on GitHub?
To create a repository on GitHub, first sign up for an account at github.com. Once logged in, click on the 'New' button in the repositories section. Fill in the repository name, description, and choose its visibility (public or private). Finally, click 'Create repository' to complete the process.
What is a GitHub repository?
A GitHub repository, often called a 'repo', is a project folder that contains all your project files and their version history. It allows multiple collaborators to work on the same project without overwriting each other's contributions, making it essential for effective version control.
Do I need a GitHub account to create a repository?
Yes, you need a GitHub account to create a repository. You can sign up for free at github.com, where you will provide a username, email, and password to get started with hosting your projects.
What types of files can I store in a GitHub repository?
In a GitHub repository, you can store various types of files including source code, documentation, images, and configuration files. This versatility makes GitHub suitable for developers, designers, and data scientists working on collaborative projects.
How do I manage my GitHub repositories?
To manage your GitHub repositories, familiarize yourself with the GitHub interface, especially the dashboard. From there, you can view your activity, edit repository settings, manage collaborators, and access your project's files and version history.
What’s your take on this? Share your thoughts in the comments below — we read every one.