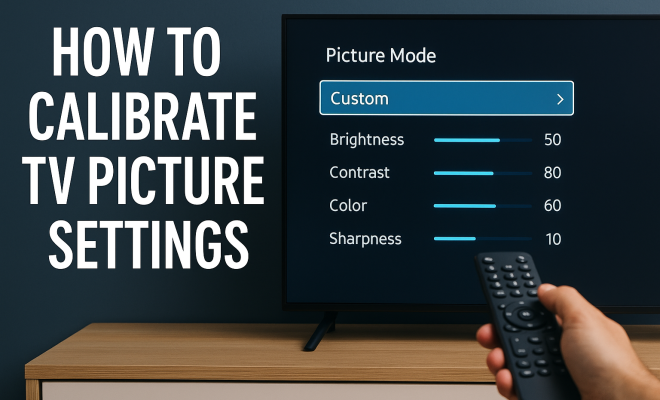
How to calibrate TV picture settings
“`html
For many of us, the TV is the centerpiece of our living rooms, serving as a portal to our favorite shows, movies, and games. However, how often do you consider the quality of what you’re watching? If you want to truly elevate your viewing experience, learning to calibrate TV picture settings is essential. This guide will explore the background, techniques, and practical insights necessary to optimize your television’s display quality.
1. Understanding TV Calibration
Calibration is the process of adjusting the settings on your TV to achieve the most accurate picture quality. This involves fine-tuning various parameters such as brightness, contrast, color temperature, and sharpness. When your TV is calibrated correctly, it reproduces images as they were intended to be seen by the creators — whether that’s in a film studio or a gaming console.
Many televisions come with preset picture modes (like Standard, Movie, and Vivid), but these often don’t provide the best representation of the content you’re watching. In fact, overly vibrant settings can lead to unnatural colors and loss of detail. Proper calibration not only enhances your overall enjoyment but also prevents eye strain and fatigue caused by improper settings.
2. Why Calibration Matters
The importance of calibrating your TV picture settings cannot be overstated. First and foremost, it leads to a more immersive viewing experience. Whether you’re watching a blockbuster film or a thrilling sports game, accurate colors and sharp images can make all the difference. Surveys have shown that viewers often underestimate how much calibration can improve their experience, with many preferring to watch content without adjustments.
Moreover, a well-calibrated TV can enhance energy efficiency. While it might seem counterintuitive, optimized settings can reduce power consumption, as the TV doesn’t have to work as hard to produce bright and vivid images. This can lead to a longer lifespan for your television and less strain on your electricity bill.
3. Tools You’ll Need for Calibration
You don’t need to be a tech expert to calibrate TV picture settings, but having the right tools helps. Here’s a list of the basics:
- Calibration Disc: Discs like the Disney WOW or Spears & Munsil provide test patterns for various settings.
- Colorimeter: This is a device that measures the color output of your TV. Brands like X-Rite and Datacolor offer affordable options.
- Smartphone Apps: There are numerous apps available that can assist in adjusting brightness, contrast, and color settings.
- Notebook and Pen: Keep track of your adjustments and settings for future reference.
With these tools, you’re well on your way to achieving a professional-level calibration.
4. Adjusting Brightness and Contrast
Your first step in calibrating your TV is to adjust the brightness and contrast settings. Start with brightness: this controls the level of black in the picture. Set the brightness too high, and you’ll lose detail in dark scenes; too low, and you’ll make the image look washed out. To find the right balance, use a calibration disc that includes a black-level test. Adjust the brightness until you can just barely see the details in the darkest areas of the image.
Next, focus on contrast. Contrast affects the difference between the lightest and darkest parts of the picture. A good contrast setting enhances details in bright scenes without blowing out highlights. Again, use a calibration disc to find the optimal level. Adjust until you can clearly see the details without losing the brightness of the whites.
5. Tuning Color Settings
After adjusting brightness and contrast, it’s time to tackle color settings. The goal is to achieve natural-looking colors that are true to the source material. Start with the color saturation setting. This controls the intensity of colors. A common mistake is to set this too high, resulting in oversaturated images. Use a calibration disc with color test patterns; adjust until the colors appear vibrant but not unrealistic. (See: Television calibration on Wikipedia.)
Next, examine color hue settings. This controls the overall tint of the picture, affecting how colors are represented. Adjust the hue until skin tones and other colors look natural. Keep in mind that different types of content may require slight adjustments, so don’t hesitate to revisit these settings based on what you’re watching.
6. Sharpness and Noise Reduction
Once color settings are in place, turn your attention to sharpness. This controls the definition of the image. While it may be tempting to crank up sharpness to make everything look crisp, too much can lead to unnatural edges and a “halo” effect around objects. Use a calibration disc to set sharpness at a level where details are defined but without artificial enhancement.
Noise reduction settings can also enhance image quality by smoothing out grainy areas in video, particularly in lower-quality sources. However, excessive noise reduction can also eliminate fine detail. Find a balance that works for your viewing preferences, and remember that the goal is a natural look.
7. Using Calibration Software
If you’re serious about achieving the best possible results, consider using calibration software along with your colorimeter. Software like CalMAN or DisplayCAL can provide precise adjustments based on your specific TV model. These programs analyze your TV’s color response and make accurate calibrations to achieve a more true-to-life image.
Using calibration software does come with a learning curve, but the investment can be worth it for devoted cinephiles and gamers. Many of these programs allow for detailed adjustments not typically available through standard TV settings, including gamma and color gamut adjustments. If you choose to go this route, be prepared to spend some time learning how to use the software effectively.
8. Maintaining Your Calibration
Once you’ve gone through the process of calibrating your TV, it’s important to maintain those settings. It’s advisable to recalibrate your TV every couple of years or whenever you notice a significant change in picture quality. Factors such as firmware updates, new devices connected to your TV, or even changes in your room’s lighting can affect your settings.
Additionally, remember that different viewing environments may require adjustments. If you often watch TV in a brightly lit room versus a darkened one, consider having different profiles saved for different settings. Many modern TVs allow you to save multiple profiles, making it easier to switch between them based on your environment.
9. Exploring Professional Calibration Options
For those who find the calibration process overwhelming, professional calibration services are available. Certified technicians will come to your home and calibrate your TV using specialized equipment and expertise. This service can range in price but often results in a noticeable improvement in picture quality.
Hiring a professional can also save you time and provide peace of mind that the calibration is done correctly. If you’re considering this route, check for reviews and recommendations to ensure you hire a reputable technician who understands your specific TV model and its unique calibration needs.
10. Common Calibration Myths
When diving into the world of TV calibration, you’ll encounter several myths that can lead to confusion. One prevalent myth is that calibration is only necessary for high-end TVs. In reality, every television, regardless of price, can benefit from calibration. The difference may be more pronounced in premium models, but even budget TVs can show improvement.
Another common misconception is that the factory settings are optimal. In truth, manufacturers often set TVs to look good in a showroom setting, which can mean overly bright and saturated images. Calibration helps bring the settings closer to what filmmakers intended. (See: CDC on eye strain and visual health.)
Lastly, some believe that calibration is a one-time task. As technology evolves, and as we add new devices, adjustments may be necessary to maintain optimal picture quality.
11. Comparing Calibration Methods
There are various methods to calibrate your TV, each with its own pros and cons. Let’s take a closer look at popular approaches:
- Manual Calibration: This is the most common method, where you adjust settings like brightness and contrast based on visual cues and calibration discs. It’s accessible but may not provide the most accurate results.
- Software Calibration: Using software and a colorimeter, this method delivers more precise results by analyzing your TV’s output in depth. It’s ideal for enthusiasts but can be time-consuming and requires more technical knowledge.
- Professional Calibration: Hiring an expert to calibrate your TV can yield the best results, as they have specialized equipment and training. However, this comes at a cost and may not be feasible for everyone.
Choosing the right method depends on your budget, technical skill, and how critical you are about picture quality.
12. How Often Should You Calibrate?
Calibration isn’t a one-and-done task; in fact, it’s recommended that you recalibrate your TV every 1-2 years. However, there are signs that indicate it might be time for a recalibration sooner than that. If you notice colors looking off, brightness appearing uneven, or if you’ve made significant upgrades to your TV setup, it’s a good idea to revisit your settings.
Additionally, environmental factors can also play a role. If you’ve recently moved your TV, or if you’ve changed the lighting in your room, recalibration may help restore optimal performance.
13. Frequently Asked Questions (FAQ)
What is the best time to calibrate my TV?
The best time to calibrate your TV is when the room is at its normal lighting conditions. This means calibrating during the time of day you usually watch TV, whether it’s in the morning with natural light or at night with artificial lighting.
Can I calibrate my TV without special equipment?
While using calibration tools like discs and colorimeters provides better accuracy, you can make noticeable improvements manually by adjusting basic settings. Just make sure to use reference images or patterns available online to guide your adjustments.
Does calibration void the warranty on my TV?
Generally, calibrating your TV does not void the warranty. However, it’s wise to check with the manufacturer’s policy, especially if you are considering modifications beyond standard settings.
How can I tell if my TV needs calibration?
If you notice that colors look unnatural, dark scenes lack detail, or bright scenes are overly harsh, these are signs that your TV may need recalibration. Additionally, if you’ve changed your viewing environment significantly, that might also prompt a recalibration.
What are the benefits of professional calibration?
Professional calibration can provide the most accurate results, ensuring that your TV displays images as intended by creators. Professionals have access to high-end equipment and are educated on the intricacies of different TV models, which can lead to a more refined viewing experience. (See: Harvard University research on visual perception.)
14. Tips for Different Types of Content
When calibrating your TV, it’s important to consider the type of content you watch the most. Different genres can benefit from unique settings. For example:
- Movies: For cinematic experiences, aim for a warmer color temperature. This emulates the look of a movie theater and enhances skin tones and colors. Lower brightness slightly to enrich black levels and contrast for dramatic scenes.
- Sports: Sports often benefit from higher brightness and contrast settings to ensure fast-moving objects are clear and vibrant. You might also want to increase sharpness slightly, but be careful to avoid the halo effect.
- Games: Gaming can require rapid response times, so consider a picture mode with lower input lag. Brightness and contrast settings should also be increased for visibility during fast-paced action.
15. Impact of New Technologies on Calibration
As television technology evolves, the calibration process can change significantly. For instance, OLED TVs present different challenges compared to LED TVs. OLEDs offer perfect black levels but can suffer from burn-in, necessitating more frequent adjustments depending on usage patterns.
Similarly, 4K and HDR content has become more prevalent, requiring different calibration techniques. HDR allows for a wider color gamut and increased brightness levels, which means that the traditional calibration methods may need to be adjusted to better accommodate this new technology.
In the future, advancements in AI-driven calibration technologies may further simplify the process, allowing for real-time adjustments based on content type and viewing conditions.
16. DIY Calibration Resources
If you’re keen on a DIY approach, several resources can assist you. Websites, forums, and YouTube channels dedicated to home theater enthusiasts can be immensely helpful. Many professionals in the field share their tips and tricks through video tutorials, enabling you to visualize the calibration process.
Books and guides on home theater setups also provide in-depth insights on calibration and can be a worthwhile investment. Look for resources that focus on your specific TV model for tailored advice.
17. Conclusion
In summary, knowing how to calibrate TV picture settings can dramatically enhance your viewing experience. Whether you choose to tackle it yourself or hire a professional, the effort spent on calibration can lead to better color accuracy, improved clarity, and a richer entertainment experience overall. So, why not take the plunge and optimize your television’s performance today? Your favorite shows and movies will thank you!
“`
Trending Now
Frequently Asked Questions
How do I calibrate my TV picture settings?
To calibrate your TV picture settings, start by accessing the picture menu on your TV. Adjust parameters like brightness, contrast, color temperature, and sharpness based on your viewing environment. Consider using calibration tools or guides for more precise adjustments to achieve the best image quality.
Why is it important to calibrate a TV?
Calibrating your TV is important because it enhances picture quality by ensuring accurate colors and sharp images. This leads to a more immersive viewing experience and can also reduce eye strain. Additionally, proper calibration can improve energy efficiency, helping your TV last longer.
What are the best settings for TV calibration?
The best settings for TV calibration can vary by model, but generally, you should adjust brightness to avoid washed-out images, set contrast for deeper blacks, and fine-tune color temperature to achieve natural skin tones. Using preset modes like 'Movie' can also be a good starting point.
Can I calibrate my TV without professional help?
Yes, you can calibrate your TV without professional help by using built-in settings and online calibration tools. Many TVs offer guided calibration processes, and you can find resources and videos online to help you make the necessary adjustments for optimal picture quality.
What tools do I need to calibrate my TV?
To calibrate your TV, you may need basic tools like a calibration disc or smartphone apps designed for this purpose. Advanced users might use a colorimeter for more precise measurements. However, many TVs also offer user-friendly settings that allow for manual adjustments without specialized tools.
Agree or disagree? Drop a comment and tell us what you think.