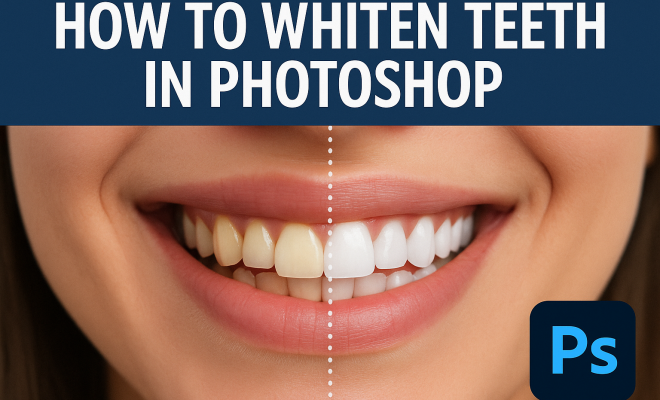
How to whiten teeth in Photoshop
“`html
In the age of social media and digital photography, the quest for the perfect smile has never been more pervasive. Whether you’re polishing your profile picture for Instagram or touching up a family photo, knowing how to whiten teeth in Photoshop can elevate your images dramatically. This guide will walk you through a step-by-step process to achieve stunning results, explore the tools available in Photoshop, and provide insights into the ethical considerations of photo editing.
1. The Importance of a Bright Smile
Teeth whitening is not just a cosmetic enhancement; it’s often linked to perceptions of health, beauty, and confidence. Research indicates that people with whiter teeth are often perceived as more attractive and successful. In an era where first impressions are increasingly crafted through digital media, whitening teeth in Photoshop can be an essential skill.
Beyond aesthetics, a bright smile can improve your self-esteem. Many individuals feel more comfortable and confident when they see a radiant smile in their photos. This desire has led to a growing interest in photo editing tools, making it vital to understand how to use them effectively.
2. The Basics of Photoshop: Getting Started
If you’re new to Photoshop, don’t worry! It’s a powerful tool, and with a bit of practice, you can master the basics needed for whitening teeth. Start by familiarizing yourself with the workspace: the toolbar, layers panel, and the adjustment options.
Ensure you have the latest version of Photoshop for the best features. Once you’re ready, open the image you want to edit. It’s best to work with a high-resolution photo to achieve optimal results. After all, nothing says “I know my way around Photoshop” like a well-edited image!
3. Preparing Your Image for Editing
Before diving into the whitening process, make sure to prepare your image. Start by creating a duplicate of the original layer. This allows you to preserve the untouched version of your photo. You can do this by right-clicking the layer and selecting “Duplicate Layer.” This step is crucial for non-destructive editing, enabling you to revert to the original image whenever necessary.
Next, zoom in on the teeth for a closer view. This will help you make more precise edits and ensure that the effects are applied accurately. It’s also a good idea to adjust the brightness and contrast of the overall image at this point to see how the teeth will look against the rest of the photo.
4. Whitening Teeth in Photoshop: The Techniques
Now, let’s get to the heart of the matter: how to whiten teeth in Photoshop. One of the most effective methods involves using the Lasso Tool coupled with the Hue/Saturation adjustment layer.
First, select the Lasso Tool from the toolbar. Carefully outline the area of the teeth you want to whiten. Take your time here for precision, as a clean selection will yield the best results. After making your selection, navigate to “Image” in the menu bar, then “Adjustments,” and select “Hue/Saturation.” In the dialog box, reduce the yellow tones by moving the yellow slider to the left. You can also adjust the lightness slider to give the teeth a more radiant look. Click OK and deselect your selection.
5. Using the Brush Tool for Detail Work
Sometimes, the selection made with the Lasso Tool isn’t enough, especially for intricate areas. This is where the Brush Tool comes into play. Select the Brush Tool, adjust its size, and make sure the hardness is set to a low value for smoother transitions.
With the Brush Tool selected, apply a soft white color on the selected areas of the teeth. Be careful not to overdo it; subtlety is key. You want the teeth to look natural rather than overly processed. If you feel you’ve applied too much, simply use the Eraser Tool to refine the edges. (See: Teeth whitening and its effects.)
6. Fine-Tuning the Edit: Blending and Smoothing
To ensure your edits blend seamlessly, you may need to adjust the opacity of the layer where you’ve made the whitening adjustments. Lowering the opacity allows the original image to shine through slightly, giving a more realistic effect.
Additionally, consider using the Smudge Tool to soften any harsh lines left from the Lasso Tool selection. This will help to give the teeth a more natural appearance. Run the Smudge Tool along the edges of the teeth lightly to create a smoother transition between the teeth and the mouth area.
7. Ethical Considerations in Photo Editing
While the ability to whiten teeth in Photoshop can enhance a photo, it’s essential to consider the ethical implications of photo editing. Over-whitening can lead to unrealistic beauty standards and set a precedent for what is considered attractive.
In a world saturated with edited images, it’s important to maintain a balance. Aim for enhancements that boost confidence without creating unattainable ideals. Being transparent about your editing practices is also vital, especially in professional contexts like advertising and fashion photography.
8. Advanced Techniques for Professionals
For those looking to take their photo editing skills to the next level, consider exploring advanced techniques like frequency separation. This method allows you to edit textures and colors separately, giving you greater control over the final appearance.
Another option is to utilize plugins or actions designed specifically for teeth whitening. These tools can automate parts of the process, allowing for quicker edits without sacrificing quality. Familiarize yourself with various plugins available in the Photoshop marketplace to find one that suits your needs.
9. Practical Tips for Effective Teeth Whitening
Here are a few practical tips to keep in mind when you want to whiten teeth in Photoshop:
- Always work on a duplicate layer to maintain your original image.
- Use natural colors; avoid creating an unnatural look by over-whitening.
- Experiment with layer styles such as Soft Light or Overlay to create a more subtle effect.
- Save your work frequently and make use of Photoshop’s Undo feature if you make a mistake.
- Consider seeking feedback from others to gauge how realistic your edits appear.
10. Common Mistakes to Avoid
When learning how to whiten teeth in Photoshop, there are common pitfalls to watch out for. Over-whitening is perhaps the most noticeable issue. If teeth appear unnaturally bright or glow, it can detract from the overall quality of the photo. Always aim for a balance between brightness and realism.
Another mistake is neglecting to adjust the surrounding areas. When you whiten teeth, the gums and lips should also be taken into account. If the teeth are significantly brighter while the rest of the mouth remains unchanged, the disparity can lead to an artificial look. Always remember to check the entire mouth area and make adjustments as needed.
11. Different Techniques to Whiten Teeth in Photoshop
In addition to the techniques mentioned earlier, there are several other ways to effectively whiten teeth in Photoshop. One approach is using the Select Color option. This method allows you to isolate specific colors in your image, making it a powerful tool for targeted adjustments.
To use this technique, go to “Select” in the menu bar, choose “Color Range,” and use the eyedropper tool to click on the yellow tones in the teeth. Adjust the fuzziness slider to refine your selection, then use the Hue/Saturation adjustment layer to modify the selected colors.
12. Before and After Examples
Seeing the results of teeth whitening through Photoshop can be incredibly motivating. Consider creating a portfolio that showcases your editing skills. Start with a variety of images: portraits, candid shots, and even group photos. Showcasing before and after images not only highlights your editing expertise but also serves as a compelling visual story.
For example, you might have a portrait where the subject has slightly discolored teeth. After applying your whitening techniques, you can display an image where the teeth look brighter and healthier, creating a striking comparison that demonstrates the power of your skills. (See: Impact of cosmetic dentistry on self-esteem.)
13. Statistics on Teeth Whitening Trends
According to a recent survey conducted by the American Academy of Cosmetic Dentistry, a staggering 74% of adults feel that an unattractive smile can hurt their chances for career success. With the rise of social media, this statistic is particularly relevant. Many individuals are turning to digital editing as a solution, driving interest in tutorials and guides on how to whiten teeth in Photoshop.
Furthermore, a study published in the Journal of Applied Social Psychology revealed that people perceived as smiling with whiter teeth are often rated higher in attractiveness and trustworthiness. This establishes a clear correlation between teeth color and social perception, supporting the idea that whitening teeth digitally can have significant benefits.
14. Frequently Asked Questions (FAQ)
Q1: Can I use mobile apps to whiten teeth instead of Photoshop?
Absolutely! There are many mobile apps that offer teeth whitening features. However, while they provide convenience, Photoshop offers more precision and control over your edits. Apps may not always yield the same level of quality, especially for detailed edits.
Q2: Is it possible to over-whiten teeth in Photoshop?
Yes, over-whitening is a common mistake. Teeth can appear unnatural if they are too bright. It’s crucial to strive for a natural look and consider the overall balance of your photo.
Q3: What if the teeth still look yellow after editing?
If you find that the teeth still appear yellow after editing, revisit your selections and adjustments. Sometimes, it may require multiple layers of adjustments to achieve the desired effect. You can also try adjusting the surrounding areas or applying a subtle blur to create a softer transition.
Q4: Are there specific colors I should avoid when whitening teeth in Photoshop?
Generally, you want to avoid overly bright or unnatural hues. Stick to soft, natural shades of white. Consider the overall color tone of the photo and ensure your whitening adjustments complement it.
Q5: Can I whiten teeth in Photoshop Elements, or do I need the full version?
You can whiten teeth in Photoshop Elements, though the tools and features may be somewhat limited compared to the full version. Techniques involving layers and adjustments are available, so you can still achieve a great result.
15. Examples of Famous Edited Smiles
Many celebrities utilize photo editing to achieve that perfect smile, often using Photoshop to enhance their images before they appear in magazines or on social media. For example, the Kardashians are known for their impeccable smiles that often look too perfect. This has resulted in conversations about the authenticity of celebrity images and has set a precedent for others to follow suit. It raises the question: Is achieving such levels of perfection worth the risk of losing authenticity?
Even brands recognize the impact of a bright smile on consumer behavior. Marketing campaigns often feature models with digitally perfected smiles, which can increase engagement and sales. This has led to a cultural norm where bright, white teeth are expected in visual media, encouraging even more individuals to seek out teeth whitening techniques, whether in Photoshop or through dental procedures. There’s a fuller look at digital photography tips.
16. The Psychological Effects of Digital Editing
Digital editing, including techniques like teeth whitening, can have profound psychological effects on both the editor and the observer. While enhancing a photo can boost an individual’s confidence by allowing them to present their best self, it can also lead to anxiety about appearance. Studies indicate that relentless exposure to edited images can create unrealistic comparisons, leading to feelings of inadequacy.
On the other hand, for those who edit their own images, there may be an empowering sensation that comes from controlling how they present themselves to the world. For many, knowing how to whiten teeth in Photoshop is not just a skill; it’s a means of self-expression. This dichotomy is important for editors and viewers alike to navigate as they engage with digital media.
17. Tips for Using Photoshop on Different Skin Tones
When working with diverse subjects, it’s essential to adjust your teeth whitening techniques based on skin tone and overall image color temperature. Cooler skin tones may require you to use less yellow reduction, as they can already appear somewhat cool or bluish. Conversely, warmer skin tones might benefit more from significant yellow reduction in teeth whitening.
Always consider the overall harmony of colors in your image. Adjusting the teeth to a bright white while the skin tone remains warm can create an imbalance. It’s beneficial to tweak the white balance or apply a slight warming filter to the teeth to ensure they don’t clash with the subject’s natural tones.
18. Teeth Whitening in the Context of Social Media
The rise of social media has dramatically changed the landscape of image editing. Users tend to portray an idealized version of their lives and appearances, often leading to heavily edited photos. Platforms like Instagram and Snapchat have popularized filters that can instantly whiten teeth, making it accessible for anyone to enhance their smile with just a tap.
This shift has implications for self-esteem and body image, especially among younger users. It’s crucial for individuals to recognize the difference between reality and digital enhancement. Encouraging conversations around the importance of authenticity in personal branding can foster a healthier relationship with one’s image, while still recognizing the technical skills required to whiten teeth in Photoshop.
19. Future Trends in Photo Editing
As technology evolves, the future of photo editing will likely see even more advanced tools that make teeth whitening and other adjustments easier and more intuitive. Artificial intelligence is already making waves in the industry, with tools that can automate complex edits and improve user accessibility.
It’s possible that we will see more real-time editing features that allow users to see adjustments as they make them, perhaps even in live video feeds. This could change how we approach digital imagery, shifting from static edits to dynamic adjustments that enhance authenticity while still offering control over one’s visual presentation.
Knowing how to whiten teeth in Photoshop is a game changer in the realm of digital photography. It opens up a world of possibilities for enhancing your images while still allowing for authenticity. Embrace your newfound skills with care, and let your creativity shine through.
“`
Trending Now
Frequently Asked Questions
How can I whiten teeth in Photoshop?
To whiten teeth in Photoshop, start by opening your image and creating a duplicate layer. Use the Lasso Tool to select the teeth, then apply the Hue/Saturation adjustment layer. Decrease the yellow saturation and increase the lightness to achieve a brighter smile. Finally, refine the selection and adjust the opacity for a natural look.
What tools do I need to whiten teeth in Photoshop?
Key tools for whitening teeth in Photoshop include the Lasso Tool for selection, the Hue/Saturation adjustment layer for color correction, and the Brush Tool for fine-tuning. Familiarizing yourself with these tools will help you achieve a polished and realistic result.
Is it ethical to whiten teeth in photos?
While enhancing teeth whiteness in photos can boost confidence and aesthetics, it's essential to consider the ethical implications. Misrepresenting your appearance can lead to unrealistic beauty standards. Use photo editing responsibly to maintain authenticity in your images.
What is the best way to prepare an image for editing in Photoshop?
Preparing your image for editing in Photoshop involves creating a duplicate of the original layer. This allows you to preserve the untouched version while making adjustments. Additionally, ensure you work with high-resolution images for optimal results.
Can beginners learn to whiten teeth in Photoshop?
Yes, beginners can learn to whiten teeth in Photoshop by following step-by-step guides. Start with basic tools and familiarize yourself with the workspace. With practice, you can master the techniques needed for effective teeth whitening and enhance your photo editing skills.
Have you experienced this yourself? We'd love to hear your story in the comments.