How to Scan Old Slides With a Flatbed Scanner
Many of us have old slides tucked away in boxes, forgotten over time. It’s time to bring those memories back to life and share them with family and friends. In this article, we will take you through step-by-step instructions on how to scan old slides using a flatbed scanner.
Step 1: Gather supplies
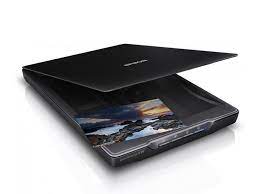
To start, gather the necessary supplies – a flatbed scanner that has a transparency adapter, a clean microfiber cloth, and the slides you want to scan.
Step 2: Clean the scanner bed
Next, make sure the scanner bed is clean and free of dust particles. Use a clean microfiber cloth to wipe down the scanner bed, ensuring it is free of fingerprints and smudges.
Step 3: Prepare the slides
Remove any dust or fingerprints from the slides. You can use a microfiber cloth to clean them gently. Arrange the slides in sequence, if necessary, to make organizing the images easier.
Step 4: Set the scanner
Open the scanner software on your computer and select the option for scanning slides. Adjust the resolution, color mode, and contrast settings based on the quality and color of the slides. Choose a higher resolution if you want to enlarge the images significantly.
Step 5: Scan the slides
Once you have set the scanner, place the slides in the transparency adapter, and lower the lid. Then, click on the scan button on your computer to start the scanning process. Make sure to monitor the process and adjust the settings as necessary.
Step 6: Save the images
After the scanning process is complete, save the images in a format that is best suited for your needs, such as JPEG or TIFF. You can also edit the images to enhance them, straighten the orientation or remove any defects.
Step 7: Store the slides
Finally, store the slides in a safe box or a slide storage system. Remember to label them accordingly, making it easy to locate them when required.

