How to Put an AirTag in Lost Mode
If you own an AirTag, you can use its Lost Mode feature to help you track it down in case it gets lost. Lost Mode allows you to place your AirTag in a state where it can emit a sound or display a message on an iOS device that comes within range of the AirTag. Here’s how to put your AirTag in Lost Mode:
Step 1: Open the Find My app
The Find My app is the main tool for managing your AirTag, so make sure to have it installed on your iPhone or iPad. Once it’s installed, open the app and select the “Items” tab.
Step 2: Select your AirTag
Find the AirTag you want to put in Lost Mode and tap on its icon.
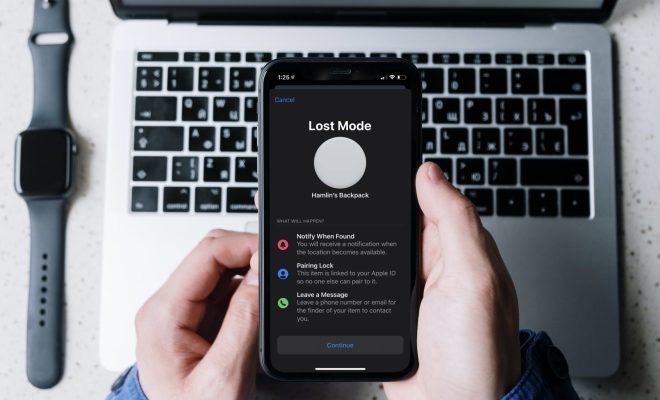
Step 3: Activate Lost Mode
In the AirTag’s device card, scroll down and tap on “Lost Mode.” You will be asked to enter a phone number where you can be reached, as well as a message that will be displayed on the iOS device that detects the AirTag. This message can include specific instructions for anyone who finds your lost AirTag, such as a reward for its return or a request to contact you.
Step 4: Wait for a notification
Once your AirTag is in Lost Mode, you’ll receive a notification if it’s detected by another iOS device near you. You can track its location and use the Find My app to navigate to it.
Step 5: Turn off Lost Mode
If you find your AirTag or it’s returned to you, you can turn off Lost Mode by opening the Find My app, finding the AirTag, and tapping on the “Lost Mode” option. Select “Turn off Lost Mode” and your AirTag will resume normal operation.
In conclusion, the Lost Mode feature is an essential tool for AirTag owners, especially in case of losing one. By following these simple steps, you can quickly activate the Lost Mode feature and increase your chances of recovering your lost item. Just make sure to keep your phone number and message up-to-date, so anyone who finds your AirTag knows how to contact you.