How to plant seeds
“`html
Gardening can be one of the most rewarding hobbies, transforming your outdoor space into a haven of beauty, sustainability, and even food production. But before you can reap the rewards of your green thumb, you need to master the art of planting seeds. Various seed planting techniques can significantly impact the success of your garden, influencing everything from germination time to plant health. In this article, we’ll explore seven essential seed planting techniques that every gardener should know.
1. Choose the Right Seeds: Start with the Basics
The foundation of any successful garden lies in selecting the right seeds. Depending on your climate, soil type, and garden goals, different seeds will perform better than others. For instance, if you’re in a cooler region, consider planting cold-tolerant varieties like kale and peas. Conversely, if you’re in a warmer climate, tomatoes and peppers may thrive.
Research is crucial here. Check local gardening extension services or community gardening groups to find recommendations for varieties that are well-suited to your area. Additionally, consider whether you want heirloom seeds, which can be saved and replanted, or hybrids that may offer better yields but often cannot be saved for future planting.
It’s also wise to consider disease resistance when selecting seeds. Many seed packets will indicate if a variety is resistant to common ailments. For instance, some tomato varieties are bred specifically to resist blight, which can be a significant concern in humid climates. This factor can save you time and effort in maintaining plant health as the season progresses.
2. Prepare Your Soil: The Bedrock of Planting Success
Once you’ve selected your seeds, the next step is soil preparation. Healthy soil is rich in nutrients and has good drainage. Start by testing your soil’s pH and nutrient levels using a home test kit. Most vegetables prefer a pH between 6.0 and 7.0. If your soil is too acidic or alkaline, you can amend it with lime or sulfur as necessary.
Additionally, improve your soil by incorporating organic matter such as compost or well-rotted manure. This not only supplies nutrients but also enhances soil structure. For seed planting, till the soil to a fine texture, breaking up any large clumps. Remember, healthy soil leads to healthy plants, making this preparation step vital for your gardening success.
Consider adding specific amendments based on your soil test results. For example, if your soil is low in nitrogen, incorporating blood meal can help. Alternatively, if your soil lacks phosphorous, bone meal could be beneficial. Understanding the specific needs of your soil can dramatically improve your seed planting outcomes.
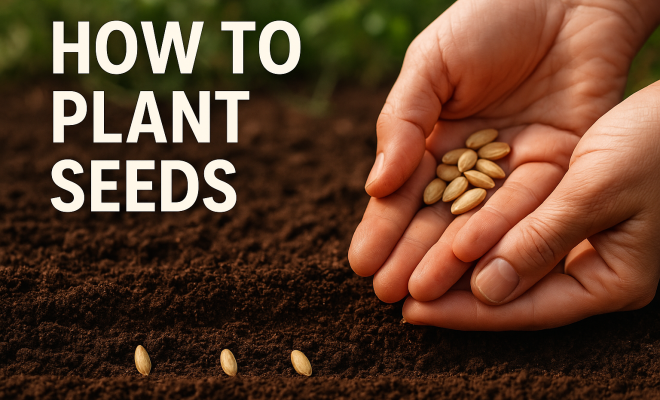
3. Know Your Planting Depth: The Importance of Depth
Different seeds require different planting depths to germinate effectively. A general rule of thumb is to plant seeds at a depth that is about two to three times their diameter. For instance, tiny seeds like lettuce should be sown on the surface or lightly covered, whereas larger seeds like beans need to be buried deeper to prevent birds and other pests from eating them.
In addition, different types of plants may require specific spacing between seeds to ensure they have enough room to grow. Proper spacing can prevent overcrowding, which can lead to competition for nutrients and sunlight. Always refer to the seed packet or reputable gardening resources for specific instructions on planting depth and spacing.
Some gardeners utilize a technique known as “seed tape” to assist with proper spacing and depth. Seed tape consists of seeds pre-spaced on biodegradable paper, making planting easier and more accurate. This can be particularly helpful for beginner gardeners or those planting in smaller spaces where precision is key.
4. Timing Your Planting: The Right Time in the Season
The timing of your seed planting can affect germination rates and overall plant health. Most seeds should be planted after the last frost date in your area, which varies by region. This is particularly important for warm-season crops like tomatoes and peppers. On the other hand, cool-season crops can be planted earlier, as they can withstand a light frost.
Consider starting seeds indoors if you live in a region with a shorter growing season. Using seed trays and grow lights can give your seeds a head start, allowing you to transplant them outdoors when the conditions are optimal. Keep an eye on the weather and be ready to protect your young plants if a late frost threatens. (See: Seed selection guidelines from USDA.)
Utilizing a garden calendar that notes planting times for various crops can help streamline your gardening efforts. Many online gardening resources can provide customized calendars based on your local hardiness zone, ensuring you plant at the right time for optimal growth. It’s also helpful to keep a garden journal to track what works best in your garden year after year.
5. Watering Techniques: Keeping Seeds Hydrated
Proper watering is critical during the germination phase. Newly planted seeds need consistent moisture to germinate, but overwatering can lead to rot. A gentle watering method, such as a spray bottle or a fine mist watering can, can help avoid disturbing the soil or displacing the seeds. Aim for moist, but not soggy conditions.
Consider the type of soil you have as well. Sandy soils drain quickly and may require more frequent watering, while clay soils hold moisture longer. As the seedlings emerge, you can adjust your watering routine based on their needs—often, mature plants prefer deeper but less frequent watering to encourage deep root growth.
Another technique worth exploring is drip irrigation, which delivers water directly to the root zone of your plants. This method reduces water waste and minimizes the risk of fungal diseases that can occur with overhead watering. If you’re serious about gardening, investing in a drip irrigation system can pay off in healthier plants and less overall maintenance.
6. Mulching Techniques: Protecting and Nourishing
Mulching is an effective way to protect your young seedlings and retain soil moisture. After your seeds have germinated and seedlings begin to establish themselves, apply a layer of organic mulch, such as straw or shredded leaves, around them. This not only helps to suppress weeds but also maintains consistent soil temperature and moisture levels.
Moreover, as the mulch decomposes, it adds organic matter to the soil, enhancing its fertility. Just be cautious not to pile mulch directly against the stems of the plants, as this can promote rot. A 2-3 inch layer is typically sufficient to reap the benefits without causing harm.
Different types of mulch can serve various purposes. For example, using black plastic mulch can help warm the soil in cooler climates, speeding up germination. Conversely, reflective mulches can deter pests and keep the soil cool, making them ideal for specific crops like strawberries. Experimenting with different mulches can give you insights into what works best for your unique growing conditions.
7. Transplanting Tips: Moving Your Seedlings
Once your seedlings have grown strong enough, you may need to transplant them into larger containers or directly into your garden beds. Timing is crucial here; wait until the seedlings have at least two sets of true leaves and are a few inches tall. Before transplanting, gradually acclimate them to outdoor conditions in a process known as hardening off.
To harden off, place your seedlings outside for a few hours each day, gradually increasing the time over a week or two. When it’s time to transplant, dig a hole that’s slightly larger than the root ball of your seedling and gently place it in the ground. Water thoroughly after transplanting to help settle the soil around the roots.
When transplanting, consider using a tool called a dibber, which can make the process easier by allowing you to create a precise hole for each seedling. This method minimizes root disturbance and enhances the chance of survival. Always handle seedlings by their leaves rather than the stem to avoid injury, and transplant during cooler parts of the day to reduce transplant shock.
8. Monitoring and Maintenance: Keeping an Eye on Growth
After planting and transplanting, the work isn’t over. Regular monitoring and maintenance are crucial for a thriving garden. Check for signs of pests or diseases and address them promptly. This could mean applying organic pest control methods or simply removing affected leaves.
Additionally, keep an eye on nutrient levels. As plants grow, they may deplete the soil of essential nutrients. Using a balanced fertilizer or compost during the growing season can promote healthy growth and ensure your plants have what they need to flourish. Don’t forget to keep your garden tidy by weeding regularly, which can help prevent competition for nutrients and water.
Consider implementing companion planting strategies, where you group plants together that benefit each other. For example, planting marigolds among vegetables can deter pests while helping to attract beneficial insects. This holistic approach can reduce the amount of external maintenance your garden requires and enhance the overall health of your ecosystem.
9. Harvesting Your Crops: Enjoying the Fruits of Your Labor
Finally, the moment you’ve been waiting for—harvesting your crops! Knowing when to harvest is crucial, as it can affect the flavor and quality of your produce. For many vegetables, the best time to harvest is when they reach their optimal size and color, but this can vary by type. For example, tomatoes are best picked when they are fully colored and slightly soft to the touch. (See: Choosing seeds for your garden.)
Harvesting should be done carefully to avoid damaging the plant. Use sharp scissors or pruners for clean cuts, and handle the produce gently to prevent bruising. Enjoying the fruits of your labor is one of the greatest joys of gardening, and sharing your bounty with friends and family can make the effort truly worthwhile.
To maximize your garden’s yield, consider implementing staggered planting, where you sow new seeds every few weeks. This technique can provide a continuous harvest throughout the season, allowing you to enjoy fresh produce longer. Documenting your harvest times can help refine your planting schedule for future seasons.
10. Common Mistakes to Avoid
Even experienced gardeners can make mistakes when it comes to seed planting. Here are a few common pitfalls to watch out for:
- Overcrowding: Planting seeds too closely together can lead to competition for resources.
- Ignoring local conditions: Not taking into account your specific climate, soil type, and pest pressures can lead to poor results.
- Neglecting to harden off: Not acclimating seedlings before transplanting can result in shock and poor growth.
- Poor watering practices: Both overwatering and underwatering can hinder germination and growth.
By being aware of these common missteps, you can adjust your approach and improve your gardening success. Observing how your plants respond to environmental factors can also provide crucial information that helps prevent these mistakes in the future.
11. Frequently Asked Questions (FAQ)
1. What are the best methods for planting seeds indoors?
Starting seeds indoors is typically done using seed trays, peat pots, or biodegradable pots. Ensure you use a seed-starting mix that provides good drainage and aeration. Place the containers under grow lights or near a window that gets plenty of natural light.
2. How often should I water my seeds?
For newly planted seeds, aim to keep the soil consistently moist but not soggy. As the seedlings grow, you can adjust your watering frequency based on soil moisture levels. A good practice is to check the soil daily and water when the top inch feels dry.
3. Can I save seeds from my plants for next year?
Yes, many gardeners save seeds from their plants, especially heirloom varieties. Make sure to allow the seeds to fully mature before harvesting and store them in a cool, dry place to ensure viability for the next planting season.
4. What factors can affect seed germination?
Several factors can impact seed germination, including soil temperature, moisture levels, light exposure, and seed quality. Ensuring optimal conditions for each type of seed can greatly enhance germination rates.
5. How can I tell if my seedlings are healthy?
Healthy seedlings should have vibrant green leaves, sturdy stems, and well-defined root systems. Signs of distress may include yellowing leaves, wilting, or stunted growth, which could indicate issues with watering, nutrition, or pests.
12. Advanced Seed Planting Techniques
As you gain confidence in your gardening skills, you might want to explore advanced seed planting techniques that can enhance your gardening experience and yield. One popular method is called direct seeding. This involves sowing seeds directly into the ground rather than starting them indoors. This technique is particularly effective for larger seeds and crops that do not transplant well, like carrots and radishes.
Another advanced method is using a seed starting heat mat. This can be particularly useful for seeds that require warmth to germinate. The consistent warmth helps to speed up germination rates, particularly for plants like peppers and tomatoes, which prefer warmer soil temperatures. According to research, using heat mats can increase germination by up to 20% for certain crops. (See: Gardening and health benefits from CDC.)
Additionally, you might try using soil blocks for seed starting. This method involves compressing soil into blocks, which allows for better root aeration and eliminates the need for plastic pots. Not only is this method environmentally friendly, but it also encourages healthier root systems, leading to stronger plants.
Hydroponic seed planting is another innovative technique worth mentioning. This soilless method can produce faster growth rates as plants can directly access nutrients in a water-based solution. Hydroponically grown plants often yield higher quantities than traditionally grown plants, making it a great option for urban gardeners with limited space.
13. Innovative Techniques and Trends in Seed Planting
In recent years, innovative methods like vertical gardening have gained popularity. This technique allows gardeners to maximize space by growing plants upward rather than outward. Vertical gardening is especially beneficial for those with limited space, such as in urban environments. You can use trellises, wall planters, or vertical towers to create a stunning green wall while still utilizing effective seed planting techniques.
Another trend is intercropping, where two or more crops are grown in proximity to promote beneficial interactions. For instance, planting corn with beans and squash, known as the Three Sisters method, not only maximizes space but also improves plant health and productivity. Beans fix nitrogen in the soil, benefiting corn and squash, while the large leaves of squash shade the ground, reducing weeds.
Microgreens have also become a trendy option for urban gardeners. These tiny seedlings, harvested just after the first leaves develop, are packed with nutrients and can be grown in small trays or containers on a windowsill. They grow quickly and are an excellent way to utilize seed planting techniques in very limited spaces.
14. Climate Considerations for Seed Planting
Your local climate plays a crucial role in your seed planting success. Knowing your USDA hardiness zone can help you select the right seeds for your region. Each zone indicates the minimum temperature range a plant can tolerate, helping you avoid planting varieties that won’t thrive in your area.
Climate change has also shifted growing seasons in many areas, so it’s essential to stay informed about local trends. Some gardeners have started experimenting with planting different varieties or using season extension techniques, such as row covers or cold frames, to adapt to these changes. Understanding your climate will help you be proactive in your garden planning.
Additionally, consider how microclimates within your garden can impact plant growth. Areas near walls may be warmer, while shaded areas may require different planting strategies. Observe your garden throughout the day and adjust your seed planting techniques accordingly.
In summary, mastering these seed planting techniques can help you create a flourishing garden. From selecting the right seeds and preparing your soil to timing your planting and monitoring growth, each step plays a critical role in how successfully your garden will yield. Get out there, get your hands dirty, and enjoy the rewarding experience of growing your own plants!
“`
Trending Now
Frequently Asked Questions
What are the best seeds to plant for beginners?
For beginners, it's best to start with seeds that are easy to grow and well-suited to your climate. Popular choices include radishes, lettuce, and beans. Research local gardening recommendations to find varieties that thrive in your area and consider starting with cold-tolerant or hardy plants for early planting.
How do I prepare my soil for planting seeds?
To prepare your soil for planting, first test its pH and nutrient levels. Most vegetables prefer a pH between 6.0 and 7.0. Amend your soil with organic matter, such as compost, to improve its nutrient content and drainage, ensuring a healthy environment for seed germination and growth.
When is the best time to plant seeds?
The best time to plant seeds varies by region and plant type. Generally, cool-season crops can be planted in early spring or late summer, while warm-season crops should be planted after the last frost in spring. Consult local gardening resources for specific timing based on your climate.
How do I know if my seeds are good quality?
Good quality seeds are usually packaged with information on germination rates and expiration dates. Look for seeds that are certified organic or from reputable sources. Additionally, check for signs of damage or mold in the packaging, as these can indicate poor quality or viability.
What techniques can improve seed germination?
To improve seed germination, ensure you choose the right seeds for your climate and prepare your soil adequately. Techniques such as soaking seeds before planting, maintaining consistent moisture, and providing adequate light can also enhance germination rates and lead to healthier plants.
What did we miss? Let us know in the comments and join the conversation.