The Tech Edvocate

Top Menu

  • Advertisement
  • Apps
  • Home Page
  • Home Page Five (No Sidebar)
  • Home Page Four
  • Home Page Three
  • Home Page Two
  • Home Tech2
  • Icons [No Sidebar]
  • Left Sidbear Page
  • Lynch Educational Consulting
  • My Account
  • My Speaking Page
  • Newsletter Sign Up Confirmation
  • Newsletter Unsubscription
  • Our Brands
  • Page Example
  • Privacy Policy
  • Protected Content
  • Register
  • Request a Product Review
  • Shop
  • Shortcodes Examples
  • Signup
  • Start Here
    • Governance
    • Careers
    • Contact Us
  • Terms and Conditions
  • The Edvocate
  • The Tech Edvocate Product Guide
  • Topics
  • Write For Us
  • Advertise

Main Menu

  • Start Here
    • Our Brands
    • Governance
      • Lynch Educational Consulting, LLC.
      • Dr. Lynch’s Personal Website
      • Careers
    • Write For Us
    • The Tech Edvocate Product Guide
    • Contact Us
    • Books
    • Edupedia
    • Post a Job
    • The Edvocate Podcast
    • Terms and Conditions
    • Privacy Policy
  • Topics
    • Assistive Technology
    • Child Development Tech
    • Early Childhood & K-12 EdTech
    • EdTech Futures
    • EdTech News
    • EdTech Policy & Reform
    • EdTech Startups & Businesses
    • Higher Education EdTech
    • Online Learning & eLearning
    • Parent & Family Tech
    • Personalized Learning
    • Product Reviews
  • Advertise
  • Tech Edvocate Awards
  • The Edvocate
  • Pedagogue
  • School Ratings

logo

The Tech Edvocate

  • Start Here
    • Our Brands
    • Governance
      • Lynch Educational Consulting, LLC.
      • Dr. Lynch’s Personal Website
        • My Speaking Page
      • Careers
    • Write For Us
    • The Tech Edvocate Product Guide
    • Contact Us
    • Books
    • Edupedia
    • Post a Job
    • The Edvocate Podcast
    • Terms and Conditions
    • Privacy Policy
  • Topics
    • Assistive Technology
    • Child Development Tech
    • Early Childhood & K-12 EdTech
    • EdTech Futures
    • EdTech News
    • EdTech Policy & Reform
    • EdTech Startups & Businesses
    • Higher Education EdTech
    • Online Learning & eLearning
    • Parent & Family Tech
    • Personalized Learning
    • Product Reviews
  • Advertise
  • Tech Edvocate Awards
  • The Edvocate
  • Pedagogue
  • School Ratings
  • A Visitor’s Guide to Fresno (CA), United States

  • A Visitors Guide to New Orleans (LA), United States

  • A Visitors Guide to Sacramento (CA), United States

  • A Visitors Guide to Lyon, France

  • JisuLife Ultra2 Portable Fan: A Powerful Multi-Function Cooling Solution

  • A Visitors Guide to Viña del Mar, Chile

  • A Visitors Guide to Århus, Denmark

  • A Visitors Guide to Bakersfield (CA), United States

  • A Visitors Guide to Aurora (CO), United States

  • A Visitor’s Guide to Toledo (OH), United States

Digital & Mobile Technology
Home›Digital & Mobile Technology›How to Perform a Clean Install of OS X Lion on Your Mac

How to Perform a Clean Install of OS X Lion on Your Mac

By Matthew Lynch
July 24, 2023
0
Spread the love

If you want to start fresh with your Mac, or if you’re experiencing issues with your current operating system, performing a clean install of OS X Lion is a great option. A clean install means wiping your hard drive and installing a fresh copy of the operating system. Here’s how to do it:

Step 1: Back Up Your Data

Before you start the clean install process, you’ll want to back up all of your important data. You can use Time Machine or a third-party backup tool to do this. Make sure you have a complete backup of all your files before proceeding.

Step 2: Create an Install Disk

You’ll need to create a bootable install disk for OS X Lion. To do this, you’ll need a USB drive with at least 8GB of storage. Follow these steps:

1. Download OS X Lion from the App Store.

2. Plug in your USB drive.

3. Open Disk Utility.

4. Select your USB drive from the list on the left.

5. Click on the “Erase” tab and choose “Mac OS Extended (Journaled)” as the format.

6. Give your USB drive a name, like “OS X Lion Install.”

7. Click on the “Erase” button to format the drive.

8. Open Terminal and type in the following command:sudo /Applications/Install\ OS\ X\ Lion.app/Contents/Resources/createinstallmedia –volume /Volumes/OS\ X\ Lion\ Install –applicationpath /Applications/Install\ OS\ X\ Lion.app
This process will create a bootable USB drive with the OS X Lion installer on it.

Step 3: Boot from the Install Disk

With your bootable USB drive ready, you can now boot your Mac from it. Follow these steps:

1. Insert the USB drive into your Mac.

2. Restart your Mac.

3. Hold down the “Option” key as your Mac starts up.

4. When the startup disk selection screen appears, select the USB drive with the OS X Lion installer on it.

5. Click the “Continue” button to start the installation process.

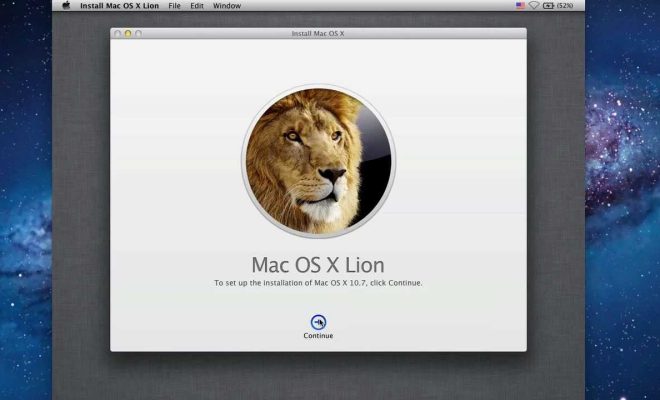
Step 4: Install OS X Lion

Once you’ve booted from the USB drive, you can begin the installation process. Follow these steps:

1. Select your language and click the “Continue” button.

2. Click the “Install OS X” button.

3. Agree to the license agreement and click the “Agree” button.

4. Select the hard drive you want to install OS X Lion on and click the “Install” button.

5. Wait for the installation process to complete. This may take some time.

6. Once the installation is complete, your Mac will restart.

Step 5: Restore Your Data

After the clean install is complete, you can restore your data from your backup. Follow these steps:

1. Connect your backup drive to your Mac.

2. Open Migration Assistant (located in the Utilities folder).

3. Follow the prompts to migrate your data back to your Mac.

Performing a clean install of OS X Lion can help speed up your Mac and resolve any issues you may be experiencing. Just be sure to back up your data before starting the process.

Previous Article

Eight Reasons Your Car Stinks, and How ...

Next Article

What Is a BR5 File?

Matthew Lynch

Related articles More from author

  • Digital & Mobile Technology

    What Is TikTok LIVE Subscription and How Does It Work?

    September 8, 2023
    By Matthew Lynch
  • Digital & Mobile Technology

    How to Record Audio on Your Android Device

    August 3, 2023
    By Matthew Lynch
  • Digital & Mobile Technology

    Top Linux Operating Systems You Should Try in a Virtual Machine

    June 22, 2023
    By Matthew Lynch
  • Digital & Mobile Technology

    What Is a Wi-Fi Hotspot?

    June 10, 2023
    By Matthew Lynch
  • Digital & Mobile Technology

    What Is Temu? What to Know About This Affordable Shopping App

    September 8, 2023
    By Matthew Lynch
  • Digital & Mobile Technology

    How to Install Android Debug Bridge (ADB)

    July 6, 2023
    By Matthew Lynch

Search

Login & Registration

  • Register
  • Log in
  • Entries feed
  • Comments feed
  • WordPress.org

Newsletter

Signup for The Tech Edvocate Newsletter and have the latest in EdTech news and opinion delivered to your email address!

About Us

Since technology is not going anywhere and does more good than harm, adapting is the best course of action. That is where The Tech Edvocate comes in. We plan to cover the PreK-12 and Higher Education EdTech sectors and provide our readers with the latest news and opinion on the subject. From time to time, I will invite other voices to weigh in on important issues in EdTech. We hope to provide a well-rounded, multi-faceted look at the past, present, the future of EdTech in the US and internationally.

We started this journey back in June 2016, and we plan to continue it for many more years to come. I hope that you will join us in this discussion of the past, present and future of EdTech and lend your own insight to the issues that are discussed.

Newsletter

Signup for The Tech Edvocate Newsletter and have the latest in EdTech news and opinion delivered to your email address!

Contact Us

The Tech Edvocate
910 Goddin Street
Richmond, VA 23231
(601) 630-5238
[email protected]

Copyright © 2025 Matthew Lynch. All rights reserved.