Master the Art of Perfect Pie Crust: Flaky & Tender Every Time
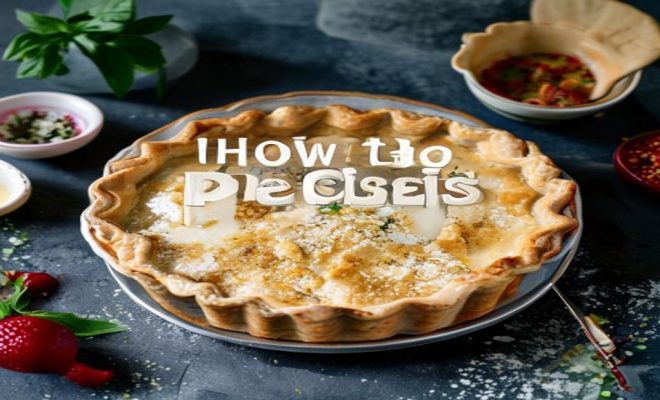
Ah, the humble pie crust. It’s often seen as the unsung hero of countless desserts, the foundational canvas upon which culinary masterpieces like apple, cherry, or even savory quiches are built. But let’s be honest, for many home bakers, perfecting a pie crust recipe can feel like chasing a mythical creature. You know, that elusive, flaky, tender, and perfectly golden-brown crust that holds its shape, doesn’t shrink, and melts in your mouth without tasting like cardboard.
It’s a common struggle, and I’ve been there. I’ve battled with tough, crumbly, or overly greasy crusts, and I’ve watched in dismay as my perfectly shaped dough collapsed into a sad, soggy mess. But what if I told you there are some fundamental principles and even a few game-changing tricks that can transform your pie-making journey from frustrating to fantastic? Because there are, and mastering them isn’t as intimidating as it seems. It’s all about understanding the science and technique behind a truly great pie crust, and then, with a little practice, applying that knowledge to your own kitchen adventures. So, let’s roll up our sleeves and get into the nitty-gritty of crafting a pie crust recipe that will earn you rave reviews every single time.
1. The Golden Ratio of Ingredients: Flour, Fat, Liquid, and Salt
When you’re aiming for a stellar pie crust, it all starts with the right balance of ingredients. Think of it as a delicate dance where each component plays a crucial role. First up, flour. All-purpose flour is usually your best bet. Its moderate protein content gives you enough structure without making the crust tough. Some bakers swear by pastry flour for an even more tender crumb, but for most everyday baking, all-purpose will do just fine. The key here is not to overwork the gluten in the flour, which is easily developed when wet and kneaded. Too much gluten development means a tough crust, and nobody wants that.
Next, the fat. This is where a lot of the magic happens, contributing to both flavor and that coveted flakiness. Cold butter is the classic choice for a reason: as it melts during baking, it creates steam pockets that separate the layers of dough, resulting in those beautiful, airy flakes. But you’ve got options. Shortening offers a higher melting point, leading to an incredibly tender and flaky crust, though it lacks the rich flavor of butter. A blend of butter and shortening often gives you the best of both worlds – great flavor and superior flakiness. Lard is another traditional option, prized for its ability to produce an exceptionally tender crust, but its flavor can be polarizing. Whichever fat you choose, remember this crucial rule: keep it cold. Seriously, colder is better.
Beyond the type of fat, the amount matters too. Too little fat, and your crust will be dry and crumbly; too much, and it becomes greasy and heavy. The typical ratio is about one part fat to two parts flour by weight, but this can vary slightly depending on the specific recipe and desired texture. And don’t forget salt! A pinch of salt might seem insignificant, but it’s a flavor enhancer, balancing the richness of the fat and flour, preventing the crust from tasting bland. It subtly elevates the entire pie, making every bite more enjoyable.
2. The Chilling Truth: Why Temperature is Your Best Friend
I can’t stress this enough: temperature control is paramount when making a pie crust. From your ingredients to your tools and even your hands, keeping everything as cold as possible is key to success. Why? Because cold fat is essential for creating those distinct, flaky layers. When butter or shortening is kept cold, it remains in solid pieces within the dough. As the crust bakes, these solid pieces melt, releasing steam and creating tiny air pockets that separate the layers of gluten, giving your pie that signature flaky texture. If your fat warms up and fully incorporates into the flour, you’ll end up with a more cookie-like, tender crust rather than a flaky one.
This principle extends beyond just the fat. Chilled water or even vodka (more on that later!) helps keep the overall dough temperature low, preventing the butter from melting prematurely and minimizing gluten development. Even chilling your flour before you start can make a difference. After mixing, chilling the dough again allows the gluten to relax, which prevents shrinkage during baking, and gives the fat a chance to firm up once more. Think of it as giving your dough a much-needed spa day – it comes out relaxed, firm, and ready to perform. Don’t skip these chilling steps; they’re non-negotiable for a truly excellent pie crust recipe.
Consider the ambient temperature of your kitchen, too. On a hot day, your ingredients will warm up much faster. If you live in a warm climate or are baking in the summer, you might want to chill your mixing bowl and even your rolling pin. Some bakers even go so far as to chill their hands by running them under cold water before handling the dough. These small efforts contribute significantly to maintaining that crucial cold temperature throughout the process, ensuring the fat stays solid and ready to create those beautiful flakes. top baking schools offers useful background here.
3. The Art of Mixing: Hands vs. Food Processor vs. Pastry Blender
How you bring your ingredients together significantly impacts the final texture of your pie crust. There are a few popular methods, each with its own advantages. The traditional hand-mixing method involves using your fingertips or a pastry blender to cut the cold fat into the flour mixture. This gives you excellent control over the size of your fat pieces – you want some pea-sized pieces and some smaller, sandy bits for optimal flakiness and tenderness. The downside? It can be slow, and the warmth of your hands can start to melt the butter if you’re not quick. However, for many purists, the tactile feedback of hand-mixing is irreplaceable.
Then there’s the food processor method, a real time-saver. It’s incredibly efficient at cutting in the fat quickly, minimizing the risk of melting. You pulse the flour and fat together until the desired consistency is reached, then add the liquid. The key here is to use short pulses and avoid over-processing, which can quickly turn your dough into a gummy mess by over-developing the gluten. While fast, some argue it can sometimes produce a slightly less flaky crust because the fat pieces might be too uniform. Finally, the pastry blender is a great middle-ground, offering more control than a food processor but being faster and cooler than using just your hands. Whichever method you choose, the goal is the same: integrate the fat into the flour without overworking the dough, ensuring those precious pockets of cold fat remain intact. (See: understanding pastry and crust types.)
4. The Liquid Quandary: Water, Vodka, or a Combination?
The liquid you add to your pie crust recipe is more than just a binder; it’s a critical component that can make or break your crust. Ice-cold water is the traditional choice, and it works wonderfully. The ‘ice-cold’ part is crucial because, as we discussed, it helps keep the butter firm and prevents gluten development. You’ll add it gradually, a tablespoon at a time, until the dough just barely comes together. The temptation to add too much liquid is strong, especially if your dough looks dry, but resist! An overly wet dough will be sticky, hard to handle, and can lead to a tough, chewy crust.
Now, here’s where things get interesting: vodka. Yes, plain old vodka. This is one of those ‘mind-blowing’ hacks I mentioned earlier. The brilliant idea, popularized by America’s Test Kitchen, is that alcohol inhibits gluten development more effectively than water. Since vodka is 40% alcohol and 60% water, it provides enough liquid to hydrate the dough without contributing to excessive gluten formation. The result? A remarkably tender and flaky crust that’s also easier to roll out because it’s less prone to shrinking. The alcohol evaporates completely during baking, leaving no taste behind. If you’re struggling with tough or shrunken crusts, substituting some of your water with vodka in your pie crust recipe is a trick worth trying.
5. Handling with Care: Don’t Overwork the Dough
This is perhaps the most common pitfall for new and even experienced bakers. Once you’ve added the liquid, your job is to bring the dough together with as little handling as possible. Overworking the dough is the arch-nemesis of a tender, flaky pie crust. Every time you knead, fold, or even just aggressively press the dough, you’re encouraging the gluten in the flour to develop. Developed gluten creates a strong, elastic network – fantastic for bread, terrible for pie crust.
Think of it this way: you want a crumbly, barely-held-together dough when you’re done mixing. It should feel shaggy, almost like wet sand, with visible pieces of fat. Gently gather it into a disk, wrap it tightly in plastic wrap, and get it into the fridge. Don’t be tempted to knead it until it’s smooth and uniform like bread dough. That’s a recipe for a tough, leathery crust. This ‘light touch’ approach is fundamental to achieving that delicate, melt-in-your-mouth texture that defines a truly great pie crust recipe.
6. The Art of Rolling: Uniform Thickness and Preventing Sticking
Rolling out pie dough can feel like a wrestling match, but with a few pointers, it becomes much more manageable. First, always start with well-chilled dough. It’s firmer, less sticky, and easier to handle. Lightly flour your work surface and your rolling pin, but don’t go overboard – too much extra flour can dry out your dough and make it tough. Work from the center outwards, rotating the dough frequently to prevent it from sticking and to ensure an even thickness. Aim for a consistent 1/8-inch thickness for most pies. Inconsistent thickness means some parts will bake faster, leading to uneven browning and texture.
If your dough starts to crack at the edges, it’s likely too cold. Let it sit at room temperature for a few minutes to soften slightly. If it starts to stick, gently lift it, add a tiny bit more flour to the surface, and continue. A pro tip: if you’re struggling with sticking, try rolling the dough between two sheets of parchment paper. This virtually eliminates the need for extra flour and makes transfer to the pie plate a breeze. Once rolled, carefully transfer the dough to your pie plate. Don’t stretch it; let it gently settle into the corners. Stretching can cause the crust to shrink back during baking, leaving you with a smaller, misshapen pie.
7. Blind Baking Basics: When and How to Do It
Blind baking, or pre-baking, your pie crust is a crucial step for certain types of pies, particularly those with wet fillings (like quiches or custard pies) or no-bake fillings (like chocolate cream pie). It helps prevent a soggy bottom crust, ensuring it’s beautifully crisp and cooked through. To blind bake, once your dough is in the pie plate, prick the bottom all over with a fork. This allows steam to escape, preventing bubbles. Then, line the crust with parchment paper and fill it with pie weights, dried beans, or even rice. These weights keep the crust from puffing up and shrinking dramatically.
Bake the weighted crust in a hot oven (usually around 400°F or 200°C) for about 15-20 minutes, or until the edges are lightly golden. Remove the weights and parchment, then return the crust to the oven for another 5-10 minutes, or until the bottom is golden brown and dry. For a fully baked crust (for no-bake fillings), continue baking until it’s deeply golden. For a partially baked crust (for wet fillings that will be baked again), just get it to a light golden hue. This simple step can elevate your pie game, transforming a potentially disappointing pie into a triumph of texture.
8. The Finishing Touches: Fluting, Venting, and Egg Washes
Once your pie is assembled, a few final touches can make all the difference, both aesthetically and functionally. Fluting the edges of your pie crust isn’t just for looks; it helps seal the top and bottom crusts together and creates a barrier to prevent filling from bubbling over. There are many ways to flute, from simple crimping with your fingers and thumb to more elaborate patterns using a fork or even specialized tools. Practice a few methods to find one you like and that feels comfortable.
For double-crust pies, don’t forget to vent the top crust. These slits or decorative cut-outs allow steam to escape during baking, preventing the crust from ballooning and cracking. Without vents, you risk a pie that looks more like a puffy balloon than a delicious dessert. Finally, an egg wash can give your pie a beautiful, glossy, golden-brown finish. A simple egg wash is typically one egg whisked with a tablespoon of water or milk. Brush it lightly over the top crust before baking. You can also sprinkle a little coarse sugar on top for extra sparkle and crunch. These small details are what elevate a good pie to a truly professional-looking and tasting masterpiece, making your pie crust recipe truly shine.
9. Troubleshooting Common Pie Crust Problems
Even with the best intentions and adherence to a solid pie crust recipe, things can sometimes go awry. Don’t get discouraged! Understanding why common problems occur is the first step to fixing them. Let’s look at a few: (See: healthy eating and nutrition principles.)
Soggy Bottom Crust
This is probably the most common complaint. It happens when the pie filling’s moisture seeps into the bottom crust before it has a chance to fully bake and crisp up. The solution? Blind baking, as we discussed. Also, consider adding a thin layer of breadcrumbs, crushed cornflakes, or even a sprinkle of sugar to the bottom of your blind-baked crust before adding a very wet filling. These absorb excess moisture during baking, creating a barrier.
Crust Shrinks During Baking
Shrinkage usually points to overworked dough or insufficient chilling. When you overwork dough, the gluten gets too developed and elastic, causing it to snap back when heated. Not chilling the dough long enough means the gluten hasn’t had time to relax, and the fat hasn’t firmed up. Always chill your dough for at least 30 minutes, and sometimes up to an hour or more, after mixing and again after it’s in the pie plate. (Edrater's culinary rankings)
Tough Crust
A tough crust is almost always a sign of too much gluten development. This can happen from overworking the dough, using too much liquid, or not keeping ingredients cold enough. Remember, a light touch and minimal mixing are your friends. If you’re consistently getting tough crusts, try the vodka trick to inhibit gluten formation.
Crumbly or Dry Dough
If your dough won’t come together or crumbles when you try to roll it, you likely haven’t added enough liquid. While it’s important not to add too much, a dough that’s too dry won’t form a cohesive mass. Add liquid a tablespoon at a time, mixing gently until the dough just starts to hold together when squeezed. It might also be too cold, so let it warm up for a few minutes before trying to roll.
Greasy Crust
A greasy crust can result from using too much fat, or, more commonly, from the fat melting and incorporating too much into the flour before baking. This goes back to the importance of keeping your ingredients, tools, and hands cold. If the fat is too warm, it won’t create those flaky layers; instead, it’ll just make the crust oily.
10. Exploring Different Pie Crust Variations
While the classic all-butter or butter-shortening crust is a staple, don’t be afraid to experiment! Different fats and flours can yield exciting textures and flavors, opening up a whole new world of pie possibilities.
Nut-Based Crusts
For a gluten-free option or just a different flavor profile, consider crusts made with ground nuts like almonds, pecans, or walnuts. These typically use less fat and come together quickly, often pressed into the pie plate rather than rolled. They offer a rich, nutty flavor that pairs beautifully with fruit or cream fillings.
Whole Wheat or Spelt Crusts
Want a heartier, more rustic crust? Incorporating whole wheat or spelt flour can add a lovely depth of flavor and a slightly denser, chewier texture. You might need a little more liquid with these flours, as they absorb more moisture. They work wonderfully with savory pies or robust fruit fillings like apple or pear.
Vegan Pie Crusts
For those avoiding dairy, vegan pie crusts are totally achievable. Substitute butter with a high-quality vegan butter stick (not margarine in a tub, as it has too much water) or a neutral-flavored vegetable shortening. Ensure your liquid is ice water, and you’re good to go. The principles of keeping ingredients cold and not overworking the dough still apply.
Sweet vs. Savory Crusts
Most basic pie crust recipes are quite versatile. For a sweet pie, you can add a tablespoon or two of sugar to the flour mixture. For savory pies, consider adding herbs like thyme, rosemary, or a pinch of black pepper to the dry ingredients for an extra layer of flavor. These small additions can dramatically change the character of your finished pie. (See: New York Times pie crust techniques.)
Crafting the perfect pie crust doesn’t have to be a daunting task. It’s a journey of understanding your ingredients, respecting temperature, and handling your dough with a light touch. Remember, every baker, even the most seasoned, has had their share of pie crust mishaps. The key is to learn from them, experiment with different techniques like that brilliant vodka trick, and find what works best for you and your kitchen. With a bit of patience and practice, you’ll be turning out flaky, tender, and utterly delicious pie crusts that will be the envy of every potluck. So go ahead, embrace the challenge, and enjoy the delicious rewards of a truly homemade pie.
Frequently Asked Questions About Pie Crust
Q: Can I make pie crust dough ahead of time?
A: Absolutely! This is one of the best tips for stress-free pie making. You can prepare the dough, form it into disks, wrap it tightly in plastic wrap, and refrigerate it for up to 2-3 days. For longer storage, you can freeze it for up to 3 months. Just be sure to thaw it in the refrigerator overnight before you plan to roll it out.
Q: What’s the best way to prevent the edges of my pie crust from burning?
A: Burning edges are a common issue, especially with longer bake times. The best solution is to use a pie crust shield, which is a metal or silicone ring that covers the edges of your crust. You can buy these, or you can easily make your own by folding aluminum foil into a ring. Place the shield over the pie about halfway through the baking time, or when the edges are already golden brown.
Q: Why is my pie crust tough?
A: A tough pie crust is usually a sign of overworking the dough. When you knead or handle the dough too much, you develop the gluten in the flour, which makes it elastic and chewy instead of tender and flaky. It can also happen if you add too much water, which also activates gluten. Remember to mix just until the dough comes together and no more.
Q: Can I use oil instead of solid fat for pie crust?
A: While you can technically make a crust with oil, it won’t give you the same flaky texture as butter, shortening, or lard. Oil creates a more mealy, tender, and crumbly crust because it fully coats the flour particles, preventing the formation of steam pockets that create flakiness. If you’re looking for a flaky crust, stick to solid fats.
Q: How can I tell if I’ve added enough water to my pie dough?
A: The dough should just barely come together when you pinch a small piece between your fingers. It should still look shaggy and a little crumbly, with visible pieces of fat. It shouldn’t be sticky or wet. If you squeeze a handful and it holds its shape, you’ve likely added enough. Err on the side of slightly dry rather than too wet.
Q: Is it necessary to chill the pie dough after it’s in the pie plate before baking?
A: Yes, it’s a really good idea, especially if you’ve been handling it a lot. Chilling the dough in the pie plate for at least 15-30 minutes helps the gluten relax one last time and allows the fat to firm up. This helps prevent shrinkage during baking and keeps the crust’s shape intact.
Trending Now
Frequently Asked Questions
What are the key ingredients for a pie crust?
The key ingredients for a pie crust include flour, fat, liquid, and salt. All-purpose flour is commonly used for its structure, while fat, such as butter or shortening, adds flakiness. Liquid, usually cold water, helps bind the dough, and salt enhances flavor.
How do I make my pie crust flaky?
To achieve a flaky pie crust, focus on using cold fat and minimal mixing. Cut the fat into the flour until it resembles coarse crumbs, and avoid overworking the dough to prevent gluten development, which can lead to toughness.
Why does my pie crust shrink in the oven?
A pie crust may shrink in the oven due to overworking the dough or not allowing it to rest before baking. Chilling the dough helps relax the gluten, reducing shrinkage during baking.
What can I do if my pie crust is too tough?
If your pie crust is too tough, it may be due to overworking the dough or using too much flour. To remedy this, ensure you handle the dough gently and consider using less flour or adding more fat to improve tenderness.
How long should I chill my pie crust before baking?
Chilling your pie crust for at least 30 minutes before baking is recommended. This allows the fat to firm up and the gluten to relax, resulting in a tender and flaky crust.
Agree or disagree? Drop a comment and tell us what you think.