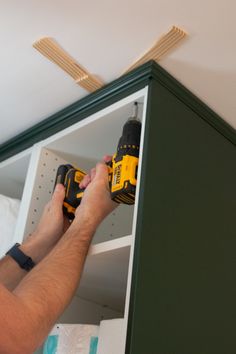
How to Install IKEA Kitchen Cabinets

IKEA kitchen cabinets are popular for their affordability, modern design, and easy installation process. They are designed so that even a novice DIYer can install them successfully. This guide will walk you through the process of installing your new IKEA kitchen cabinets from start to finish.
Step 1: Take Proper Measurements
Before you begin the installation process, it’s crucial to take accurate measurements of your kitchen space. This will help you plan your IKEA kitchen cabinet layout accurately and ensure that all components fit together seamlessly. Measure the width, height, and depth of your space and plan where each cabinet will go. Don’t forget to consider appliances such as your refrigerator and dishwasher when planning your cabinet placement.
Step 2: Assemble Your Kitchen Cabinets
IKEA kitchen cabinets come with detailed instructions, so it’s essential to follow them closely when assembling your cabinets. Lay out all components on a flat surface and organize them based on the instructions. This will make assembling the cabinets much easier.
Make sure to have all necessary tools on hand, such as a screwdriver, drill, clamps, hammer, level, and measuring tape. Start by assembling the cabinet frames according to the instructions, then move on to drawers, doors, hinges, and hardware.
Step 3: Install Cabinet Suspension Rails
Next up is installing the suspension rails. These are what your IKEA kitchen cabinets hang from, providing support and keeping them in place once installed. Start by marking a level line along your wall where the bottom edge of the wall cabinets will be located.
Measure and cut the suspension rail sections needed for your cabinet layout. Attach them to studs in your wall using the provided screws and plastic anchors if necessary. Make sure they are level and secure before continuing.
Step 4: Hang Your Wall Cabinets
With suspension rails in place, it’s time to hang your IKEA kitchen wall cabinets. Use the brackets provided to attach each cabinet to the rail. Before tightening all screws, use a level to ensure that the cabinets are positioned correctly and even. Adjust your cabinets as needed until they are perfectly aligned.
Step 5: Install Base Cabinets
Now it’s time to install your base cabinets. Place them in their intended spots, using your previously marked measurements for guidance. It’s important to make sure that your base cabinets are level before securing them.
Use shims and the adjustable feet on your IKEA kitchen cabinets to help level them, if necessary. Once you are satisfied with their position, secure the base cabinets to the wall and each other using screws provided in your IKEA installation kit.
Step 6: Attach Doors and Drawers
Once your cabinets have been hung and secured, you can attach doors and front panels for drawers. Use the system IKEA provides – generally, this involves mounting hinges on the door or drawer panel first, then attaching them directly to corresponding brackets in the cabinets. Ensure that everything aligns properly by making minor adjustments


