How to install garbage disposal
“`html
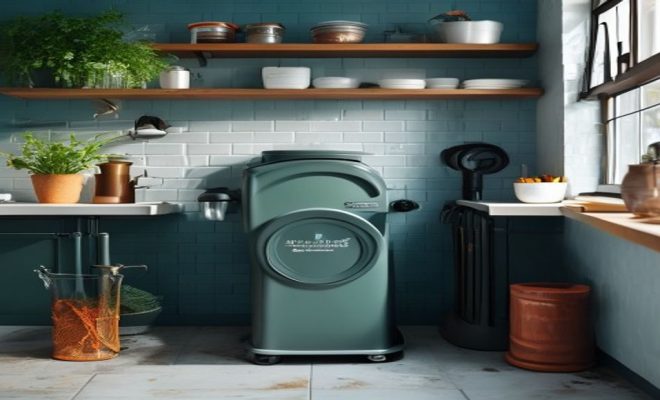
Installing a garbage disposal can be an intimidating task for many homeowners, but with the right tools, a bit of guidance, and a willingness to get your hands dirty, it’s a project you can tackle successfully. Not only does a garbage disposal make kitchen cleanup a breeze, but it also contributes to a more efficient waste management system. In this article, we’ll walk you through seven essential steps to install garbage disposal, breaking down the process into manageable parts.
1. Understanding Your Garbage Disposal Options
Before you dive into the installation process, it’s crucial to understand the different types of garbage disposals available on the market. Generally, you’ll find three main types: continuous feed, batch feed, and food cycler disposals. Continuous feed disposals are the most popular, allowing you to run the disposal while adding food waste. Batch feed models, on the other hand, require you to close a lid on the disposal before it operates, providing an added safety feature.
If you’re looking for something more eco-friendly, consider a food cycler. These systems don’t just grind food waste; they also dehydrate and compost it, helping to reduce landfill waste significantly. Assess your kitchen needs, waste volume, and how often you cook before choosing the right model.
2. Gathering Your Tools and Materials
Preparation is key to any successful installation. To install garbage disposal, you’ll need the following tools and materials:
- Garbage disposal unit
- Mounting assembly
- Plumber’s putty
- Screwdriver (flathead and Phillips)
- Wrench
- Wire stripper (if necessary)
- Electrical tape
- Bucket (for catching any water leaks)
- Safety glasses and gloves
Before starting, double-check that your disposal unit is compatible with your sink and plumbing system. If you’re replacing an old unit, it’s also wise to inspect the connections and pipes for any wear that might need addressing.
3. Preparing the Sink for Installation
To prepare for installation, you’ll want to remove any existing disposal unit if applicable, and clean the sink area thoroughly. If you’re starting fresh, ensure that the sink itself has the correct opening for mounting a garbage disposal. Most kitchen sinks will require a 3.5-inch hole for installation.
Once the area is clean, take the mounting assembly and attach it to the sink flange. This step often involves applying plumber’s putty around the flange to create a watertight seal. Insert the flange into the hole from the top, and then secure it from underneath using the mounting ring provided with your disposal unit.
4. Connecting the Disposal Unit
With the sink flange secured, it’s time to connect the garbage disposal unit itself. Start by lifting the unit and aligning it with the mounting assembly. Most units will turn to lock into place, so make sure you follow the manufacturer’s specific instructions for your model.
Next, connect the dishwasher drain hose if applicable. This is typically a straightforward task of securing the hose with a clamp on the disposal’s inlet. Don’t forget to check for any screw or clamp that might need tightening to prevent leaks.
5. Electrical Wiring: Connecting Your Disposal
Before proceeding to the electrical connections, ensure that the power is turned off at the circuit breaker to avoid any electrical shocks. Most disposals come with a power cord, which may require some wiring if you don’t have an outlet under the sink. (See: CDC on garbage disposal safety.)
Open the disposal’s wiring compartment, which usually requires a screwdriver. Connect the wires according to the color coding: black to black (hot), white to white (neutral), and green or bare to the grounding screw. Secure the connections with wire nuts and tuck the wires back into the compartment before sealing it. If you’re unsure about your electrical skills, consider hiring a licensed electrician for this step.
6. Plumbing Connections and Testing for Leaks
Once the electrical work is complete, it’s time to connect the water lines. This may involve attaching the disposal to your sink’s drain line. Use a wrench to secure the drain pipe to the disposal, ensuring everything is tightly fitted to prevent any leaks.
After all connections are made, it’s crucial to test for leaks. Slowly turn on the water and check each joint for any signs of dripping. If you notice any leaks, tighten the connections as necessary or use additional plumber’s putty or tape as a sealant.
7. Final Checks and Cleanup
After confirming that there are no leaks and everything is securely in place, it’s time to conduct a final test of your newly installed garbage disposal. Turn the power back on at the circuit breaker, and then switch on the disposal. Run cold water through the sink while the disposal is operating to help flush any debris away.
Lastly, clean up your work area, removing any tools, packaging, or debris from the installation. Not only will this make your kitchen look better, but it also ensures you won’t trip over anything in the days to come!
Wrap-Up: Enjoy Your New Garbage Disposal
Installing a garbage disposal can seem daunting, but with the right preparation and steps, you can do it yourself. Not only does it make kitchen clean-up easier, but it also promotes a sustainable waste management practice. And once you see how much time and effort it saves you in the kitchen, you’ll wonder why you didn’t install garbage disposal sooner!
Now that you’ve completed the installation, take the time to learn about proper disposal use and maintenance. Avoid putting fibrous foods, large bones, or grease down the disposal to keep it running smoothly. Regularly run cold water while using it and clean the blades periodically to maintain your new kitchen ally.
8. Common Issues and Troubleshooting
Even with a successful installation, you may encounter a few issues down the line. Here are some common problems and how to resolve them:
- Disposal Won’t Turn On: Check that it’s plugged in and that the circuit breaker hasn’t tripped. If it’s still not working, there may be an internal issue that requires professional help.
- Strong Odors: If bad smells emanate from your disposal, run it while flushing it with cold water. You can also grind up lemon peels or ice cubes to help clean and freshen it.
- Clogs: A clogged disposal can often be remedied by using the reset button and running cold water. If that doesn’t work, you may need to manually clear the clog using a wrench to turn the blades.
- Leaking Water: Check all connections to ensure they are tight. If the leak persists, you may need to replace a worn-out seal or connection.
9. Cost Considerations
When planning to install garbage disposal, budget for both the cost of the unit and potential additional expenses. The price of garbage disposals ranges significantly, from around $70 for basic models to over $300 for high-end, commercial-grade units. Installation costs can add up as well, especially if you hire a plumber or electrician. On average, professional installation can cost anywhere from $100 to $200.
Consider the long-term savings too. With a garbage disposal, you may find that you waste less food, leading to lower grocery bills. Plus, the convenience it offers can save you time and effort in the kitchen.
10. Maintenance Tips to Extend Lifespan
To keep your garbage disposal running efficiently for years to come, regular maintenance is crucial. Here are some tips to consider: (See: New York Times on installation tips.)
- Run it Regularly: To prevent rust and corrosion, run your disposal regularly, even if you don’t have much waste to grind.
- Use Cold Water: Always run cold water while using your disposal. Hot water can melt grease, which might then solidify and cause clogs further down the drain.
- Clean the Disposal: Every few weeks, grind ice cubes and salt to clean the blades. You can also use a mixture of baking soda and vinegar to eliminate odors and break down residual waste.
- Avoid Hard Items: While disposals can handle many types of food waste, avoid grinding hard foods, fibrous vegetables, and large bones that can damage the blades.
11. Environmental Impact of Garbage Disposals
In recent years, the environmental implications of using garbage disposals have come under scrutiny. Some argue that they can contribute to increased water usage and strain municipal sewage systems. However, studies indicate that when used properly, disposals can actually reduce the amount of waste sent to landfills by breaking down food scraps that would otherwise contribute to methane emissions.
According to the EPA, food waste is the single largest material sent to landfills. By using a garbage disposal, you’re helping to divert organic waste from landfills, which can help reduce greenhouse gas emissions. Additionally, the ground waste can often be processed at wastewater treatment facilities to produce energy or compost.
12. Frequently Asked Questions (FAQ)
Q: Can I install a garbage disposal myself?
A: Yes, many homeowners find they can successfully install their own garbage disposal by following the steps outlined in this guide. Just be sure to read the manufacturer’s instructions thoroughly and take appropriate safety precautions.
Q: How often should I run my garbage disposal?
A: It’s a good practice to run your garbage disposal regularly, even if there’s little waste. This helps to keep the blades sharp and prevents corrosion.
Q: What should I avoid putting down my garbage disposal?
A: Avoid fibrous foods (like celery or onion skins), large bones, grease, and starchy foods (like pasta or rice) that can cause clogs. Always consult your disposal’s manual for specific guidelines.
Q: Is it safe to use a garbage disposal?
A: When used correctly, garbage disposals are safe and can greatly enhance kitchen efficiency. Always keep your hands away from the disposal’s blades and avoid overloading the unit.
Q: Do I need a special sink to install a garbage disposal?
A: No, most sinks can accommodate a garbage disposal. However, you will need to ensure that your sink has the appropriate drain hole size (typically 3.5 inches) for the installation.
Q: Can I run hot water while using the garbage disposal?
A: It’s best to use cold water while operating the disposal. Cold water helps solidify fats and grease, making them easier to grind. Hot water can cause grease to melt and lead to clogs.
Q: What if my garbage disposal makes a humming noise but won’t turn on?
A: This humming sound usually indicates that the motor is stuck. You can reset the disposal using the reset button located at the bottom of the unit or use an Allen wrench to manually turn the flywheel and free any jams. (See: Harvard University resources.)
Q: How do I know when to replace my garbage disposal?
A: If your disposal is constantly jamming, leaking, or producing unpleasant odors that can’t be eliminated, it may be time for a replacement. Additionally, if the unit is older than eight years, it might be more cost-effective to replace it than to repair it. Related reading: top appliance repair programs.
13. Final Thoughts
Installing a garbage disposal can be a rewarding DIY project that transforms your kitchen experience. Not only does it make cleaning easier, but it also plays a part in reducing your household waste. By choosing the right unit, following proper installation techniques, and maintaining it regularly, you can enjoy the benefits of a garbage disposal for years to come. Whether you’re a seasoned DIYer or a first-timer, with the right guidance, you can confidently tackle the installation and enjoy the efficiency it brings to your kitchen.
14. Advanced Features to Consider
If you’re in the market for a new garbage disposal, you might want to consider models that come with advanced features. These can enhance functionality and convenience, making your kitchen experience even smoother. Here are some options to keep in mind:
- Noise Insulation: Some models come with sound-dampening technology that significantly reduces noise, making it more pleasant to use your disposal, particularly in open-concept living spaces.
- Jam-Sensing Technology: This feature detects jams and reverses the motor to prevent potential damage. It can save you time and hassle, as you won’t need to manually fix jams as often.
- Built-in Air Switch: Instead of using a traditional wall switch, some disposals feature a button you can install on your countertop. This can add a modern touch and improve safety, as it’s typically safer to operate with wet hands.
- Multi-Grind Technology: Higher-end models may offer two or more grinding stages to effectively handle tougher food waste, reducing the chance of clogs and improving overall efficiency.
- Power Rating: Look for units with higher horsepower ratings if you regularly dispose of hard food items. Units with 1 HP or higher can handle greater volumes and tougher waste materials.
15. Comparing Different Brands
When considering a purchase, it helps to compare different brands to find the right garbage disposal for your needs. Some of the most popular brands include InSinkErator, Waste King, and Moen. Each brand has its own strengths and specialties:
- InSinkErator: Known for its durable designs and extensive product range, InSinkErator disposals often come with excellent warranties, making them a reliable choice for long-term use.
- Waste King: This brand typically offers budget-friendly options without sacrificing quality. Their disposals are often lightweight and easy to install, making them a good option for DIY enthusiasts.
- Moen: Moen disposals are praised for their quiet operation and innovative features. They often come with a powerful motor and are designed to last, providing good value for the price.
16. Long-Term Savings with Garbage Disposals
Investing in a garbage disposal can offer significant long-term savings beyond just the initial purchase cost. Here are some ways a disposal can save you money:
- Reduced Waste Disposal Costs: With a garbage disposal, you can reduce the amount of organic waste you send to the landfill, which can lower your overall waste management costs.
- Lower Grocery Bills: When you can dispose of food scraps easily, you’re likely to waste less food. This can lead to lower spending on groceries over time.
- Preventing Plumbing Issues: Regular use of a garbage disposal can mean less food waste going into your plumbing system, potentially preventing clogs and costly plumbing repairs.
- Energy Savings: Newer disposal models are designed to be energy-efficient, potentially lowering your electricity bills compared to older units.
17. Choosing the Right Garbage Disposal Size
When you’re ready to install garbage disposal, selecting the right size is crucial for optimal performance. Garbage disposals come in various capacities, which are typically measured in horsepower (HP). Here’s what you should know:
- 1/2 HP Units: These are suitable for smaller households or occasional use. They can handle softer food waste but may struggle with tougher items.
- 3/4 HP Units: This size is ideal for average families who generate moderate food waste. It can handle a broader range of materials, making it versatile for daily kitchen tasks.
- 1 HP Units: Perfect for large families or frequent cooks, these units can handle tougher scraps like bones and fibrous vegetables. They tend to be more powerful and efficient.
18. Conclusion
Installing a garbage disposal is a project that can greatly enhance your kitchen’s efficiency and sustainability. With the right information and tools, you’re well-equipped to take on this task yourself. Remember to consider your household’s needs, the types of food waste you typically produce, and the features that will best serve you. By staying informed about maintenance and troubleshooting, you can ensure that your disposal serves you well for years to come. Whether you’re preparing a simple meal or a feast, your garbage disposal will become an indispensable part of your kitchen routine.
“`
Trending Now
Frequently Asked Questions
What tools do I need to install a garbage disposal?
To install a garbage disposal, you'll need a garbage disposal unit, mounting assembly, plumber's putty, screwdrivers (flathead and Phillips), a wrench, wire stripper (if necessary), electrical tape, a bucket for leaks, and safety glasses and gloves.
How do I choose the right garbage disposal for my kitchen?
When choosing a garbage disposal, consider the type that best suits your needs: continuous feed for convenience, batch feed for safety, or food cyclers for eco-friendliness. Assess your cooking habits and waste volume to make the best choice.
Can I install a garbage disposal myself?
Yes, many homeowners can install a garbage disposal themselves with the right tools and guidance. The process involves understanding your disposal options, gathering necessary materials, and following step-by-step instructions to ensure a successful installation.
What should I do before installing a garbage disposal?
Before installation, ensure that your disposal unit is compatible with your sink and plumbing system. If replacing an old unit, inspect connections and pipes for wear. Gather all necessary tools and materials to streamline the process.
What are the different types of garbage disposals?
The main types of garbage disposals are continuous feed, which allows you to add waste while running; batch feed, which requires a lid for operation; and food cyclers, which dehydrate and compost food waste for eco-friendly disposal.
What did we miss? Let us know in the comments and join the conversation.