How to Hatch Quail Chicks

Quails are small, attractive birds that make great pets and can also be kept as a source of eggs and meat. Hatching quail chicks is an exciting experience, whether you’re a hobbyist or a professional farmer. In this article, we will cover the essential steps and provide valuable tips on hatching quail chicks.
1.Selecting the Right Eggs
The first step in the hatching process is selecting healthy, fertile eggs. Pick eggs that are clean, free from cracks, and have good shell quality. Medium to large-sized eggs typically have better hatch rates. Avoid excessively large or too small eggs, as they may have poor embryonic development.
2.Proper Storage of Eggs
Store the collected eggs in a cool, dry place with a temperature between 55-60°F (13-16°C). Keep them in an egg carton or another holder at a 45-degree angle with the pointed end down to keep the air cell intact. Turn the eggs at least twice a day to maintain optimum embryo development. It’s essential to store eggs for no more than seven days before incubation begins to ensure a higher hatch rate.
3.Incubator Preparation
To hatch quail chicks successfully, you need a suitable incubator that maintains consistent temperature and humidity levels. Ensure your incubator can control these factors accurately. Set up your incubator 24 hours prior to placing the eggs to give it time to stabilize temperature and humidity.
4.Temperature and Humidity Settings
For most quail species, maintain an internal incubator temperature of 99-100°F (37-38°C) and humidity level between 45-50% during the first 15 days of incubation. On the last three days of incubation, which is known as “lockdown,” increase the humidity level to around 60% but keep the same temperature. Remember to monitor the temperature and humidity levels daily and adjust if necessary.
5.Turning The Eggs
Turning the eggs helps prevent the embryo from sticking to the shell. Do this at least three times a day for 15 days, either manually or using an automatic egg turner. Do not turn eggs during the lockdown period.
6.Monitoring Development
It is wise to monitor embryo development by candling the eggs on days seven and 14 of incubation. Using a bright flashlight or egg candler, check for visible signs of growth in the eggs by looking for blood vessels and dark spots that signify a developing embryo.
7.Hatching Process
The actual hatching process will take place between 16-18 days of incubation for most quail species. Refrain from opening the incubator during this period, as it may cause temperature and humidity fluctuations that can harm the chicks.
8.Moving Chicks to Brooder
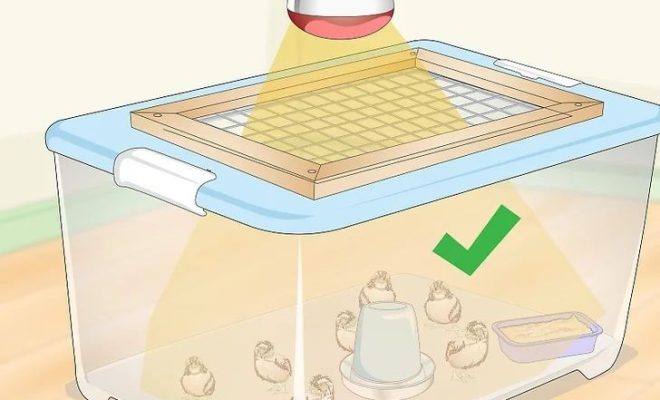
Once all chicks are hatched, let them dry within the incubator for about 12-24 hours before moving them to a brooder. Keep the brooder temperature around 95°F (35°C) during their first week of life, reducing it by approximately 5°F (2-3°C) each week until they’re ready for outdoor temperatures.
9.Feeding Quail Chicks
Provide a high-protein chick starter feed (about 24-28% protein) with a finely grounded texture or crumbles suitable for quail chicks’ small beaks. Provide clean water in shallow dishes or chick drinkers to prevent drowning.
By following these essential steps and tips, you will be well-equipped to hatch healthy quail chicks successfully! Happy hatching!


