How to find downloads on Mac
“`html
Having trouble locating your downloaded files on your Mac? You’re not alone. Many users find it challenging to navigate their system and track down files that seem to have vanished. Whether it’s a PDF, image, or application, knowing how to find downloads on Mac can save you time and frustration. In this guide, we’ll explore eight effective methods to help you quickly locate your downloads.
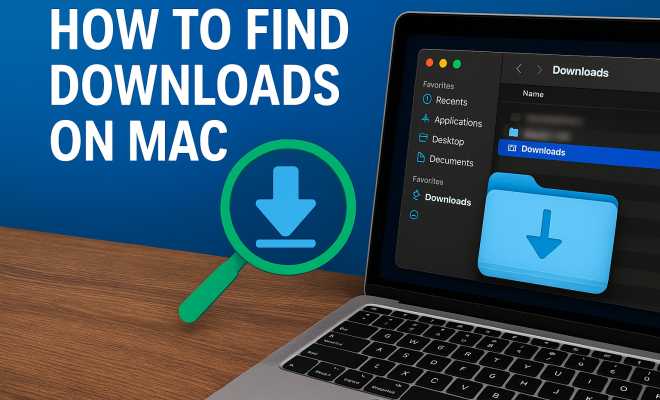
1. Using the Downloads Folder
The Downloads folder is the default location for all downloaded files on your Mac. To access this folder, simply follow these steps:
- Open Finder (the smiley face icon in your dock).
- In the sidebar, look for the Downloads folder and click on it.
Here, you’ll find all the files you’ve downloaded. If you’ve downloaded a sizable amount of content, you can sort them by date or type to make locating specific files easier. To sort files, click on the column headers in the Finder window. This method is straightforward, but it may not help if you’ve changed the default download location.
2. Searching with Spotlight
If you prefer a more direct approach, Spotlight is your friend. This powerful search tool indexes all your files, making it easy to find downloads without sifting through folders. To use Spotlight:
- Press Command (⌘) + Space to open Spotlight.
- Type the name of the file you’re looking for.
Spotlight not only searches your downloads but also your applications, emails, and documents. If you remember part of the file name or its type, simply enter that information, and you’ll likely find what you need. This method is particularly useful for files with obscure names or those buried deep in folders.
3. Using Finder Search Features
For even more refined searching, Finder offers advanced search features. After opening Finder, you can utilize the search bar in the upper-right corner. Here’s how:
- Click in the search bar and type your query.
- To narrow down results, use the options that appear below the search bar (e.g., “This Mac,” “Downloads,” etc.).
- You can also add filters by clicking the plus sign (+) to specify file type, date modified, and other criteria.
This method is excellent if you need to locate multiple files or if you’re searching for something specific within the Downloads folder.
4. Check Your Web Browser’s Download History
Sometimes, you might forget where a file is saved after downloading. Browsers typically keep a history of downloaded files that you can easily access:
- In Safari, go to the menu bar, click Safari, then select Downloads.
- For Chrome, click the three vertical dots in the upper right corner, then choose Downloads.
- In Firefox, click the three horizontal lines in the upper right corner, and select Downloads.
This history not only tells you what files you’ve downloaded but often allows you to quickly open the file or reveal it in Finder. This is a lifesaver if you can’t remember where you saved something!
5. Using the Terminal
If you’re comfortable with command-line tools, the Terminal can help you locate downloads as well. For users who enjoy techy approaches, here’s how to do it:
- Open the Terminal from Applications > Utilities.
- Type cd ~/Downloads and press Enter to navigate to the Downloads folder.
- Type ls to list all the files in your Downloads folder.
This command-line approach may be a bit daunting for some, but it can be quicker if you’re familiar with terminal commands. Plus, it gives you the option to run additional commands to filter or manipulate your files.
6. Utilizing Smart Folders
For those who often download specific file types or projects, creating a Smart Folder can streamline your workflow. A Smart Folder automatically collects files based on criteria you set. Here’s how to create one:
- Open Finder and select File from the menu bar.
- Choose New Smart Folder.
- Click the + button in the upper right corner to set your criteria.
You can filter by file type, date, tags, and more. For example, if you frequently download PDFs, you could create a Smart Folder that only shows PDF files. This will save you time and make your downloads easier to manage.
7. Checking iCloud Drive
If you use iCloud Drive, files downloaded from other Apple devices may be stored there instead of the local Downloads folder. It’s worth checking if you frequently switch between devices. To access iCloud Drive:
- Open Finder and look for iCloud Drive in the sidebar.
- Click on it to view your saved files.
iCloud Drive allows for seamless access to your files across devices, so if you downloaded something on your iPhone or iPad, it may well be here waiting for you. This is especially useful for collaborative projects or if you’ve shared files with others.
8. Using Third-Party Applications
Sometimes, built-in tools just aren’t enough. Third-party download managers can offer a more organized way to find and manage your downloads. Applications like Folx, JDownloader, and Download Manager provide advanced features like categorization, speed control, and better file organization.
- Folx allows you to tag your downloads for easier searching later.
- JDownloader lets you manage multiple downloads and can automatically organize them into folders based on your preferences.
- Download Manager offers a straightforward interface for tracking downloads in real time.
If you’re a heavy downloader or frequently manage large files, investing in a third-party app could enhance your experience significantly.
9. Understanding Download Locations
It’s essential to know that not all files downloaded through your web browser end up in the Downloads folder. Depending on your settings, files may go to different locations. For example, if you’re downloading images from a website, some browsers may allow you to choose where to save files each time. Check your browser’s settings to confirm where your downloads are stored. Here’s how:
- In Safari, go to Preferences and click on the General tab. You’ll see the “File download location” option. Change it if necessary.
- For Chrome, navigate to Settings, scroll down to Advanced, and find “Downloads.” You can set your preferred download location here.
- In Firefox, go to Preferences, look for the Files and Applications section, and adjust the download settings to your liking.
Being aware of where your files might be saved can save you a lot of hassle later on.
10. Using Tags for Organizing Downloads
Tags are a fantastic way to keep your downloaded files organized. By tagging files with relevant keywords, you make it easier to locate them later. Here’s how you can tag your downloads:
- Right-click (or Control-click) the file in Finder.
- Select Tags from the context menu.
- Choose an existing tag or create a new one by typing in the tag name.
Once tagged, you can easily search for files using the tag name in the Finder search bar. This is especially useful for large projects where you might download multiple related files.
11. Best Practices for Managing Downloads
Staying organized is key to efficiently managing your downloads. Here are a few best practices to consider:
- Regularly Clean Out Your Downloads Folder: Set a reminder to review and delete unneeded files monthly.
- Subfolders for Different Types: Create subfolders within your Downloads folder for different categories, like Work, Music, and Photos.
- Utilize a Consistent Naming System: When saving files, use a consistent naming convention that includes dates or project names to make searching easier.
By implementing these practices, you can avoid the frustration of a cluttered Downloads folder and streamline your workflow.
12. Frequently Asked Questions (FAQ)
What if I can’t find the Downloads folder?
If the Downloads folder isn’t visible in Finder, you can easily add it back. Open Finder, click on Finder in the top menu, select Preferences, then under the Sidebar tab, ensure the Downloads box is checked.
Can I change the default download location?
Yes, you can change the default download location for your browsers. Each browser has its own settings page where you can specify a new folder for downloads. Just look under the preferences or settings section of your browser.
Are files deleted from the Downloads folder gone forever?
Not necessarily. If you delete a file from your Downloads folder, it may go to the Trash. Check the Trash icon on your dock; if the file is there, you can simply drag it back to the Downloads folder.
How do I find recently downloaded files?
To find recently downloaded files, open the Downloads folder and sort the files by ‘Date Modified’ to see the latest downloads at the top. You can also use Spotlight by typing “Recently Downloaded” to filter results quickly.
What if I download files directly to an external drive?
If you’ve set your browser to download files directly to an external drive, you’ll need to navigate to that drive in Finder. Make sure the drive is connected, then check the designated folder where your downloads are saved.
How can I recover deleted download files?
If you’ve accidentally deleted files from your Downloads folder, don’t panic. You can restore them from the Trash if you haven’t emptied it yet. Open the Trash, locate your file, right-click on it, and select Put Back. If you’ve emptied the Trash, recovery becomes more complicated, and you might need to use data recovery software or restore from a Time Machine backup if you have one set up.
What should I do if downloads are interrupted?
Interrupted downloads can be frustrating. Typically, your browser will allow you to resume a download if the server supports it. Check your download history or notifications in your browser, and look for an option that says ‘Resume’ next to the interrupted file. If that doesn’t work, you may need to re-download the file and ensure you have a stable internet connection.
13. Advanced Download Management Tips
Once you’re comfortable with the basics of managing downloads on a Mac, you can enhance your efficiency even further with these advanced tips:
- Utilize Download Automation: Consider using automation tools like Automator to create workflows that help you sort and organize downloaded files automatically based on your criteria.
- Schedule Regular Backups: Make it a habit to back up your Downloads folder using Time Machine or another backup service. This way, you’ll have access to important files even if they’re accidentally deleted.
- Use Cloud Services: For files that are critical, consider uploading them to a cloud service like Google Drive or Dropbox immediately after downloading. This ensures that you have access to them from any device and minimal risk of loss.
- Monitor Disk Space: Keep an eye on your disk space usage. If your Downloads folder tends to accumulate large files, frequent monitoring can help you avoid running into storage issues.
14. Comparing Browsers for Download Management
Different web browsers handle downloads in subtly different ways. Understanding these can help you choose the best browser based on your download habits:
- Safari: Apple’s native browser integrates well with macOS, making it easy to access the Downloads folder directly from the browser. It offers a clean interface and simple management options.
- Google Chrome: Known for its extensive extensions, Chrome allows for significant customization. Its download management is robust, with features to pause and resume downloads seamlessly. You can also set it to ask where to save each file before downloading.
- Firefox: Firefox offers solid privacy features and allows users to set specific download locations for different file types. Its download manager is straightforward, and it also supports a variety of add-ons for additional functionality.
Choosing the right browser can make a difference in how efficiently you manage your downloads, so consider what features matter most to you before making a decision.
Finding your downloaded files on a Mac doesn’t have to be a daunting task. By using these twelve methods, you can navigate your system more effectively and ensure quick access to the files you need. Whether you rely on built-in tools like Finder and Spotlight or opt for third-party applications, mastering how to find downloads on Mac is all about knowing where to look and how to search efficiently. With a little organization and the right techniques, you can turn a potentially frustrating experience into a seamless one.
“`
Trending Now
Frequently Asked Questions
Where can I find my downloads on a Mac?
You can find your downloads on a Mac by navigating to the Downloads folder. Open Finder, and in the sidebar, click on the Downloads folder to view all your downloaded files. If you've changed the default location, you may need to check other specified folders.
How do I search for files on my Mac?
To search for files on your Mac, use Spotlight by pressing Command (⌘) + Space. Type the name of the file you are looking for, and Spotlight will display results from your downloads, applications, and documents, making it easy to find what you need.
What is the easiest way to locate downloads on a Mac?
The easiest way to locate downloads on a Mac is to access the Downloads folder via Finder. Alternatively, you can use Spotlight to quickly search for specific files without navigating through folders, making it a convenient option.
How can I sort my downloads on a Mac?
To sort your downloads on a Mac, open the Downloads folder in Finder. You can sort files by date or type by clicking on the column headers in the Finder window, which makes it easier to locate specific files among many.
What if I can't find my downloaded files on Mac?
If you can't find your downloaded files on Mac, check the Downloads folder first. If they’re not there, use Spotlight to search for the file name or type. Additionally, consider checking other folders if the default download location was changed.
Have you experienced this yourself? We’d love to hear your story in the comments.