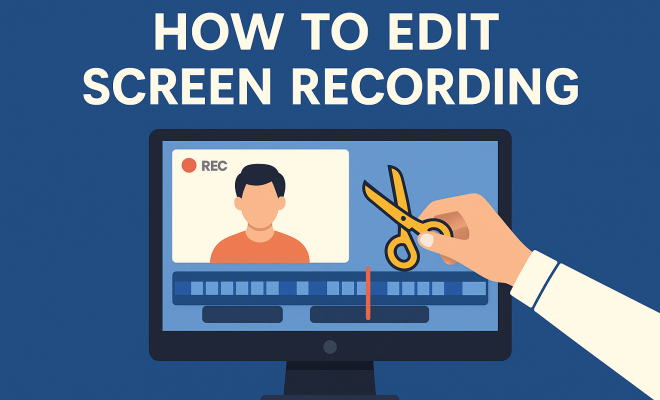
How to edit screen recording
“`html
In today’s digital landscape, screen recordings have become a vital tool for educators, gamers, business professionals, and content creators alike. Whether you’re sharing a tutorial, recording a gameplay session, or conducting a virtual meeting, the ability to edit screen recordings effectively can elevate your content to the next level. If you’ve ever wondered how to edit screen recording footage to make it more engaging and professional, you’re in the right place. Here are seven essential tips to get you started.
1. Choose the Right Editing Software:
The first step in the editing process is selecting an appropriate software that suits your needs. There are many options available, from free tools to premium software, each with its own set of features. Popular choices include:
- iMovie: This is a great option for Mac users, offering intuitive features and seamless integration with macOS.
- Windows Movie Maker: A user-friendly tool for Windows users, though it’s somewhat limited in features.
- Adobe Premiere Pro: A professional-grade software that provides extensive capabilities for more complex projects.
- OBS Studio: Besides screen recording, it offers basic editing features and is completely free.
- Camtasia: Known specifically for screen recordings, it combines recording and editing functionalities in one package.
When deciding on software, consider factors such as your budget, the complexity of your editing needs, and your familiarity with video editing. Each software has its unique advantages, so choose one that aligns with your specific requirements.
2. Organize Your Footage:
Once you have recorded your screen, the next step is to organize your footage. This might seem trivial, but a well-organized project can save you tons of time during the editing process. Start by sorting your clips into folders or bins based on themes, topics, or segments. For instance, if you’re showing different software functionalities, group those clips together. Similarly, label your files descriptively to quickly identify the content later.
Another useful tip is to create a rough outline of your video. This doesn’t have to be detailed, but jotting down key points or segments can help guide your editing, ensuring that you convey your message clearly. Having a roadmap can also help you identify what footage you might still need to film.
3. Trim and Cut Unnecessary Parts:
In screen recordings, it’s common to have excess footage that doesn’t contribute to the final product. Trimming out these unnecessary parts is one of the most crucial steps in editing. You want your final video to be concise and engaging, keeping your audience’s attention from start to finish. Use your editing software to trim beginnings and ends of clips, cutting out any pauses or errors that may have occurred during recording.
Additionally, consider using jump cuts to remove long pauses or filler content. This technique can help maintain a fast-paced rhythm and keep your audience engaged. However, be mindful of how often you cut; too many jump cuts can be jarring. Strive for a balance that maintains a natural flow.
4. Add Captions and Annotations:
Captions and annotations can significantly enhance the clarity of your screen recording. They are particularly useful for tutorials or instructional videos, where viewers may need additional context to understand the visuals on screen. Most editing software allows you to easily add text overlays. You can create captions that summarize key points, introduce new segments, or highlight critical areas on the screen.
Annotations can serve a similar purpose, offering visual cues or prompts that guide the viewer through the video. For example, if you are showing how to navigate a particular software, consider adding arrows or circles to direct attention to specific buttons or features. Just be cautious not to overcrowd the screen; the aim is to clarify, not distract.
5. Incorporate Voiceovers and Background Music:
Voiceovers can add a personal touch to your screen recording, allowing you to explain complex concepts more clearly than text alone. If your recording is instructional, narrating over the footage can enhance understanding. When recording your voiceover, ensure that you use a good quality microphone and record in a quiet environment to minimize background noise. (See: Understanding screen recording technology.)
In addition to voiceovers, background music can set the tone for your video. Choose royalty-free music that complements your content and enhances the viewing experience. Just remember to keep the volume low enough so that it doesn’t overpower your voiceover. The combination of clear narration and suitable music can create an engaging atmosphere that keeps viewers interested.
6. Utilize Transitions Effectively:
Transitions can help your video flow smoothly from one segment to another. While it’s tempting to use flashy transitions, simplicity is often more effective. Fade-ins and fade-outs are classic choices that can make your video feel polished without being distracting. Additionally, you can use cuts or dissolves to transition between sections, especially if they contain different themes or topics.
However, overusing transitions can detract from your message. Aim for consistency in style and only include transitions where they make sense. If you’re shifting from one topic to another, a gentle fade might be more appropriate than a flashy slide transition. Ultimately, the goal is to keep the audience engaged without drawing attention away from the content itself.
7. Export and Optimize for Your Target Platform:
After editing your screen recording, it’s time to export it. Ensure you choose the right format for your target platform. For instance, if you’re uploading to YouTube, MP4 is generally the best format. If you plan to use it on social media, consider shorter clips that are optimized for platforms like Instagram or TikTok. Each platform has its own preferred specifications, so do a bit of research to ensure your video looks its best.
Additionally, don’t forget to optimize your video’s title, description, and tags for searchability. Use the primary SEO keyword “edit screen recording” naturally in your title and description to help it appear in relevant searches. This optimization can make a huge difference in how many people see your content.
8. Seek Feedback and Iterate:
Once you’ve published your edited screen recording, don’t just sit back and relax. Gather feedback from your audience to understand what worked and what can be improved. You can use analytics tools to track viewer engagement, comments, and overall performance. This feedback loop can provide insights into what aspects of your editing resonated and what areas might need refinement.
Don’t hesitate to ask for specific feedback from trusted peers or mentors familiar with digital content creation. Their insights can be invaluable in helping you identify blind spots in your editing process. Use this feedback to refine your skills, and apply what you learn to your next project — each video is an opportunity to improve.
9. Keep Learning and Experimenting:
The world of video editing is vast and constantly evolving. As software updates roll out and new tools emerge, it’s crucial to stay informed about the latest trends and techniques in the industry. Online resources, including tutorials, forums, and courses, can be great ways to expand your knowledge and skillset.
Don’t be afraid to experiment with different editing styles and techniques. Create several versions of your video to see which resonates best with your audience. This willingness to learn and adapt will not only improve your editing but can also keep your content fresh and engaging.
10. Understanding the Importance of Resolution:
Resolution plays a critical role in how your screen recording appears to viewers. Higher resolutions, such as 1080p or even 4K, offer clearer, more detailed visuals but also require more storage space and processing power. On the other hand, lower resolutions might save space but can lead to blurry or pixelated images, detracting from the viewing experience.
When you edit your screen recording, consider the intended audience. If you’re creating content for educational purposes, a higher resolution may be essential to ensure details are clear. For quick social media snippets, 720p might suffice. Always balance quality with practicality to ensure your videos are accessible and engaging.
11. Color Grading and Correction:
Color grading is an often-overlooked aspect of video editing that can significantly improve your screen recordings. By adjusting colors, contrast, and brightness, you can enhance the overall aesthetic of your video. For instance, softening harsh colors or adding a slight tint can make your video feel more professional and cohesive. (See: Tips for creating effective videos.)
Most editing software has built-in tools for color correction, allowing you to tweak the footage without extensive training in color theory. If you’re unsure where to start, consider watching online tutorials specifically focused on color grading for screen recordings. It’s a skill that can dramatically change the viewer’s experience and perception of your content.
12. Creating Thumbnails and Titles:
Once your screen recording is edited, the next step is to create an engaging thumbnail and title. Both are critical for attracting viewers, especially on platforms like YouTube. Your thumbnail should be eye-catching, relevant, and accurately reflect the video content. Consider using bold text, striking colors, and images that represent key moments from your video.
Titles should be descriptive and include relevant keywords, including “edit screen recording” to improve searchability. It’s essential to strike a balance between being informative and intriguing, so viewers feel compelled to click on your video. Researching successful titles in your niche can provide inspiration and help you craft titles that resonate with your target audience.
13. FAQs on Editing Screen Recordings:
What is the best format to export my screen recording?
The most common and recommended format for exporting screen recordings is MP4. This format provides good quality while maintaining a manageable file size, making it suitable for most platforms like YouTube, Vimeo, and social media sites.
How do I add music to my screen recording?
To add music, import the audio file into your editing software and drag it to the timeline beneath your video track. Adjust the audio levels to ensure that the music doesn’t overpower your voiceover or other audio elements in your recording.
Can I edit screen recordings on my phone?
Yes! There are several mobile apps available for editing screen recordings, including iMovie for iOS and PowerDirector for Android. While mobile editing may be more limited than desktop software, many apps offer sufficient features for basic editing.
How can I make my screen recordings more engaging?
To make your screen recordings more engaging, focus on clear narration, use visuals like annotations and captions, and consider pacing your content effectively. Incorporating a mix of audio and visual elements can help maintain viewer interest.
Is it necessary to have a script for my screen recording?
While not mandatory, having a script can enhance the clarity and flow of your screen recording. It helps you stay on topic and cover all necessary points without rambling or losing your train of thought.
14. Advanced Editing Techniques:
If you’re looking to take your editing skills to another level, consider exploring advanced techniques that can make your screen recording stand out. For instance, you can use motion graphics to create dynamic visuals that enhance your storytelling. Tools like Adobe After Effects allow you to add animated elements that can draw attention to important information or highlight key features in your recording.
Another powerful technique is creating a split-screen effect, which can be particularly useful in tutorials. This allows viewers to see both the screen activity and the presenter simultaneously, making your video more interactive and engaging. This method works well for Q&A sessions or when demonstrating software while providing a personal touch through face-to-camera interactions. (See: Tips for effective screen recordings.)
15. Statistics on Screen Recording Usage:
Understanding the broader context of how screen recordings are being utilized can give you insights into best practices and trends. According to a survey conducted by Wistia, video content, including screen recordings, is shared 1,200% more times than text and images combined. This statistic underlines the importance of engaging video content in today’s digital communication landscape.
Moreover, studies indicate that 64% of viewers are more likely to buy a product online after watching a video about it. This highlights the effectiveness of screen recordings in marketing and educational contexts. By mastering the art of editing screen recordings, you’re not just creating content; you’re enhancing communication and increasing engagement across various platforms.
16. Real-World Examples of Effective Screen Recordings:
Looking at successful examples can provide inspiration and ideas for your own screen recordings. For instance, educational platforms like Khan Academy utilize screen recordings effectively to explain complex subjects. Their clear, concise editing style, combined with engaging visuals and narrations, creates content that is not only informative but also enjoyable to watch.
Gaming tutorials on YouTube demonstrate another effective use of screen recordings. Channels like PewDiePie and Markiplier have mastered the blend of humor and gameplay, using editing techniques like jump cuts, humorous annotations, and dynamic transitions to keep viewers engaged. Observing how they edit their videos can provide valuable lessons on pacing and audience engagement.
17. Common Pitfalls to Avoid:
As you learn to edit screen recordings, being aware of common mistakes can help you improve faster. One frequent pitfall is neglecting audio quality. Poor sound can ruin even the best visuals. Always prioritize clear audio, using high-quality microphones and ensuring that background noise is minimized. Additionally, watch out for over-editing, which can make your videos feel choppy and disjointed. Aim for a natural flow that enhances the story rather than detracting from it.
Another common mistake is failing to tailor your content for the platform it will be shared on. Different platforms have distinct audience expectations and formatting requirements. For example, shorter, punchier videos tend to perform better on TikTok, while longer, in-depth tutorials are more suited for YouTube. Always align your editing style with the expectations of your target audience.
Editing screen recordings doesn’t have to be a daunting task. By following these essential tips and practicing regularly, you’ll be well on your way to producing high-quality, engaging videos that effectively communicate your message. Whether you’re creating tutorials, recordings for presentations, or gaming content, mastering the art of editing will undoubtedly enhance your digital storytelling skills.
“`
Trending Now
Frequently Asked Questions
What is the best software to edit screen recordings?
The best software for editing screen recordings depends on your needs. Popular options include iMovie for Mac users, Windows Movie Maker for beginners, Adobe Premiere Pro for advanced editing, OBS Studio for free basic editing, and Camtasia for integrated recording and editing.
How do I organize my screen recording footage?
To organize your screen recording footage, sort your clips into folders or bins based on themes or topics. This practice streamlines the editing process, making it easier to locate specific segments, especially when demonstrating different software functionalities.
Can I edit screen recordings for free?
Yes, there are free editing software options available for screen recordings. OBS Studio and Windows Movie Maker are popular choices that offer basic editing features without any cost, making them accessible for beginners.
What features should I look for in screen recording software?
When choosing screen recording software, consider features like ease of use, editing capabilities, compatibility with your operating system, and your budget. Look for software that offers tools suited to your editing complexity, such as transitions, effects, and audio editing.
How can I make my screen recordings more engaging?
To make your screen recordings more engaging, focus on effective editing techniques such as adding annotations, transitions, background music, and trimming unnecessary footage. Organizing your content clearly and presenting it in a visually appealing manner can also enhance viewer engagement.
What did we miss? Let us know in the comments and join the conversation.