How to Dry Wood for Woodworking: 7 Steps

Woodworking is a skill that requires patience, precision, and knowledge. One of the most important aspects of woodworking is working with properly dried wood. Using wet or improperly dried wood can lead to warping, cracking, and even structural failure in your finished projects. In this article, we’ll go through a step-by-step guide on how to dry wood for woodworking.
Step 1: Choose the right wood
Selecting the right type of wood for your project plays a crucial role in successful drying. Choose wood that is relatively free from knots, checks, and other defects. Hardwoods like oak, maple, and cherry tend to be more resistant to warping and shrinking compared to softwoods like pine and cedar.
Step 2: Cut and stack the wood
Cut the wood into your desired thickness and length, making sure each piece has enough room to dry on all sides when stacked. Stack the cut pieces by placing spacers or stickers (small strips of wood) between each layer at even intervals, allowing for airflow around all surfaces.
Step 3: Choose your drying method
There are two common methods of drying wood: air-drying and kiln-drying. Air-drying is more cost-effective but can take several months or even years depending on the thickness of the wood and local climate conditions. Kiln-drying uses heat inside an industrial oven or home-built kiln to quickly remove moisture from the wood and can take days or weeks instead.
Step 4: Monitor moisture content
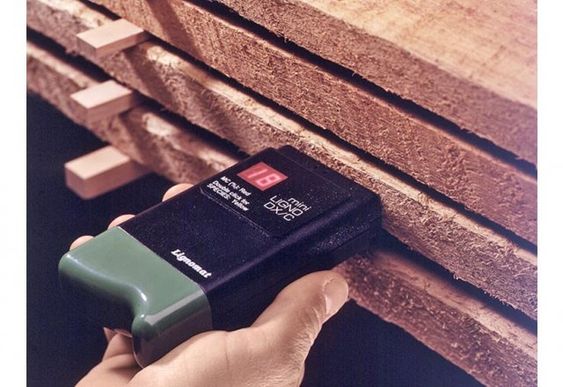
Use a moisture meter to check the moisture content of your wood regularly throughout the drying process. The ideal moisture content for most woodworking projects is around 6-8%. Checking regularly will help you determine when it’s time to stop drying your pieces.
Step 5: Allow for equalization
Once your wood reaches the desired moisture content, it’s essential to let it equalize by leaving it stacked in the same drying environment for a couple of weeks. This allows the moisture content across the entire piece to stabilize, reducing the chance of warping or cracking
Step 6: Protect the wood
Sealing the ends of your wood pieces with a commercial end-grain sealer or wax helps prevent over-drying and splitting. Additionally, store your dried wood in a stable, indoor environment with consistent temperature and humidity levels to avoid swelling or shrinking after drying.
Step 7: Prepare for your woodworking project
Once your wood has been properly dried and equalized, it’s ready for use in your woodworking project. Always remember to acclimate the wood to your workshop’s conditions by allowing it to sit for at least a few days before beginning any cutting or assembly work.
By following these seven steps, you’ll be well on your way to creating beautiful and long-lasting woodworking pieces using properly dried wood. Happy woodworking!


