How to draw in Google Keep
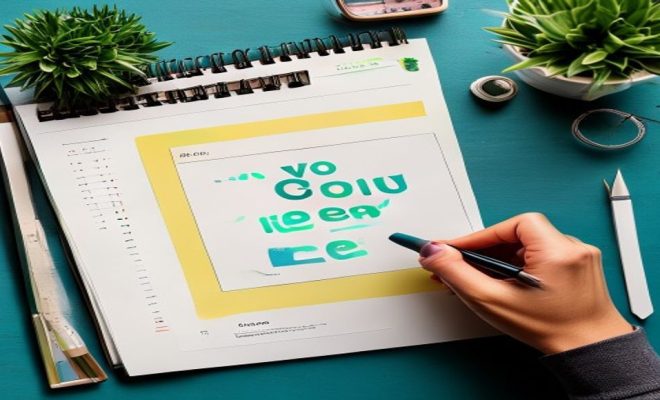
Google Keep, for many of us, is that digital sticky note app we turn to for quick reminders, grocery lists, or jotting down fleeting ideas. It’s incredibly handy for capturing text, sure, but what if I told you it holds a surprisingly robust, if understated, feature for visual thinkers and doodlers? We’re talking about the ability to draw directly within your notes. Learning how to draw in Google Keep can genuinely transform how you capture and organize information, turning simple notes into richer, more expressive canvases.
Think about it: sometimes words just don’t cut it. A quick sketch can convey a complex idea faster than a paragraph of text. A diagram helps visualize a process. A doodle can make a mundane list memorable. This feature isn’t just a gimmick; it’s a powerful tool for visual learners, designers, students, or anyone who finds themselves grabbing a pen and paper to illustrate a point. Google Keep’s drawing capabilities are integrated seamlessly, making it accessible whether you’re on your phone, tablet, or even a desktop with a touchscreen. Let’s dive into how you can harness this often-overlooked creative side of your favorite note-taking app.
1. Getting Started on Mobile: Android and iOS Devices
The mobile experience is arguably where Google Keep’s drawing feature shines brightest, especially on devices with styluses like the Samsung S Pen or Apple Pencil. To start a drawing note on your smartphone or tablet, simply open the Google Keep app. You’ll see a small ‘plus’ icon at the bottom right corner, which is your standard ‘create new note’ button. Right next to it, or sometimes within the ‘plus’ menu, you’ll find an icon that looks like a pen or a squiggly line. Tap that, and you’re instantly in drawing mode.
Once you’ve tapped the drawing icon, Keep presents you with a blank canvas. It’s clean and uncluttered, designed for immediate use. You’ll notice a toolbar at the top of the screen that houses all your drawing tools. This intuitive layout means you’re not fumbling through menus; everything you need is right there, ready for you to start sketching your ideas, diagrams, or even just some playful doodles. It’s a remarkably quick way to go from thought to visual representation.
2. Navigating the Drawing Toolbar: Your Creative Arsenal
The drawing toolbar in Google Keep is surprisingly comprehensive for a note-taking app. It typically features several key tools: a pen, a marker, and a highlighter. Each of these isn’t just a different stroke; they offer distinct visual effects. The pen gives you a fine, precise line, perfect for detailed sketches or writing. The marker provides a thicker, more opaque stroke, great for bolding elements or filling in areas. And the highlighter, as you’d expect, offers a translucent wash of color, ideal for emphasizing text or parts of your drawing without obscuring what’s underneath.
Beyond the different types of writing instruments, you also get a palette of colors and several line thickness options for each tool. This flexibility allows for a good degree of customization in your drawings. Need a thin red line for an annotation? No problem. Want a thick blue marker for a flow chart? Easy. There’s also an eraser tool, which is crucial for correcting mistakes or refining your artwork. It functions like a real eraser, removing strokes as you drag it across the canvas, making the process feel natural and forgiving.
3. Drawing on the Web Interface: A Different Flavor
While the mobile experience is optimized for touch and stylus input, you can absolutely learn how to draw in Google Keep on the web interface as well. It’s a bit different, as most desktop users don’t have touchscreens or styluses. To start a drawing note on the web, go to keep.google.com. You’ll see the ‘Take a note…’ input field. Look for the drawing icon (again, often a pen or squiggly line) which might be next to the new note field or under the ‘More’ options (three dots).
Once you click the drawing icon, a new note will open with a drawing canvas. You’ll find a similar, though perhaps slightly more condensed, toolbar at the top. You’ll use your mouse or trackpad to draw, which can feel less precise than a stylus, but it’s still perfectly functional for simple diagrams, arrows, or quick sketches. For those with touch-enabled laptops or external drawing tablets, the experience on the web can be quite similar to mobile, offering a larger canvas to work on.
4. Integrating Drawings with Text: The Best of Both Worlds
One of the true strengths of Google Keep’s drawing feature is its seamless integration with text. When you create a drawing note, you’re not just limited to the canvas; you can also add a title and traditional text below or above your drawing. This hybrid approach is incredibly powerful. Imagine sketching out a flowchart for a project and then adding detailed explanations in text underneath. Or drawing a quick map and then listing directions.
This ability to combine visual and textual information in a single note makes Google Keep an even more versatile tool for brainstorming, planning, and learning. You can draw a diagram for a concept and then elaborate on its nuances with bullet points. It’s like having a whiteboard and a notepad all rolled into one, allowing you to capture ideas in the format that best suits them, enhancing comprehension and recall. (See: visual learning concepts.)
5. Erasing and Undoing: Correcting Your Artistic Endeavors
No artist, digital or otherwise, gets it right on the first try every time. Thankfully, Google Keep provides essential tools for correction. The eraser tool, as mentioned, lets you selectively remove parts of your drawing. It’s a ‘smart’ eraser in that it often removes entire strokes rather than just pixels, making cleanup quick and efficient. This can be a lifesaver when you’ve made a sweeping mistake or just want to refine a shape.
Beyond the eraser, you’ll also find an ‘undo’ and ‘redo’ button, usually represented by curved arrows. These are your best friends for quick fixes. Made a line too long? Hit undo. Accidentally erased something important? Hit redo. These functions allow for experimentation without fear of permanent mistakes, fostering a more fluid and less stressful drawing experience. They’re standard features in any drawing application, and their inclusion here speaks to the thought Google put into making this a genuinely useful tool.
6. Adding Images and Grabbing Text from Drawings
Google Keep also offers some surprisingly advanced features related to images and drawings. You can, for instance, add existing images to your notes, which can then serve as a backdrop for your drawings or annotations. This is incredibly useful for marking up screenshots, photos, or diagrams you’ve imported.
Perhaps even more impressive is Keep’s ability to ‘grab image text.’ If you’ve drawn something with text in it – say, a handwritten diagram with labels – Google Keep can often use its optical character recognition (OCR) technology to extract that handwritten text and convert it into editable digital text. This is a huge productivity booster, bridging the gap between your freehand sketches and searchable, shareable digital content. It means your scribbled notes aren’t just pretty pictures; they can become actionable data.
7. Organizing and Sharing Your Visual Notes
Like any other note in Google Keep, your drawings can be organized, labeled, and shared. You can add labels to categorize your visual notes (e.g., ‘project ideas,’ ‘meeting diagrams,’ ‘creative sketches’), making them easy to find later using Keep’s search function. Color-coding your notes also helps with visual organization, allowing you to quickly identify types of notes at a glance.
Sharing is just as straightforward. You can easily send your drawing notes to collaborators, colleagues, or friends directly from the app. This makes it a fantastic tool for remote teams, students working on group projects, or anyone who needs to quickly share a visual idea. The drawing retains its integrity when shared, ensuring that your visual message comes across exactly as intended, whether they open it in their Keep app or on the web.
8. Use Cases and Practical Applications for Drawing in Keep
Knowing how to draw in Google Keep isn’t just about creating pretty pictures; it opens up a world of practical applications. For students, it’s perfect for sketching out mind maps during lectures, diagramming scientific processes, or annotating study materials. Professionals can use it for quick wireframes, flowcharts, brainstorming sessions, or visually explaining complex concepts to colleagues.
Even for personal use, the possibilities are vast. You can sketch out home renovation ideas, plan garden layouts, design simple logos, or even just doodle to relax. It’s particularly useful for visual thinkers who find traditional text notes limiting. The tactile feel of drawing, especially with a stylus, can also aid memory and creativity, making your notes more engaging and effective.
9. Tips and Tricks for Maximizing Your Drawing Experience
To get the most out of drawing in Google Keep, consider a few tips. First, if you’re on a mobile device, experiment with different styluses. Even a basic capacitive stylus can offer more precision than a finger. Second, don’t be afraid to use the different pen types and colors. Varying your strokes and hues can make your diagrams clearer and more engaging. Try using the highlighter to draw transparent overlays on images you’ve imported.
Also, remember that your drawing canvas isn’t infinite, but you can scroll within it if your sketch gets too large. And always title your drawing notes clearly so they’re easy to find later. Finally, practice! Like any creative endeavor, the more you draw, the more comfortable and proficient you’ll become. Google Keep isn’t a professional art studio, but it’s an excellent, accessible tool for bringing your visual ideas to life within your daily note-taking workflow. It’s a reminder that sometimes, the simplest tools hold the greatest hidden potential for creativity and productivity.
10. The Cognitive Benefits of Visual Note-Taking
Beyond just being a practical tool, drawing in Google Keep taps into some fundamental aspects of how our brains process and retain information. There’s a growing body of research highlighting the cognitive benefits of visual note-taking. When you draw, you’re engaging multiple areas of your brain simultaneously: visual, spatial, and motor cortexes. This multi-modal engagement can significantly boost memory recall compared to just writing text.
Think about the “picture superiority effect” – the idea that concepts learned by viewing pictures are more easily and accurately recalled than concepts learned by reading words. By sketching out a concept, you’re essentially creating a personalized visual cue that’s deeply embedded in your memory. This is why students who doodle during lectures often remember more, not less. It’s not a distraction; it’s an active form of processing. Google Keep makes this accessible to everyone, without needing a dedicated sketchbook or fancy software. It turns passive information consumption into active creation, leading to better understanding and retention. (See: mental health and creativity.)
11. Comparing Keep’s Drawing to Dedicated Drawing Apps
It’s important to set expectations for Google Keep’s drawing capabilities. While surprisingly robust for a note-taking app, it’s not trying to compete with dedicated digital art studios like Procreate, Adobe Fresco, or even more advanced note-taking apps with extensive drawing features like GoodNotes or Notability. Those apps offer layers, advanced brush customization, vector drawing, and far more sophisticated editing tools.
Google Keep’s strength lies in its simplicity and integration. It’s for quick sketches, functional diagrams, and visual annotations, not for producing gallery-worthy artwork. It focuses on speed and utility within your existing Google ecosystem. The learning curve is almost nonexistent, which means you can jump right in and start drawing without watching tutorials. This makes it perfect for those moments when an idea strikes and you need to capture it visually, right now, without opening a separate, complex application. It’s the digital equivalent of grabbing a pen and the nearest napkin.
12. Enhancing Collaboration with Visuals
Google Keep is already a fantastic tool for collaboration, letting you share notes and lists with others in real-time. Adding drawings into the mix amplifies this collaborative power. Imagine you’re brainstorming a new website layout with a colleague. Instead of trying to describe complex UI elements in text, you can quickly sketch out wireframes directly in a Keep note.
Both of you can then annotate the drawing, adding arrows, circles, and text comments to refine the design. This visual back-and-forth is far more efficient and less prone to misinterpretation than purely text-based communication. For project managers, it can mean quickly sketching a Gantt chart or workflow diagram. For educators, it allows students to collaboratively draw concept maps or illustrate answers. The shared visual canvas becomes a dynamic space for collective idea generation and problem-solving, breaking down barriers that text-only communication sometimes creates.
13. Accessibility and Inclusivity of Drawing in Keep
Another often-overlooked aspect is how drawing in Google Keep can improve accessibility. For individuals who struggle with typing or expressing themselves purely through text, visual communication can be a lifeline. This could be due to learning differences, language barriers, or physical limitations. A quick drawing can sometimes communicate a need or an idea more effectively than struggling to type out words. We covered top organization apps in more detail.
Furthermore, visual notes cater to different learning styles. Not everyone is a textual learner. Many people are visual or kinesthetic learners who benefit greatly from seeing and doing. By offering a drawing option, Google Keep becomes a more inclusive tool, supporting a wider range of communication and learning preferences. It ensures that more users can engage with and benefit from digital note-taking, making information capture a less daunting task for diverse audiences.
14. Future Possibilities and AI Integration
While Google Keep’s drawing feature is currently focused on basic sketching, it’s exciting to consider its future potential, especially with advancements in AI. Google is a leader in AI and machine learning, and we’ve already seen how Keep uses OCR for handwritten text. What if this capability expands?
Imagine drawing rough shapes and Keep automatically smoothing them into perfect circles or squares, or even recognizing a hastily drawn arrow and snapping it to an ideal vector. Could you sketch a few elements of a flowchart and have Keep suggest connections or complete the diagram? Perhaps AI could help organize your drawings by recognizing common objects or themes within your sketches. This isn’t science fiction; it’s the natural progression of intelligent features. While these are speculative, the foundation is already there, making Keep’s drawing feature one to watch for future enhancements.
Frequently Asked Questions About Drawing in Google Keep
Q1: Can I draw on existing text notes in Google Keep?
A: Yes! While you can start a note directly in drawing mode, you can also convert an existing text note into a drawing note. Just open the text note, tap the three dots (More options), and look for an option like “Add drawing” or “Show drawing canvas.” This lets you add a drawing above your existing text, combining both forms of information.
Q2: Is there a way to resize my drawing after I’ve made it?
A: Unfortunately, Google Keep’s drawing feature is quite basic. Once you’ve drawn something, you can’t typically select and resize individual strokes or the entire drawing as a single object. You’ll need to use the eraser to remove parts you want to change and redraw them. This is one of the key differences between Keep and more advanced drawing or note-taking apps. (See: impact of drawing on learning.)
Q3: Can I change the background color of my drawing canvas?
A: No, the drawing canvas itself always remains white. However, you can change the background color of the entire Google Keep note, which will affect the area around your drawing. This is done by tapping the palette icon when viewing or editing a note.
Q4: What if I accidentally close a drawing note before saving it?
A: Google Keep automatically saves your notes as you create or edit them, including drawings. There isn’t a manual “save” button. So, if you accidentally close the app or navigate away, your drawing progress should be preserved when you reopen the note.
Q5: Can I import images into my drawing and then draw on them?
A: Yes, absolutely! This is one of the most powerful features. When creating or editing a note, you can add an image using the “Add image” option. Once the image is in the note, you can then switch to drawing mode, and your drawing canvas will appear *above* the image, allowing you to annotate, highlight, or draw directly on top of it. This is great for marking up screenshots or photos.
Q6: Does Google Keep’s OCR for handwritten text work with all handwriting styles?
A: Google Keep’s OCR is quite good, but its accuracy can vary depending on the legibility of your handwriting. Clear, neat handwriting will yield the best results. Very messy or stylized handwriting might be difficult for the OCR to interpret correctly. It’s a fantastic feature, but it’s not foolproof for every scribble.
Q7: Can I use different pressure sensitivities with a stylus in Google Keep?
A: Google Keep’s drawing tools generally don’t support pressure sensitivity. The line thickness is determined by your selection in the toolbar, not by how hard you press your stylus. While it might feel slightly different with a pressure-sensitive stylus, the software won’t interpret varying pressure for line thickness or opacity. This keeps the experience consistent across all devices, regardless of stylus capabilities.
Q8: How do I get my drawings out of Google Keep if I want to use them elsewhere?
A: The easiest way to export your drawing is to open the note, then take a screenshot of the drawing area on your device. Alternatively, you can share the note with yourself via email or another app, and the drawing will often be included as an image within that share. Google Keep doesn’t offer a direct “export drawing as image” feature, but these workarounds are effective.
So, next time you open Google Keep, don’t just reach for the keyboard. Tap that little pen icon and see where your imagination takes you. You might be surprised at how much richer your notes become, and how much easier it is to communicate those tricky, visual-heavy ideas. It’s a small feature, but one that can make a big difference.
Trending Now
Frequently Asked Questions
How can I draw in Google Keep?
To draw in Google Keep, open the app on your mobile device and tap the '+' icon to create a new note. Then, select the drawing icon, which resembles a pen or squiggly line, to access the drawing mode. You’ll find a blank canvas and a toolbar with various drawing tools at the top.
What devices support drawing in Google Keep?
Google Keep's drawing feature is available on mobile devices, including Android and iOS smartphones and tablets. It works particularly well with devices that have styluses, such as the Samsung S Pen or Apple Pencil, enhancing the drawing experience.
Can I use Google Keep for sketches and diagrams?
Yes, Google Keep is ideal for sketches and diagrams. Its drawing feature allows users to create quick sketches, diagrams, or doodles directly within notes, making it a valuable tool for visual learners and anyone looking to illustrate ideas quickly.
Is Google Keep suitable for visual learners?
Absolutely! Google Keep's drawing capabilities cater to visual learners by enabling them to express ideas through sketches and diagrams. This feature enhances note-taking by allowing users to combine text with visual elements, making information easier to understand and remember.
How do I access the drawing tools in Google Keep?
To access drawing tools in Google Keep, create a new note by tapping the '+' icon. Then, select the drawing icon, which leads you to a blank canvas. At the top of the screen, you'll find a toolbar containing various drawing tools to customize your sketches.
What did we miss? Let us know in the comments and join the conversation.