How to Cure Cast Iron

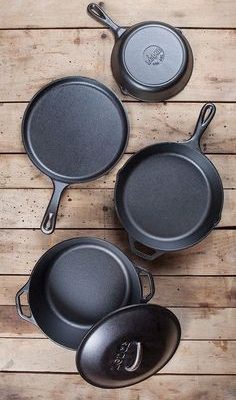
Cast iron is a popular choice for cookware due to its durability, even heating, and ability to hold heat for long periods. However, cast iron requires proper care and maintenance to ensure it lasts a lifetime. Curing, also known as seasoning, is an essential process that helps protect your cast iron from rust and develops a non-stick surface. This article will guide you through the process of curing your cast iron cookware with easy and actionable steps.
Step 1: Clean Your Cast Iron
Before curing your cast iron skillet or grill, it’s important to thoroughly clean it. If you have purchased a new cast iron piece, remove any packaging materials or stickers, then wash the cookware with warm soapy water and a sponge. For older cast iron pieces that need re-seasoning, scrub off any rust or stuck-on food particles using a brush or steel wool—then follow up with warm soapy water. Make sure to dry it completely with a clean cloth or paper towel before proceeding.
Step 2: Preheat Your Oven
Preheat your oven to 350°F (175°C) in preparation for the curing process. You can also use the stovetop method if you prefer, but using an oven provides more uniform heat and is the most recommended method.
Step 3: Apply Oil
Once your cast iron is dry, use a clean cloth or paper towel to apply a thin layer of vegetable oil or flaxseed oil evenly over the entire surface of the cookware—both inside and out. Ensure that all areas are covered but avoid using too much oil; otherwise, it could leave sticky residue after curing.
Step 4: Place in Oven
Put your cast iron on the middle rack of the preheated oven upside down so that any excess oil can drip off during the curing process. Place a foil-covered baking sheet or another piece of cookware below it to catch any drippings. Close the oven and let it cure for one hour.
Step 5: Cool Off
After an hour, turn off your oven and allow the cast iron to cool down inside. Wait until it’s cooled enough to handle safely before taking it out. Your cookware should now have a slightly glossy, protective layer that helps form a non-stick surface when cooking.
Step 6: Repeat If Necessary
If you want to build up an even stronger seasoning on your cast iron, you can repeat steps 3 to 5 a few times to create multiple layers of this protective coat.
Step 7: Maintenance
Now that your cast iron is cured, regular maintenance is crucial to keep it in optimal condition. After each use, clean your cookware with warm water and minimal soap—then dry thoroughly. Avoid soaking cast iron in water or placing it in the dishwasher. Occasionally, you may need to re-season your cast iron following the same steps above.
In conclusion, by following these simple steps, you can effectively cure your cast iron cookware and ensure it lasts for generations. The properly seasoned surface will enhance the overall functionality of your cookware and make cooking all your favorite recipes a pleasure.


