How to create WordPress menu
“`html
Creating a menu in WordPress is more than just a simple task; it’s a vital part of your website’s architecture that can significantly affect user experience and navigation. A well-structured menu helps visitors find what they’re looking for quickly, which can lead to longer site visits and higher conversion rates. In this article, we will explore how to create a WordPress menu step-by-step, discussing the various types of menus, customization options, and best practices to ensure your menu is effective and user-friendly.
1. Understanding WordPress Menus
Before diving into how to create a WordPress menu, it’s essential to understand what menus are and their significance. In WordPress, a menu is a navigational tool that allows users to move between pages, posts, categories, and custom links on your website.
Menus can be horizontal or vertical, typically located at the top of a site, in a sidebar, or footer. WordPress allows for multiple menus, enabling users to customize navigation based on various needs, such as a primary menu, a footer menu, or a social media menu.
2. Preparing Your Site for Menu Creation
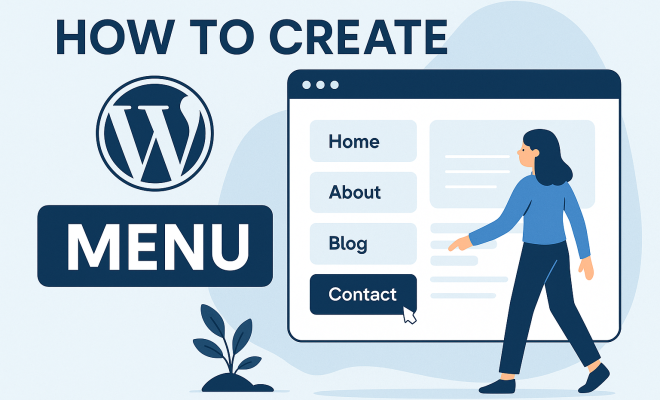
Before you create a WordPress menu, ensure your website is ready for navigation. This means having your pages and posts set up. Determine which pages you want to include in your menu. Common choices are:
- Home
- About Us
- Contact
- Blog
- Services
Having a clear idea of your website’s structure will make the menu creation process smoother. Also, make sure to consider your target audience; knowing what your visitors are looking for will help you design a menu that meets their needs effectively.
3. Accessing the Menu Settings in WordPress
To create a WordPress menu, you first need to access the menu settings. Log into your WordPress dashboard and navigate to Appearance > Menus. This section gives you access to all your menu settings.
If you’re creating a new menu, click on the Create a new menu link. Name your menu something relevant, like ‘Main Navigation’ or ‘Footer Menu,’ depending on its intended use. Once you’ve named it, click the Create Menu button.
4. Adding Items to Your Menu
Once your menu is created, the next step is to add items. On the left side of the Menus page, you’ll see several boxes containing different sections: Pages, Posts, Custom Links, and Categories.
To add an item, simply check the box next to the page or post you want and click the Add to Menu button. The selected item will appear in the right panel. You can also add custom links by entering the URL and link text in the Custom Links section. This is particularly useful for external links or specific anchors within your site.
5. Organizing Your Menu Structure
After adding items to your menu, it’s time to organize them. You can drag and drop items to reorder them according to your preferences. A good menu structure is hierarchical; consider grouping related items under a parent menu item. (See: Understanding website navigation principles.)
To create a dropdown menu, arrange a sub-item slightly to the right underneath its parent item. This visual hierarchy helps users quickly identify related pages and can significantly enhance usability.
6. Customizing Your Menu Appearance
WordPress themes often allow for various levels of menu customization. For instance, while some themes support background colors, fonts, and hover effects, others may have more limited options. To customize the appearance of your menu, go to Appearance > Customize and look for menu styling options.
Consider how the menu fits within your overall site design. The colors and fonts of the menu should align with your branding for a cohesive look. Pay attention to the mobile version of your menu too—ensure it’s responsive and easy to navigate on smaller screens.
7. Setting a Menu Location
Once you’ve organized and customized your menu, it’s crucial to assign it to a specific location. Most WordPress themes offer predefined menu locations, such as a primary menu location, footer menu, or social menu.
Select the appropriate location for your menu by checking the box next to the desired location within the Menu Settings area. For example, if you’re creating a primary navigation menu, select the corresponding location and hit Save Menu to finalize your changes.
8. Adding Advanced Menu Features
For users looking to enhance their menus even further, WordPress offers several advanced features. One popular option is to create mega menus, which allow for larger dropdowns containing multiple columns of links. This is particularly beneficial for e-commerce sites or any website with extensive content.
To create a mega menu, you’ll usually need a compatible theme or a plugin. Plugins like Max Mega Menu enable this functionality, allowing you to customize the layout and appearance of your mega menu easily. Don’t forget to test its functionality, ensuring that it enhances rather than complicates the user experience.
9. Testing and Optimizing Your Menu
After creating your WordPress menu, it’s vital to test its usability thoroughly. Check how it appears across various devices and screen sizes. Ask yourself questions: Is it easy to navigate? Do users have trouble finding important pages? Consider conducting user testing by gathering feedback from actual users.
Moreover, keep an eye on analytics to see how visitors interact with your menu. Tools like Google Analytics can show you which pages are most visited, helping you adjust the menu for enhanced performance. If certain links aren’t being clicked, consider reordering or removing them to streamline the experience.
10. Maintaining Your WordPress Menu
Creating your menu is just the beginning. Regular maintenance is necessary to keep it effective. As your site grows, you may want to add new pages or remove outdated links. Make it a routine to review your menu periodically and adjust it according to your site’s evolving needs. (See: Best practices for website design.)
Additionally, keep an eye on design trends and user feedback, as these can inspire menu updates that enhance user satisfaction. In summary, a well-structured, user-friendly WordPress menu can make a significant difference in how users experience your site, leading to greater engagement and success.
11. The Importance of Accessibility in Menu Design
When creating a WordPress menu, accessibility should be a top priority. An accessible menu is not just a legal requirement in many places; it also enhances the user experience for all visitors, including those with disabilities. Here are some strategies to enhance menu accessibility:
- Keyboard Navigation: Ensure that all menu items can be navigated using a keyboard. This is crucial for users who cannot use a mouse.
- Screen Reader Compatibility: Use proper HTML semantic elements so that screen readers can accurately convey the structure and purpose of menu items.
- Color Contrast: Ensure there’s sufficient contrast between the background and text colors, making it easier for users with visual impairments to read menu items.
- Aria Attributes: Implement ARIA roles and attributes to provide additional context to assistive technologies.
By integrating these practices, you not only comply with regulations but also create a more pleasant experience for all users.
12. SEO Considerations for Your WordPress Menu
Your WordPress menu can play a significant role in your site’s SEO. Here are a few ways to ensure that your menu helps improve your search engine rankings:
- Keyword-Rich Menu Items: Use relevant keywords in your menu item titles. This can help search engines understand the structure of your site and the content that users can expect.
- Link Structure: Ensure that the links in your menu follow a logical structure that makes it easier for search engines to crawl your site.
- Breadcrumbs: Implement breadcrumb navigation in conjunction with your main menu to give users and search engines clear context about their location on your site.
- Keep it Simple: A cluttered menu can confuse both users and search engines. Stick to a simple, logical structure that prioritizes your most important content.
By considering these SEO factors, you can enhance your site’s visibility and usability simultaneously.
13. Examples of Effective WordPress Menus
Sometimes the best way to learn is through examples. Here are a few websites that showcase effective WordPress menu designs:
- Astra: The Astra WordPress theme features a clean, responsive menu that adapts seamlessly across devices. Its dropdown options are clear and easy to navigate.
- WWF (World Wildlife Fund): The WWF website uses a mega menu to display various categories and subcategories, making it easy for visitors to find specific information about their initiatives.
- Neve: Neve’s menu is minimalistic yet functional, with smooth animations that provide feedback on user actions. It focuses on speed and simplicity, crucial for enhancing user experience.
By examining these examples, you can gain insights into best practices and design elements that could work for your own WordPress menu.
14. FAQs About Creating WordPress Menus
What if I want to create multiple menus in WordPress?
You can create multiple menus in WordPress by following the same steps for creating your initial menu. After naming and saving each menu, you can assign them to different locations in your theme.
Can I add icons to my WordPress menu items?
Yes! You can add icons to your menu items using custom HTML or by using plugins that support icons. Plugins like Menu Icons by ThemeIsle make it easy to add icons next to menu items.
How do I create a sticky menu in WordPress?
A sticky menu remains visible as users scroll down the page. You can achieve this effect by using a plugin like Sticky Menu (or anything on Scroll) or by adding custom CSS to your theme’s stylesheet.
What are the best practices for mobile menus?
For mobile menus, consider using a hamburger menu icon to save space. Ensure that touch targets are large enough for easy tapping, and maintain a simple, straightforward structure to avoid overwhelming users.
Are there any plugins to enhance my WordPress menus?
Absolutely! Several plugins can enhance your WordPress menus, such as Max Mega Menu for complex layouts, WP Responsive Menu for mobile menus, and UberMenu for advanced customization options.
How often should I update my WordPress menu?
It’s a good idea to review and update your menu at least every few months or whenever you add new pages, services, or blog posts. This keeps your navigation relevant and user-friendly.
15. Common Mistakes to Avoid When Creating WordPress Menus
Creating a WordPress menu can be straightforward, but there are common pitfalls you should be aware of. Avoid these mistakes to enhance usability:
- Overcomplicating the Structure: While it might be tempting to include every page and sub-page in your menu, this can overwhelm users. Aim for simplicity and clarity.
- Neglecting Mobile Users: Ensure that your menu is just as functional on mobile devices. Poorly designed mobile menus can lead to frustration and increased bounce rates.
- Ignoring Analytics: After your menu goes live, don’t forget to track user interactions. Data can reveal which links are performing well and which ones may need revising.
- Failing to Update: As your content evolves, so should your menu. Regularly revisit your menu to ensure it accurately reflects the current structure of your website.
16. Enhancing User Experience with Custom Menus
Custom menus are an excellent way to improve user experience on your WordPress site. You can tailor your menu to meet the specific needs of your audience. Here are a few strategies:
- Dynamic Menus: Consider creating dynamic menus that change based on user behavior or preferences. This personalization can make navigation more relevant.
- Search Functionality: Incorporate a search bar within your menu for quick access to specific content. This can be particularly useful for content-heavy sites.
- Highlighting Important Links: Make vital links stand out in your menu using bold text or different colors. This draws attention and encourages clicks.
- Using Descriptive Labels: Instead of generic labels like “Products” or “Services,” opt for more descriptive titles that provide context about what users can expect when they click.
17. Final Thoughts on Creating a WordPress Menu
Creating a WordPress menu is a fundamental aspect of web design that can greatly influence user experience and engagement. By following the steps outlined in this article, focusing on accessibility, SEO, and usability, you can design a menu that not only looks good but works effectively for your audience. The digital landscape is ever-evolving; keeping your menu fresh, functional, and aligned with user needs will ensure your website remains relevant and engaging.
“`
Trending Now
Frequently Asked Questions
How do I create a menu in WordPress?
To create a menu in WordPress, log into your dashboard, navigate to Appearance > Menus, and click on 'Create a new menu.' Name your menu, select the pages you want to include, and customize its structure. Save the changes to make the menu live on your site.
What are the types of menus in WordPress?
In WordPress, there are several types of menus you can create, including primary menus for main navigation, footer menus for additional links, and custom menus for specific needs. Menus can be structured horizontally or vertically, depending on your site's design.
How do I access the menu settings in WordPress?
To access the menu settings in WordPress, log into your WordPress dashboard, and go to Appearance > Menus. This section allows you to create new menus, assign existing ones, and customize the items included in your navigation.
What pages should I include in my WordPress menu?
When creating a WordPress menu, consider including essential pages such as Home, About Us, Contact, Blog, and Services. Tailoring your menu to your target audience's needs will enhance navigation and improve user experience.
Can I have multiple menus in WordPress?
Yes, WordPress allows you to create multiple menus. You can have a primary menu for main navigation, a footer menu for additional links, and even custom menus for specific purposes, giving you flexibility in your site's navigation structure.
Agree or disagree? Drop a comment and tell us what you think.