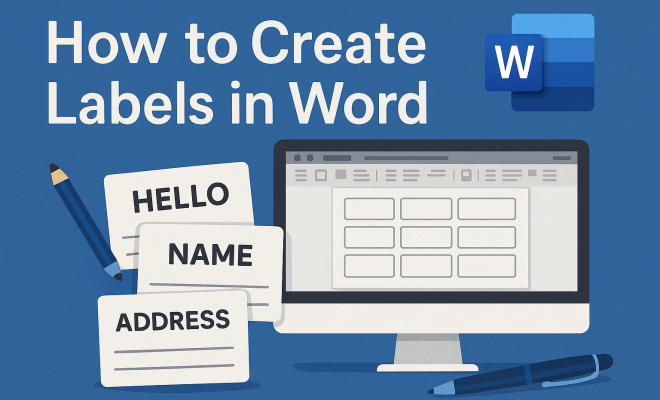
How to create labels in Word
“`html
Creating labels in Word might seem like a simple task, but it can make a world of difference when it comes to organization, branding, and professionalism. Whether you’re addressing envelopes, creating name tags, or labeling storage boxes, knowing how to efficiently use Microsoft Word for labels is an essential skill. In this article, we’ll explore various methods and tips to help you easily create labels in Word that suit your needs.
1. Understanding the Basics of Labels
Before diving into the specifics of using Word for label creation, it’s essential to understand what labels are and why they are important. Labels serve as a means of identification for various items. They can range from simple adhesive stickers for organizing home supplies to professionally printed stickers for businesses. Knowing the types of labels available can help you determine what you need for your project.
Labels can be made from various materials, such as paper or plastic, and they can feature different designs. When creating labels in Word, consider the purpose of your labels—whether it’s for mailing, marketing, or personal organization. This will guide your design choices and layout preferences.
2. Setting Up Your Document
The first step in creating labels in Word is setting up your document correctly. This process involves choosing the right page layout and dimensions based on your label size. To start, open Microsoft Word and create a new document. Navigate to the ‘Layout’ tab and select ‘Size’ from the dropdown menu. Here, you can choose a predefined label size or create a custom size by selecting ‘More Paper Sizes.’
For custom labels, input the width and height of your labels, along with any necessary margins. This setup is crucial for ensuring that your labels print correctly without misalignment. Once your document is configured, you’re ready to move on to the next steps in label creation.
3. Using the Label Wizard
One of the most efficient ways to create labels in Word is by using the built-in Label Wizard. To access this feature, go to the ‘Mailings’ tab and select ‘Labels.’ A dialog box will appear, allowing you to choose the type of labels you want to create. You can select from a variety of label brands and sizes, ensuring compatibility with your label sheets.
After choosing your label type, you can enter the text for each label in the ‘Address’ field. If you need to create multiple labels with different information, use the ‘New Document’ option instead of ‘Print.’ This opens a new document with a table format where you can customize each label individually. This method is particularly useful for batch processing labels for events or mailings.
4. Customizing Your Labels
Now that you’ve set up your labels, it’s time to customize them. This is where you can let your creativity shine! Use various fonts, colors, and images to make your labels more visually appealing. You can highlight important information or create a specific aesthetic by adjusting font sizes and styles.
Moreover, consider adding logos or graphics to personalize your labels further. To insert images, go to the ‘Insert’ tab, select ‘Pictures,’ and choose an image file from your computer. Position the image within your label area and resize it as needed. Always keep in mind the balance between text and imagery so that your labels remain readable and professional.
5. Utilizing Mail Merge for Bulk Label Creation
If you’re looking to create labels in Word for a large batch of items, Mail Merge is a powerful feature that streamlines the process. Mail Merge allows you to pull information from a data source, such as an Excel spreadsheet, and automatically populate your labels with this data. (See: Understanding the concept of labels.)
To use Mail Merge, first set up your data source—make sure it includes all necessary fields like names and addresses. Then, in Word, navigate to the ‘Mailings’ tab and select ‘Start Mail Merge,’ followed by ‘Labels.’ Choose your label type and then select ‘Select Recipients’ to link your data source. After configuring the labels to include the desired fields, you can finish the merge and print your labels. This method saves time and reduces errors when dealing with large volumes of information.
6. Printing Your Labels
Once you’ve created and customized your labels, the next crucial step is printing them. Before hitting that print button, it’s vital to ensure that your printer settings align with your label sheets. Go to ‘File’ > ‘Print’ and check the print preview to confirm that everything looks right.
Adjust the printer settings, paying attention to options like the paper size and type. If you’re using a laser printer, select that option to avoid smudging on the labels. It’s also wise to do a test print on regular paper to check for alignment and formatting before printing on your label sheets. This minimizes the risk of wasting materials and ensures a professional finish.
7. Troubleshooting Common Issues
Even the most seasoned Word users can encounter problems when creating labels. Some common issues include misalignment, printing errors, and formatting problems. If your labels aren’t aligning correctly, double-check your label dimensions and margins. Often, minor adjustments here can resolve your issue.
Printing errors can also occur if the printer settings are incorrect or if the wrong paper type is selected. Make sure to review your printer settings carefully. If you’re using a pre-perforated label sheet, ensure that the sheet is loaded correctly in the printer tray. For any persistent issues, consult your printer’s manual or online resources for guidance.
8. Advanced Techniques for Label Design
For those looking to elevate their label design skills, consider exploring advanced techniques such as using templates or integrating graphic design software. Microsoft Word offers a range of templates that can save you time and provide inspiration. You can find templates by searching online or directly within Word’s template gallery.
If you want more control over your label design, using graphic design tools like Adobe Illustrator or Canva can be beneficial. Create your label design in these applications, then import the design into Word for printing. This approach allows for more intricate designs and layouts that can make your labels stand out.
9. Practical Applications of Labels
Labels have a wide variety of practical applications in both personal and professional settings. From organizing your home to enhancing brand visibility for your business, the uses are nearly limitless. For example, businesses often use labels for product packaging, mailing, and branding. Personal uses might include organizing files, creating gift tags, or labeling food storage containers.
As you become proficient in creating labels in Word, consider exploring how labels can streamline your life or improve your business’s efficiency. The ability to create professional-looking labels can enhance the presentation of your products and help you manage your personal space more effectively.
10. Examples of Label Use Cases
To give you some inspiration, let’s take a look at various real-world examples of label applications. In a corporate environment, for instance, companies often use labels for employee identification badges. This not only helps in branding but also enhances security and ensures that employees are easily identifiable.
In a home setting, parents can create labels for children’s storage bins. For example, labels that say “Toys,” “Books,” and “Art Supplies” can make it easier for kids to return items to their designated places. You can use colorful designs to make the labels appealing to children, encouraging them to participate in the organization process. (See: Importance of labeling for organization.)
In retail, businesses frequently label products with pricing and product information. Creating cohesive labels that align with branding guidelines can significantly enhance customer experience. For instance, using eco-friendly labels can attract customers who prioritize sustainability. A study by Nielsen revealed that 66% of consumers are willing to pay more for sustainable brands.
11. Label Design Best Practices
Once you start creating labels in Word, implementing some best practices can help you achieve the best results. Consider the following tips:
- Consistency: Use consistent fonts, colors, and layout across all labels to project a professional image.
- Legibility: Ensure that the text is easy to read. Avoid overly intricate fonts or colors that clash with the background.
- Size: Make sure your labels are the appropriate size for their intended use. For instance, smaller labels are suitable for product tags, while larger ones work well for packages and boxes.
- Test and Measure: Always test print a few labels before the final print run to check alignment and design.
- Feedback: If creating labels for a team or organization, gather feedback on the design to ensure it meets the needs of everyone involved.
12. Frequently Asked Questions (FAQ)
How do I create custom label sizes in Word?
You can create custom label sizes in Word by opening a new document, going to the ‘Layout’ tab, selecting ‘Size,’ and then ‘More Paper Sizes.’ From there, you can input specific dimensions for your labels.
Can I use images in my labels?
Absolutely! You can insert images into your labels by going to the ‘Insert’ tab, choosing ‘Pictures,’ and selecting an image from your computer. Just make sure the images are of high quality for the best print results.
What types of labels can I create in Word?
You can create various types of labels in Word, including address labels, product labels, name tags, and more. The flexibility of Word allows for both simple and complex designs.
Is it possible to use label templates in Word?
Yes! Microsoft Word provides several label templates that can save time and offer creative inspiration. You can access these templates through the ‘File’ > ‘New’ section and search for label templates.
What should I do if my labels are misaligned when printed?
If your labels are misaligned, double-check the label dimensions in your document and ensure they match the actual size of your label sheets. Adjust margins and perform test prints until the alignment is correct.
Can I print on different materials using Word?
Yes, Word allows printing on various materials depending on your printer’s capabilities. Make sure to select the correct media type in your printer settings for optimal results.
How do I save my label designs for future use?
To save your label designs, simply save your Word document as you normally would. You can also save it as a template by going to ‘File’ > ‘Save As’ and selecting the template option, making it easy to reuse in the future. (See: Effective labeling for personal organization.)
Are there any alternatives to Microsoft Word for label creation?
While Microsoft Word is a popular choice, there are other software options like Avery Design & Print, Canva, and Adobe Illustrator that might offer more specialized tools for label design. Each has its strengths, so explore what works best for your needs.
13. Creative Label Ideas
Thinking outside the box can lead to some impressive label designs. Here are some creative label ideas that can add a personal touch or enhance your branding:
- Handwritten Style: Use fonts that mimic handwriting for a personal touch, perfect for gifts or homemade products.
- Seasonal Themes: Design labels according to seasons or holidays, like festive colors for Christmas or pastel shades for spring.
- Color-Coded Labels: Use different colors to categorize items easily. For instance, use red labels for urgent files and green for completed ones.
- Interactive Labels: Consider QR codes on labels that, when scanned, lead to more information about a product or service.
- Custom Shapes: If your printer allows, explore cutting labels into shapes that reflect the product, such as a teardrop for a tea brand or a leaf for organic products.
14. Statistics on Labeling Impact
Understanding the impact of effective labeling can motivate you to invest time and creativity into your designs. Here are some compelling statistics:
- According to a survey by the Label Manufacturers Institute, 68% of consumers say that product labeling influences their purchasing decisions.
- Research shows that 90% of the information processed by the brain is visual, emphasizing the importance of attractive labels in drawing attention.
- Products with labels that communicate sustainability can increase sales by 50% in certain demographics, as consumers become more eco-conscious.
- In a study by ClearVoice, 80% of consumers said they are more likely to remember a brand when it is associated with a unique and creative label design.
15. Labeling for Small Businesses
For small business owners, effective labeling can be a game-changer. Not only does it enhance your brand’s image, but it also communicates professionalism and attention to detail. Here are some ways to leverage labels in your small business:
- Brand Identity: Use labels to reinforce your brand identity. Include your logo, brand colors, and fonts to create a cohesive look across all products.
- Information Dissemination: Provide essential product information on labels, including ingredients, usage instructions, and contact information, helping customers make informed decisions.
- Seasonal Promotions: Change your labels for seasonal promotions or limited-time offers to create a sense of urgency and attract attention.
- Customer Engagement: Encourage customers to share their experiences on social media by adding a hashtag or social media handle to your labels.
16. Getting Feedback on Label Designs
Feedback is crucial in refining your label designs. Consider these strategies to gather insights:
- Focus Groups: Organize small groups of potential customers to evaluate your labels and provide constructive criticism.
- Online Surveys: Use platforms like SurveyMonkey or Google Forms to create surveys about different label designs.
- Social Media Polls: Engage your audience on social media by asking them to vote on their favorite label designs.
- Test Runs: Print a small batch of labels and distribute them to a trusted group of customers to gather initial feedback.
17. Label Maintenance and Adaptation
As your business or organization evolves, so should your labels. Here are some ways to ensure your labels remain relevant:
- Regular Reviews: Set a schedule to review label designs regularly, ensuring they meet current standards and branding.
- Trend Watching: Keep an eye on design trends within your industry to stay fresh and appealing to consumers.
- Customer Feedback: Continuously seek customer feedback to improve label designs based on actual user experiences.
- Adapt to New Regulations: Ensure that your labels comply with any new regulations or standards that may arise in your industry, especially for product safety or labeling requirements.
18. Conclusion
Creating labels in Word is a valuable skill that can greatly enhance your organization and branding efforts. By following the guidelines outlined in this article, along with best practices and examples, you can produce high-quality labels tailored to your needs. Whether for personal use or professional projects, the ability to create customized labels will serve you well in various settings.
“`
Trending Now
Frequently Asked Questions
How do I create labels in Word?
To create labels in Word, start by setting up your document with the correct layout and dimensions. Open a new document, go to the 'Layout' tab, select 'Size,' and choose a predefined label size or create a custom size. Then, you can use the Label Wizard to design and print your labels efficiently.
What is the label wizard in Word?
The Label Wizard in Word is a tool that simplifies the process of creating labels. It guides you through selecting the label type, entering your information, and formatting the layout. This feature helps ensure your labels are printed correctly and aligned properly.
Can I create custom labels in Word?
Yes, you can create custom labels in Word. After opening a new document, navigate to the 'Layout' tab, select 'Size,' and choose 'More Paper Sizes' to input your desired label dimensions. This allows you to design labels that fit your specific needs.
What materials can I use for labels in Word?
Labels created in Word can be made from various materials, including paper and plastic. The choice of material depends on the purpose of your labels, whether for mailing, organizing, or branding. Ensure that the material is compatible with your printer for the best results.
Why are labels important?
Labels are important for identification and organization. They help in categorizing items, creating a professional appearance for businesses, and enhancing personal organization. Understanding the purpose of your labels can guide your design choices and layout preferences.
Agree or disagree? Drop a comment and tell us what you think.