How to build gaming PC
“`html
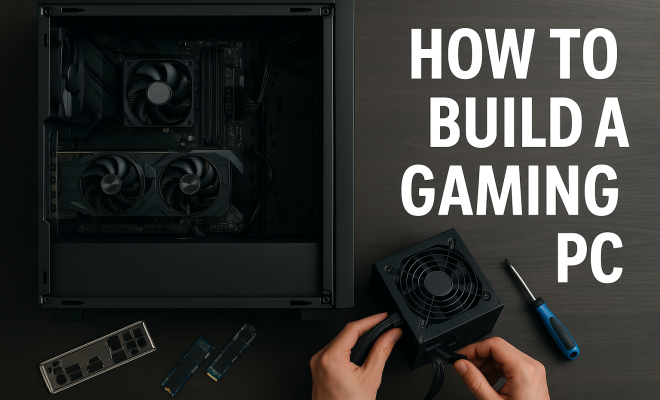
Building your own gaming PC can be one of the most rewarding and fulfilling projects for any gaming enthusiast. Not only does it allow you to customize your rig to your exact specifications, but it can also be more cost-effective than purchasing a pre-built system. If you’ve ever wondered how to build a gaming PC, this guide is packed with essential information, tips, and insights to help you get started.
1. Understanding the Basics of PC Components
Before diving into the specifics of how to build a gaming PC, it’s crucial to grasp the roles of the various components that make up a computer. A typical gaming PC consists of the following key components:
- Central Processing Unit (CPU): Often referred to as the brain of your PC, the CPU executes instructions and processes data. Popular choices for gaming include Intel’s Core i5/i7 and AMD’s Ryzen series.
- Graphics Processing Unit (GPU): This is critical for rendering images and videos. A powerful GPU, like NVIDIA’s RTX series or AMD’s RX series, can significantly enhance your gaming performance.
- Motherboard: This is the main circuit board that connects all components. Ensure compatibility with your CPU and GPU.
- Memory (RAM): RAM affects your system’s multitasking capabilities. For gaming, 16GB is often sufficient, but 32GB offers future-proofing.
- Storage: You can choose between Hard Disk Drives (HDD) for larger space or Solid State Drives (SSD) for faster load times. Many gamers opt for a combination of both.
- Power Supply Unit (PSU): This supplies power to your components. It’s important to get a reliable unit with enough wattage.
- Cooling System: Adequate cooling is essential for optimal performance and longevity. This can be achieved with air coolers or liquid cooling systems.
- Case: The case houses all components and should provide good airflow while fitting your chosen hardware.
Familiarizing yourself with these components will streamline the process of building your gaming PC, as you’ll understand how each element interacts.
2. Setting Your Budget and Expectations
Establishing a budget is a crucial step in the journey of how to build a gaming PC. Determine what you’re willing to spend, and prioritize components based on your gaming needs. A standard mid-range gaming PC can range from $800 to $1,500, while high-end builds can exceed $2,000.
You should consider the types of games you want to play. For instance, if you’re into competitive first-person shooters or AAA titles, investing in a robust GPU and CPU will be essential. Be realistic about performance expectations; a $1,000 build might not run the latest games on ultra settings, but it will perform admirably on high settings.
Additionally, it’s important to account for peripherals such as monitors, keyboards, and mice in your budget. A well-rounded gaming experience goes beyond just the PC itself.
3. Choosing the Right Components
Now that you’ve established your budget, it’s time to select the components for your gaming PC. The selection process can be daunting due to the vast number of options on the market. Here’s what to consider:
- Compatibility: Always check compatibility between your CPU, motherboard, and RAM. Websites like PCPartPicker can help avoid conflicts.
- Performance Needs: Based on your gaming preferences, prioritize performance. If VR or 4K gaming is on your agenda, higher-end GPUs will be necessary.
- Future-Proofing: Investing in slightly better hardware than you currently need can extend the lifespan of your PC. This is particularly relevant for GPUs and CPUs.
- Brand Preferences: Brands like ASUS, MSI, and Gigabyte offer reliable motherboards, while Corsair and NZXT are popular for cooling solutions and cases. It’s a good idea to stick with reputable brands.
Researching reviews and benchmarks can also provide insights into how different components perform in real-world scenarios.
4. Gathering Tools and Preparing for the Build
Before you start assembling your gaming PC, it’s essential to gather the right tools and create a conducive working environment. You’ll need:
- A Phillips screwdriver (preferably magnetic),
- Anti-static wristband (to prevent damaging components),
- Zip ties (for cable management),
- Thermal paste (if your CPU cooler doesn’t come with it), and
- A clean, flat workspace with good lighting.
Preparing your workspace helps avoid misplacing screws or components during the build. Make sure the environment is free of static electricity; working on a wood surface is often recommended over carpet, and an anti-static wrist strap can prevent any accidental shocks.
5. Step-by-Step Assembly of Your Gaming PC
Now, let’s dive into the assembly process. This is where the real fun begins! Follow these steps carefully: (See: Overview of personal computers.)
- Install the CPU: Open the CPU socket on the motherboard, align the CPU with the notches, and gently place it in. Lock it into place.
- Apply Thermal Paste: If not pre-applied on the cooler, place a pea-sized amount of thermal paste on the CPU.
- Attach the Cooler: Secure the CPU cooler according to the manufacturer’s instructions.
- Install RAM: Locate the RAM slots on the motherboard, align the RAM sticks with the slots, and press down until they click in place.
- Mount the Motherboard: Securely attach the motherboard to the case using standoffs and screws.
- Install the PSU: Place the power supply in its designated area and secure it with screws.
- Install the GPU: Insert the graphics card into the PCIe slot on the motherboard and secure it with screws.
- Connect Cables: Connect power and data cables to the motherboard, GPU, storage drives, and any additional components.
- Close the Case: Once everything is connected, close up the case and ensure all screws are tightened.
Always refer to your component manuals for specific assembly instructions, as different brands may have unique requirements.
6. Installing the Operating System and Drivers
Once your gaming PC is assembled, it’s time to install an operating system (OS). Windows is the most popular choice among gamers, but Linux can also be a viable option. Here’s how to get started:
1. Create a Bootable USB: Download the Windows installation media onto a USB flash drive using the official Microsoft tool.
2. Boot from USB: Insert the USB into your new PC and access the BIOS/UEFI settings (usually by pressing F2 or DEL during startup) to change the boot order so that the USB loads first.
3. Install Windows: Follow the prompts to install Windows, including partitioning your storage drive as needed.
After the OS installation, install necessary drivers for your motherboard, GPU, and any peripherals. Keeping your drivers up to date is crucial for optimal performance and security.
7. Optimizing Performance and Cooling
Once you’ve got your gaming PC up and running, it’s time to optimize it for the best performance. Cooling is a major factor here, as gaming can generate significant heat. Consider these tips:
- Monitor Temperatures: Use software like MSI Afterburner or HWMonitor to keep an eye on CPU and GPU temperatures.
- Adjust Fan Curves: Many motherboards allow you to customize fan speeds based on temperature thresholds, which can keep your system cooler during intense gaming sessions.
- Clean and Dust Regularly: Dust can clog fans and components, leading to overheating. Regular cleaning helps maintain airflow.
Additionally, consider overclocking your CPU or GPU for improved performance, but proceed with caution. Always monitor temperatures and stability when overclocking to avoid damaging your components.
8. Cable Management and Aesthetics
While performance is key, aesthetics can also enhance your gaming experience. Good cable management not only looks better but also improves airflow within your case. Here are some tips:
- Route Cables Behind the Motherboard Tray: Most cases have space behind the motherboard for cable routing. This hides cables and reduces clutter.
- Use Zip Ties: Group cables together using zip ties to keep them organized.
- Consider RGB Lighting: If you enjoy aesthetics, adding RGB components can create a unique look that enhances your gaming setup.
Take your time with cable management; it pays off in the long run for both aesthetics and airflow.
9. Keeping Your Gaming PC Up to Date
Congratulations! You’ve successfully built your gaming PC. But the work doesn’t stop there. To ensure your rig stays relevant and performs well, regular maintenance is crucial. Here are some best practices:
- Regular Updates: Keep your OS, drivers, and software up to date to ensure optimal performance and security.
- Periodic Hardware Checks: Inspect components for dust buildup or physical issues, especially after heavy gaming sessions.
- Future Upgrades: As gaming technology evolves, consider upgrading components like your GPU or adding more RAM to keep pace with new titles.
Building a gaming PC may seem daunting at first, but with the right knowledge, tools, and patience, it can be a gratifying experience that enhances both your gaming performance and your technical skills. Whether you’re a casual gamer or a hardcore enthusiast, building your own rig allows for customization that meets your unique gaming needs. So go ahead, roll up your sleeves, and start building your gaming dream machine!
10. Common Challenges When Building a Gaming PC
Even seasoned builders can encounter challenges. Here are some common issues and how to solve them: (See: Importance of computer safety.)
- Component Compatibility: Sometimes, components might not work well together. Always double-check the specifications and compatibility before purchasing.
- Wiring Issues: It can be confusing to manage numerous cables. Taking a picture of your wiring setup before disconnecting anything can help when reconnecting.
- Overheating: If your system runs hot after the build, check that all fans are working, and that the thermal paste is applied correctly.
- No Power: If your system won’t turn on, ensure the power supply is switched on and that all power cables are securely connected.
These challenges can often be resolved with careful troubleshooting. Joining forums or communities can also provide valuable assistance.
11. Comparing Pre-Built vs. Custom Builds
As you consider how to build a gaming PC, it’s helpful to weigh the pros and cons of pre-built systems versus custom builds:
- Customization: Building your own PC allows for complete customization, ensuring every component meets your needs. Pre-built systems often come with set configurations, limiting your control.
- Cost: Custom builds may offer better performance for your dollar, as you’re able to allocate funds directly to the components you value most. Pre-built systems may include markup for assembly and brand reputation.
- Support and Warranty: Pre-built systems typically come with customer support and warranties for the entire unit. Custom builds require you to manage warranties for individual components.
- Time and Learning Curve: Building a PC takes time and patience, especially if it’s your first time. Pre-builts are ready to go right out of the box, making them more convenient for those who aren’t tech-savvy.
Ultimately, your choice depends on your budget, technical skills, and how much customization you want.
12. Upgrading Your Gaming PC
Once you’ve built your gaming PC, you might think about upgrades in the future. Common upgrade paths include:
- Graphics Card: This is often the first component gamers upgrade to improve performance, especially for newer titles.
- Memory (RAM): If you find your system slowing down during multitasking, consider adding more RAM for smoother performance.
- Storage: Upgrading to an NVMe SSD can provide faster load times compared to traditional HDDs.
- Cooling Solutions: If you’re overclocking or simply want better thermal management, investing in a high-quality cooling solution can prolong component life.
When considering upgrades, always assess compatibility with your existing components and overall system balance.
13. FAQs About Building a Gaming PC
Q: What tools do I need to build a gaming PC?
A: A Phillips screwdriver, anti-static wristband, zip ties, thermal paste, and a clean workspace are essential.
Q: How long does it take to build a gaming PC?
A: For beginners, it usually takes between 3 to 5 hours, while experienced builders may take less time.
Q: Do I need to buy an operating system separately?
A: Yes, if you choose Windows, it needs to be purchased separately unless you have a license key. (See: Trends in personal computer sales.)
Q: Can I build a gaming PC on a budget?
A: Yes, there are many budget-friendly components that can provide excellent performance. Look for sales and discounts to maximize your budget.
Q: What should I do if I encounter issues after building?
A: Double-check all connections, consult manuals, and consider seeking help from online communities or forums.
14. Best Practices for Cable Management
Cable management isn’t just about aesthetics; it also plays a significant role in airflow and cooling. Properly managed cables can help maintain optimal temperatures within your case, which is essential for performance longevity. Here are some best practices:
- Plan Your Layout: Before you start building, visualize where each component will go and how the cables will route. This planning can save you time and frustration later.
- Utilize Modular PSUs: If you’re using a modular power supply, only connect the cables you need. This reduces clutter and allows for easier cable management.
- Keep Cables Tidy: Use Velcro straps or cable ties to bundle cables together. This not only looks good but makes it easier to troubleshoot issues down the line.
- Label Cables: If you have multiple similar cables, consider labeling them for easier identification during future upgrades or troubleshooting.
15. Current Trends in PC Gaming Hardware
The gaming hardware landscape is constantly evolving, and staying informed about the latest trends can help you make better decisions when building your gaming PC. Here are a few trends to keep an eye on:
- Increase in 4K Gaming: As more gamers adopt 4K displays, powerful GPUs are becoming essential for a smooth gaming experience at high resolutions.
- Rise of Ray Tracing: Real-time ray tracing technology allows for realistic lighting and shadows in games, pushing the need for high-end GPUs.
- More Focus on Cooling Solutions: With increased performance comes increased heat. The demand for effective cooling solutions, including liquid cooling systems, is on the rise.
- Gaming Peripherals Integration: Gamers are increasingly looking for peripherals that enhance their gaming experience, such as mechanical keyboards, high-DPI mice, and VR setups.
16. Building a Gaming PC for Specific Genres
Different gaming genres have varying hardware demands. If you’re focused on a specific genre, here’s what to consider:
- First-Person Shooters (FPS): FPS games benefit from high frame rates and quick response times. A higher refresh rate monitor (144Hz or more) and a powerful GPU are essential.
- Massively Multiplayer Online (MMO): For MMOs, having ample RAM and a reliable internet connection is critical. Consider investing in additional RAM if you play heavily populated games.
- Simulation Games: Simulation games often require strong CPU performance for complex calculations. Look for higher-end CPUs with good multi-core performance.
- Casual Games: If you’re into casual games, you might not need ultra-high specs. A mid-range GPU and CPU would suffice, allowing you to save on budget for other peripherals.
Building your gaming PC is an exciting journey that can be tailored to your personal preferences and gaming needs. With careful planning, knowledge, and patience, you can create a system that offers superb performance and a satisfying gaming experience.
“`
Trending Now
Frequently Asked Questions
What do I need to build a gaming PC?
To build a gaming PC, you need several key components: a CPU, GPU, motherboard, RAM, storage (HDD or SSD), power supply unit (PSU), cooling system, and a case. Understanding the role of each component is essential for a successful build.
How much does it cost to build a gaming PC?
The cost of building a gaming PC varies widely based on component choices. A budget build can start around $500, while high-end systems may exceed $2000. It's important to balance performance and budget to get the best value.
Is it hard to build a gaming PC?
Building a gaming PC can be challenging if you're unfamiliar with computer components, but it's very rewarding. With careful planning and following guides, even beginners can successfully assemble a custom gaming rig.
What are the best components for a gaming PC?
The best components for a gaming PC depend on your gaming needs and budget. Popular choices include Intel's Core i5/i7 or AMD's Ryzen CPUs, NVIDIA’s RTX or AMD's RX GPUs, and at least 16GB of RAM for optimal performance.
How long does it take to build a gaming PC?
Building a gaming PC typically takes between 2 to 5 hours, depending on your experience level and the complexity of the components. Taking your time to ensure proper installation and configuration is crucial for a successful build.
What did we miss? Let us know in the comments and join the conversation.