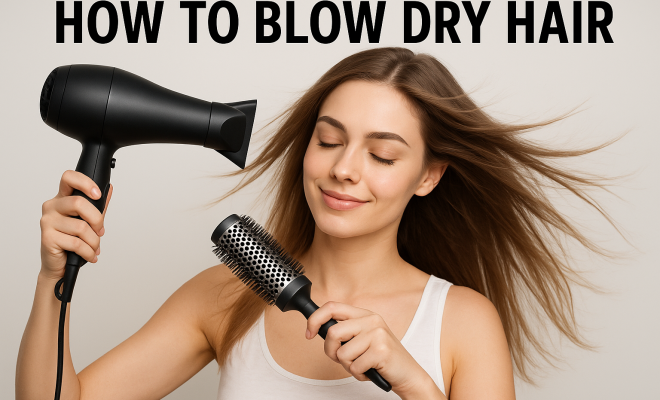
How to blow dry hair
“`html
Achieving a stunning blowout isn’t just for the salons. With the right blow dry hair techniques, you can transform your everyday styling routine into a luxurious experience. Whether you’re looking to add volume, create sleekness, or enhance your natural waves, mastering these methods will elevate your hair game. Let’s dive into the essential techniques that can help you blow dry your hair like a pro.
1. Preparation is Key
Before you even think about reaching for your blow dryer, it’s crucial to prep your hair properly. Start by washing your hair with a quality shampoo and conditioner that suits your hair type. After rinsing, gently squeeze out excess water using a microfiber towel to avoid frizz. Remember, wet hair is more fragile, so minimize rough handling.
Next, apply a heat protectant spray or serum throughout your damp hair. This step is vital because it shields your strands from the high temperatures of the blow dryer, reducing the risk of heat damage. Depending on your hair type, you may also consider applying a volumizing mousse or smoothing cream to enhance the blow-drying process.
2. Selecting the Right Tools
The tools you use can make a significant difference in your blow drying results. First and foremost, invest in a high-quality blow dryer with adjustable heat and speed settings. A powerful motor helps speed up the drying process while minimizing damage. Look for a model with a concentrator nozzle, which allows you to direct airflow more precisely.
In addition to the blow dryer, a good round brush is essential for styling. The size of the brush will depend on the look you’re aiming for. A larger brush creates volume and soft curls, while a smaller one gives more defined waves. Ceramic or ionic brushes help distribute heat evenly, making your blowout last longer.
3. Sectioning Your Hair
Effective blow drying starts with proper sectioning. This technique ensures that every part of your hair gets the attention it needs. Begin by dividing your hair into four sections: two in the front and two in the back. Use clips to secure each section, allowing you to work on one area at a time without getting overwhelmed.
For finer hair, smaller sections can yield better results, while thicker hair may require larger sections for efficiency. Regardless of your hair type, taking the time to section will allow for more control and a smoother finish.
4. Blow Drying Techniques for Volume
If you’re aiming for voluminous locks, the following blow dry hair techniques will be your best friends. Start with the back sections of your hair. Using a round brush, place it underneath a section of hair, lifting upward as you dry. This technique helps create lift at the roots.
Continue this process, rotating the brush as you pull through the hair to foster movement and volume. For a finishing touch, you can flip your head upside down while blow drying the roots to amplify volume even further. Remember to keep the dryer at least six inches away from your hair to prevent overheating, and use a cool blast after drying to set the volume in place. (See: Effects of heat on hair health.)
5. Sleek and Straight Blow Dry
On days when you’re craving a sleek, polished finish, specific techniques will help you achieve that salon-level straightness. After sectioning your hair, take a section and run a flat paddle brush through it while blow drying. Starting at the roots and working your way down, continually pull the brush through your hair.
To achieve a straight finish, make sure to keep the blow dryer pointed downward as you work. This method helps smooth the cuticles and reduce frizz. You can also finish with a flat iron for an extra sleek look, but if you’ve used the right blow-drying techniques, you might find you won’t need it.
6. Creating Natural Waves
If you’re looking to enhance your natural waves, the blow-drying process can be your secret weapon. Instead of using a round brush, try using your fingers or a wide-tooth comb to scrunch your hair as you dry it. This technique will help maintain your hair’s texture while adding definition to the waves.
To achieve this, flip your head upside down and use a diffuser attachment on your blow dryer. The diffuser helps distribute heat evenly while allowing your curls to maintain their shape. Remember to scrunch upwards to create volume at the roots and finish with a light-hold hairspray to keep your waves bouncy throughout the day.
7. Finishing Touches: Products and Techniques
Once you’ve perfected your blowout, it’s time to add some finishing touches. A lightweight serum can help tame any remaining frizz while adding shine. Apply a small amount to your palms, rub them together, and gently run your fingers through the ends of your hair.
If you’ve created volume, consider using a dry shampoo at the roots to extend the life of your blowout. This product not only absorbs oil but also refreshes your hair’s texture. Finish with a light hairspray to secure your style without weighing it down.
8. Maintaining Your Blowout
To keep your blowout looking fresh for days, be mindful of how you treat your hair post-drying. Avoid excessive touching or styling, as this can lead to frizz. Instead, try sleeping with a silk or satin pillowcase, which reduces friction and helps maintain your hairstyle.
For those looking to extend their blowout, a top knot or loose braid can be effective for the next day. A quick refresh with a blow dryer can also help reshape your style in the morning without a full redo. Remember that caring for your hair, including using sulfate-free products and regular trims, contributes to the longevity of your blowouts.
9. Understanding Different Hair Types and Blow Dry Techniques
Not all blow-drying techniques are created equal, and understanding your hair type is crucial to achieving the best results. Let’s break down some key differences and tailored techniques based on hair texture and thickness.
Fine Hair
For those with fine hair, the goal is to create volume without weighing it down. Lightweight products like volumizing mousses or sprays are ideal. When blow drying, utilize a round brush and focus on lifting the roots. Holding the brush vertically while blow drying can help add more lift. Additionally, avoid heavy creams or serums that can flatten your hair after styling.
Thick or Curly Hair
Thick or curly hair often requires more moisture to maintain a healthy shine. Use a moisturizing conditioner and leave-in treatment before blow drying. A diffuser is your best friend here, as it helps distribute heat without disrupting the natural curl pattern. Consider using a lower heat setting to prevent frizz, and don’t forget to apply a heat protectant to shield your locks from damage. (See: Hair care and safety guidelines.)
Textured Hair
If you have textured or coily hair, embrace the definition of your natural curls. You can use a wide-tooth comb to detangle while applying a styling cream. Blow dry with a diffuser to help define your curls without losing moisture. Focus on drying your hair in sections to ensure each curl gets the attention it deserves while maintaining its bounce.
10. Expert Tips for the Perfect Blowout
Even the pros have secrets up their sleeves when it comes to blowouts. Here are some expert tips that can make a world of difference:
- Know Your Products: Invest in high-quality products that suit your hair type. This can significantly impact your blowout’s longevity and appearance.
- Don’t Rush: Take your time while blow drying; rushing can lead to uneven results and damage. Patience is key to a salon-quality finish.
- Practice the Cool Blast: Most hairstylists swear by the cool blast feature on blow dryers. It seals the cuticle and helps set your style, resulting in a shinier finish.
- Regular Maintenance: Regular trims every 6-8 weeks will help reduce split ends, making blowouts easier and more effective.
11. Common Blow Drying Mistakes to Avoid
Even seasoned veterans can fall victim to common blow drying pitfalls. Here are a few mistakes to look out for:
- Blow Drying on Wet Hair: Always towel-dry your hair before using a blow dryer. Excess water can lead to frizz and longer drying times.
- Using the Wrong Heat Setting: Find the appropriate heat setting for your hair type. High heat may be tempting for faster results, but it can lead to damage, particularly for fine or color-treated hair.
- Skipping the Heat Protectant: Never skip heat protectant! Always apply before you start to prevent heat damage.
- Neglecting the Nozzle: The concentrator nozzle is essential for directing heat and airflow. Skipping it can lead to less control and a frizzier outcome.
12. Frequently Asked Questions About Blow Drying
1. How often should I blow dry my hair?
It depends on your hair type and texture. Generally, it’s best to limit blow drying to a few times a week to avoid heat damage. Embrace air drying when possible.
2. Can I blow dry my hair without a heat protectant?
While it’s not recommended, if you find yourself without a heat protectant, use the lowest heat setting and don’t hold the dryer too close to your hair.
3. What can I do if my blowout doesn’t last?
If your blowout doesn’t last, consider adjusting your products, focusing on your technique, or trying a different styling method. Sometimes, switching to a lighter product can make a big difference.
4. Is it better to blow dry my hair straight or with a round brush?
If you’re aiming for volume, a round brush is the way to go. For sleek, straight styles, a flat paddle brush can give you the best results.
5. How can I refresh my blowout on the second day?
Try a quick blast with the blow dryer, focusing on the roots, and use a bit of dry shampoo at the roots to absorb any excess oil. This can help revitalize your style.
13. Innovative Blow Dry Hair Techniques to Try
As techniques evolve, so do the methods of achieving the perfect blowout. Here are some innovative approaches to consider: (See: Research on hair care technology.)
Volume-Boosting Techniques
For an extra layer of volume, consider incorporating velcro rollers into your routine. After blow drying, roll sections of hair into the rollers and let them sit for about 15-20 minutes. This technique allows your hair to cool in the rolled position, creating long-lasting volume. To enhance the effect, you can mist the rollers with a light hairspray before applying them.
Textured Blowouts
This technique is all about embracing and enhancing your natural texture. Begin by applying a curl-enhancing cream on damp hair. When blow drying, use a diffuser on a low-speed setting, flipping your head upside down to encourage volume at the roots. This method allows your natural curls to shine while eliminating excess frizz.
Bantu Knot Blowouts
For those looking to mix things up, try the Bantu knot technique. After washing your hair and applying a leave-in conditioner, separate your hair into small sections. Twist each section into a knot and secure it at the base. Allow your hair to air dry or use a hooded dryer. Once your hair is completely dry, take out the knots and gently separate the curls with your fingers. Finish with a light oil for shine. This method provides beautiful, defined curls and is a perfect way to get a blowout look without heat damage.
14. Choosing the Right Products for Blow Drying
Product selection is vital. Here’s a breakdown of must-have products tailored for different hair needs:
For Fine Hair
- Volumizing Mousse: This lightweight product can provide lift and body without weighing hair down.
- Heat Protectant Spray: An essential to shield your hair from heat damage while maintaining volume.
For Curly Hair
- Curl Cream: Helps define curls while providing moisture and reducing frizz.
- Leave-in Conditioner: Keeps curls hydrated and bouncy, which is crucial for a healthy blowout.
For Thick Hair
- Smoothing Cream: Helps to tame frizz while giving your blowout a sleek finish.
- Hair Oil: Use sparingly on the ends of your hair for added shine and moisture.
15. Statistics About Blow Drying and Hair Health
Understanding the impact of blow drying on hair health can be enlightening. Here are some key statistics:
- According to a survey by the American Academy of Dermatology, over 70% of women blow dry their hair regularly.
- In a study published in the Journal of Cosmetic Dermatology, it was noted that improper blow drying techniques can lead to up to 50% more hair breakage.
- Heat protectants can reduce the risk of heat damage by up to 80%, making them a crucial part of any blow drying routine.
- Research indicates that using the right products can extend the lifespan of a blowout by up to 3 days, depending on hair type and environmental factors.
16. Final Thoughts on Blow Drying Techniques
With these blow dry hair techniques under your belt, you can achieve beautiful results at home. Practice makes perfect, and as you continue to refine your skills, you’ll find that blow drying becomes a quick and enjoyable part of your hair care routine. Don’t forget that the right products, techniques, and tools can elevate your blow-drying experience to new heights. Whether you’re going for volume, sleekness, or defined waves, there’s a technique to help you achieve the look you desire.
“`
Trending Now
Frequently Asked Questions
What is the best way to blow dry hair?
The best way to blow dry hair involves proper preparation, using the right tools, and sectioning your hair. Start with a quality shampoo and conditioner, apply a heat protectant, and use a high-quality blow dryer with a concentrator nozzle. Section your hair for even drying, and choose a round brush based on your desired style.
How can I protect my hair while blow drying?
To protect your hair while blow drying, always apply a heat protectant spray or serum to damp hair before using the dryer. This shields your hair from high temperatures, reducing the risk of heat damage. Additionally, use a blow dryer with adjustable heat settings to minimize potential harm.
What tools do I need to blow dry my hair?
Essential tools for blow drying your hair include a high-quality blow dryer with adjustable heat and speed settings, a concentrator nozzle for directed airflow, and a round brush. The size of the brush will depend on your desired style, with larger brushes for volume and smaller ones for defined waves.
How do you section hair for blow drying?
To section hair for blow drying, divide it into manageable parts, typically starting from the bottom and working your way up. Use clips to hold sections apart, ensuring each part receives adequate attention. Proper sectioning allows for more even drying and styling, leading to a better blowout.
What should I do before blow drying my hair?
Before blow drying your hair, wash it with a suitable shampoo and conditioner for your hair type. Gently squeeze out excess water with a microfiber towel to prevent frizz. Apply a heat protectant and, if desired, a volumizing mousse or smoothing cream to enhance your blow-drying results.
What’s your take on this? Share your thoughts in the comments below — we read every one.