How to Apply a Text Shadow in PowerPoint
Applying a text shadow in PowerPoint can add depth and dimension to your presentation. By incorporating this effect, you can create a more professional and eye-catching layout for your typography.
Here are the steps to apply a text shadow in PowerPoint:
Step 1: Select the Text you want to apply the shadow to
Make sure you’ve selected the text box that contains the text you want to apply the shadow to.
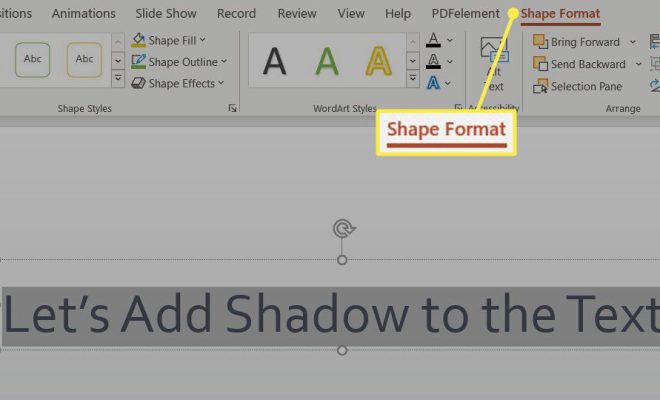
Step 2: Click on the “Format” tab
Once you have selected the text box, go to the “Format” tab located on the PowerPoint ribbon at the top of your screen.
Step 3: Select “Text Effects”
Click on the “Text Effects” button located towards the right-hand side of the ribbon.
Step 4: Choose “Shadow” from the dropdown menu
From the “Text Effects” menu, scroll down to the “Shadow” option and select it.
Step 5: Pick the Type of Shadow
You will be presented with a dropdown menu of different shadow options that you can choose from. You can select an option that already suits your presentation style or you can customize your shadow by clicking on “Shadow Options” at the bottom of the dropdown menu.
Step 6: Customize your Shadow
If you want to customize your shadow, you can do so by clicking on the “Shadow Options” selection at the bottom of the dropdown menu. This will take you to a new window where you can adjust the size of the shadow, distance from the text, and color of the shadow.
Step 7: Preview and Confirm
After customizing your shadow, click on the “Preview” button to see how your text will appear on your presentation slides. If you’re satisfied with your changes, click the “OK” button to apply the new text shadow.
Conclusion
Applying a text shadow in PowerPoint can take your presentation to the next level. It’s easy to do and can make your typography stand out. Use these simple steps to create eye-catching text boxes and impress your audience. Remember to practice and experiment with different shadow options until you find the perfect fit for your presentation style