The Tech Edvocate

Top Menu

  • Advertisement
  • Apps
  • Home Page
  • Home Page Five (No Sidebar)
  • Home Page Four
  • Home Page Three
  • Home Page Two
  • Home Tech2
  • Icons [No Sidebar]
  • Left Sidbear Page
  • Lynch Educational Consulting
  • My Account
  • My Speaking Page
  • Newsletter Sign Up Confirmation
  • Newsletter Unsubscription
  • Our Brands
  • Page Example
  • Privacy Policy
  • Protected Content
  • Register
  • Request a Product Review
  • Shop
  • Shortcodes Examples
  • Signup
  • Start Here
    • Governance
    • Careers
    • Contact Us
  • Terms and Conditions
  • The Edvocate
  • The Tech Edvocate Product Guide
  • Topics
  • Write For Us
  • Advertise

Main Menu

  • Start Here
    • Our Brands
    • Governance
      • Lynch Educational Consulting, LLC.
      • Dr. Lynch’s Personal Website
      • Careers
    • Write For Us
    • The Tech Edvocate Product Guide
    • Contact Us
    • Books
    • Edupedia
    • Post a Job
    • The Edvocate Podcast
    • Terms and Conditions
    • Privacy Policy
  • Topics
    • Assistive Technology
    • Child Development Tech
    • Early Childhood & K-12 EdTech
    • EdTech Futures
    • EdTech News
    • EdTech Policy & Reform
    • EdTech Startups & Businesses
    • Higher Education EdTech
    • Online Learning & eLearning
    • Parent & Family Tech
    • Personalized Learning
    • Product Reviews
  • Advertise
  • Tech Edvocate Awards
  • The Edvocate
  • Pedagogue
  • School Ratings

logo

The Tech Edvocate

  • Start Here
    • Our Brands
    • Governance
      • Lynch Educational Consulting, LLC.
      • Dr. Lynch’s Personal Website
        • My Speaking Page
      • Careers
    • Write For Us
    • The Tech Edvocate Product Guide
    • Contact Us
    • Books
    • Edupedia
    • Post a Job
    • The Edvocate Podcast
    • Terms and Conditions
    • Privacy Policy
  • Topics
    • Assistive Technology
    • Child Development Tech
    • Early Childhood & K-12 EdTech
    • EdTech Futures
    • EdTech News
    • EdTech Policy & Reform
    • EdTech Startups & Businesses
    • Higher Education EdTech
    • Online Learning & eLearning
    • Parent & Family Tech
    • Personalized Learning
    • Product Reviews
  • Advertise
  • Tech Edvocate Awards
  • The Edvocate
  • Pedagogue
  • School Ratings
  • Urgent Warning: How AI is Fueling Rampant Skincare Scams Right Now

  • Urgent: This Skincare Trend Is Exploiting Children — And It’s Spreading Fast

  • Seattle Times sues Microsoft and OpenAI, alleging they trained their AI on its journalism

  • Astonishing: Anthropic Axed $6 Billion Deal for Decart — Why?

  • Sega cancelled its “risky” Super Game project as it “would have to grow enormously to match the scale of the service” | GamesIndustry.biz

  • Devastating: Don’t Nod’s €8M Cash Crisis Threatens Studio Future

  • OpenAI Accused of Shocking Attempt to Hijack Euler Proof — The Truth Revealed

  • Meta Child Sexual Abuse Ads: A Disturbing Investigation Unveils Shocking Truths

  • Unveiling the Quiet Crisis: Why Two Mega-Districts Just Banned AI in Education

  • Unveiling the Controversial New Texas Curriculum: A Battle Over History and Identity

Digital & Mobile Technology
Home›Digital & Mobile Technology›How to Add a Border in Google Slides

How to Add a Border in Google Slides
By Matthew Lynch
June 23, 2023
0
Spread the love

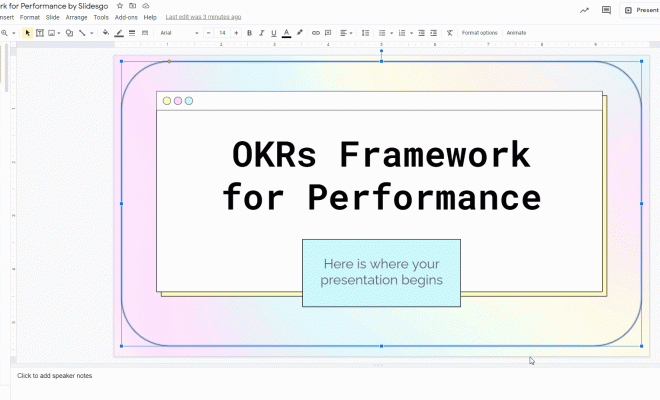
Google Slides is an online presentation tool that allows users to create and share stunning presentations with ease. One of the features that Google Slides offers is adding a border to the slides. Borders can be quite useful for improving the look and feel of your presentations and can be used to create a professional look. In this article, we will guide you through the process of how to add a border in Google Slides.

Step 1: Open Google Slides

To start, you need to open Google Slides. If you have a Google account, go to Google Drive, click the New button, and select Google Slides from the drop-down menu. If you don’t have a Google account, you can create one for free.

Step 2: Select your slide

Once you have opened Google Slides, you need to choose the slide you want to add a border to. To select a slide, simply click on it, and it will become active. You can then proceed to the next step.

Step 3: Click on the “Borders and Shading” option

After selecting your slide, click on the “Borders and Shading” option under the toolbar. This will open the border options menu for you to choose from.

Step 4: Choose the border style

In the Borders and Shading menu, you have several border styles to choose from, such as solid lines, dashed lines, dotted lines, and more. Select the border style of your choice by clicking on it.

Step 5: Choose the border color

Once you have chosen the border style, you need to select a color for your border. You can choose from the color palette or enter a custom color code if you have a specific color in mind. Click on the color of your choice to apply it to the border.

Step 6: Adjust the thickness of the border

The next step is to adjust the thickness of the border. This will determine how thick or thin the border will be. You can adjust the thickness by clicking on the up or down arrow button next to the thickness option.

Step 7: Apply the border

Finally, click the “Apply” button to add the border to your slide. You can repeat this process for each slide you want to add a border to.

Conclusion

Adding a border to your Google Slides is an easy process that can greatly improve the overall look and feel of your presentations. Borders can help to highlight important information and create a professional and polished look. Follow these simple steps to add a border to your Google Slides and enhance the visual appeal of your presentations.


Previous Article

How to Add Money to a Venmo ...

Next Article

Chrome OS Is Missing or Damaged: How ...

Matthew Lynch

Related articles More from author

  • Digital & Mobile Technology

    CleanMem – A Windows Memory Cleaner That Works?

    June 6, 2023
    By Matthew Lynch
  • Digital & Mobile Technology

    How to Record a Phone Call on iPhone

    May 31, 2023
    By Matthew Lynch
  • Digital & Mobile Technology

    How to Fix It When the History Channel on Roku Is Not Working

    June 12, 2023
    By Matthew Lynch
  • Digital & Mobile Technology

    Cheat-Proof App Blockers That Make You Focus

    June 15, 2023
    By Matthew Lynch
  • Digital & Mobile Technology

    How to Rotate a Video in VLC (And Save It)

    May 5, 2023
    By Matthew Lynch
  • Digital & Mobile Technology

    How to Set Up Port Forwarding

    June 2, 2023
    By Matthew Lynch

Search

Login & Registration

  • Log in
  • Entries feed
  • Comments feed
  • WordPress.org

Newsletter

Signup for The Tech Edvocate Newsletter and have the latest in EdTech news and opinion delivered to your email address!

About Us

Since technology is not going anywhere and does more good than harm, adapting is the best course of action. That is where The Tech Edvocate comes in. We plan to cover the PreK-12 and Higher Education EdTech sectors and provide our readers with the latest news and opinion on the subject. From time to time, I will invite other voices to weigh in on important issues in EdTech. We hope to provide a well-rounded, multi-faceted look at the past, present, the future of EdTech in the US and internationally.

We started this journey back in June 2016, and we plan to continue it for many more years to come. I hope that you will join us in this discussion of the past, present and future of EdTech and lend your own insight to the issues that are discussed.

Newsletter

Signup for The Tech Edvocate Newsletter and have the latest in EdTech news and opinion delivered to your email address!

Contact Us

The Tech Edvocate
910 Goddin Street
Richmond, VA 23231
(601) 630-5238
[email protected]

Copyright © 2026 Matthew Lynch. All rights reserved.