Can I use presets in Lightroom?
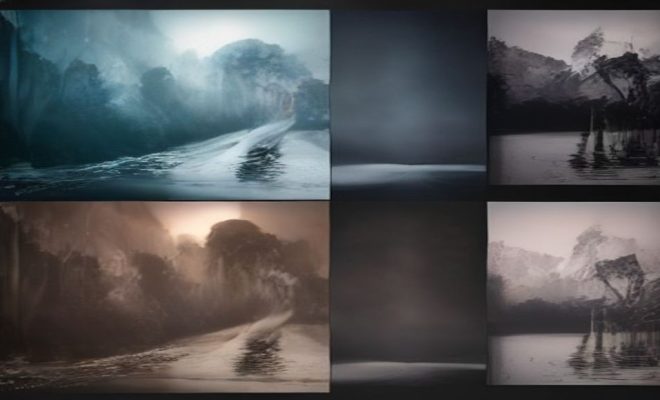
You’ve probably seen those stunning images online – vibrant landscapes, perfectly toned portraits, or moody street scenes – and wondered how photographers achieve such a consistent, professional look. Often, the ‘secret sauce’ isn’t just a masterful eye or expensive gear, though those certainly help. A massive part of that equation, and one that’s surprisingly accessible, comes down to something called Lightroom presets. If you’ve ever asked, ‘Can I use presets in Lightroom?’ the answer is an emphatic, resounding YES – and not only can you, but you absolutely should, whether you’re a seasoned pro or just starting your photographic journey.
Think of Lightroom presets as a set of pre-configured adjustments that you can apply to your photos with a single click. Instead of manually tweaking exposure, contrast, highlights, shadows, whites, blacks, saturation, vibrance, color temperature, tint, and a dozen other sliders for every single image, a preset does it all for you instantly. It’s like having a professional editor’s recipe for a particular style, ready to be poured over your raw ingredients. This isn’t about cutting corners; it’s about efficiency, consistency, and unlocking a level of creative control that might otherwise feel overwhelming. We’re going to dive deep into what presets are, how they work, why they’re so incredibly useful, and how you can integrate them into your own workflow to transform your photography.
The Genesis of Lightroom Presets: A Workflow Revolution
Before we get into the nitty-gritty of using them, it helps to understand the historical context. Digital photography, while liberating, also introduced a new challenge: the sheer volume of images. Shooting hundreds, sometimes thousands, of photos in a single session became common. Editing each one from scratch, trying to match a specific look across an entire series, was a monumental task. This is where Adobe Lightroom, first released in 2007, stepped in as a game-changer. It wasn’t just an image editor; it was a comprehensive workflow solution for photographers, designed specifically to manage, organize, and process large quantities of digital images.
Within Lightroom, the concept of developing a ‘look’ or ‘style’ for an image became central. Photographers would spend hours meticulously adjusting various parameters in the Develop module. Once they achieved a desirable aesthetic – perhaps a high-contrast black and white, or a warm, cinematic tone – they realized the power of saving these exact adjustments. This ability to save a collection of edits as a reusable template gave birth to the Lightroom preset. It was a natural evolution, born out of a practical need to streamline post-production and maintain a cohesive visual identity across a body of work. The early adopters quickly recognized that this wasn’t just a convenience; it was a fundamental shift in how photographers approached editing.
What Exactly Are Lightroom Presets? Deconstructing the Magic
At their core, Lightroom presets are simply a saved collection of slider positions and settings within Lightroom’s Develop module. When you apply a preset, Lightroom essentially moves all those sliders to the saved positions simultaneously. It’s not magic, but it certainly feels like it when you see an image transform in an instant. These settings can include:
- Basic Adjustments: Exposure, contrast, highlights, shadows, whites, blacks, clarity, vibrance, saturation.
- Tone Curve: Adjusting the tonal range and contrast with more precision.
- HSL/Color: Modifying the hue, saturation, and luminance of individual colors.
- Split Toning: Adding color tints to highlights and shadows.
- Detail: Sharpening and noise reduction settings.
- Lens Corrections: Fixing optical distortions specific to your lens.
- Transform: Correcting perspective and aspect ratios.
- Effects: Adding grain, vignetting, or dehaze.
- Calibration: Fine-tuning color profiles.
It’s important to understand that a preset is non-destructive. Applying a preset doesn’t permanently alter your original image file. Instead, Lightroom saves these adjustments as metadata instructions. You can apply a preset, tweak it further, apply another preset, or revert to the original state at any time without any loss of image quality. This flexibility is one of Lightroom’s most powerful features and makes experimentation with presets incredibly safe and encouraging.
The Unbeatable Benefits of Integrating Lightroom Presets into Your Workflow
Why should you bother with Lightroom presets? The advantages are numerous and compelling, impacting both the efficiency and the creative output of your photography.
1. Drastic Time Savings
This is arguably the most immediate and impactful benefit. Imagine editing 500 wedding photos. If each photo takes an average of 3-5 minutes to edit from scratch, you’re looking at 25-40 hours of editing time. With a well-chosen preset, you can apply a base edit to hundreds of photos in minutes. You’ll still need to fine-tune individual images for exposure or composition, but the heavy lifting of establishing the overall look is done. This frees up countless hours, allowing you to shoot more, spend more time on other creative pursuits, or simply enjoy life outside the computer.
2. Achieving a Consistent Visual Style
A consistent visual style is a hallmark of professional photography. Whether you’re building a portfolio, curating an Instagram feed, or delivering a client gallery, a cohesive look elevates your work. Lightroom presets are the ultimate tool for this. By using the same set of presets (or variations of them) across your images, you ensure a unified aesthetic. This consistency helps build your brand, makes your work instantly recognizable, and presents a more polished, professional image to viewers and clients alike. Think of famous photographers – their work often has an unmistakable ‘feel’ to it, a significant part of which is achieved through consistent post-processing.
3. Learning and Experimentation
For beginners, presets are an incredible learning tool. By applying a preset, you can see exactly how a professional achieved a particular look by examining the slider positions. You can then reverse-engineer the adjustments, understanding the interplay between different settings. This hands-on exploration accelerates your understanding of color theory, tonal adjustments, and overall image processing. For experienced photographers, presets offer new avenues for experimentation, pushing you out of your comfort zone and potentially inspiring new creative directions you might not have explored manually. (See: Learn about Adobe Lightroom features.)
4. Overcoming Creative Blocks and Inspiring New Ideas
We all hit creative walls. Sometimes, staring at a raw image on screen, you just can’t visualize how to make it pop. Applying a diverse range of Lightroom presets can be like having a brainstorming session with a team of designers. A preset might suggest a mood you hadn’t considered, or highlight colors in a way you hadn’t imagined. It can kickstart your creativity, offering a fresh perspective and helping you see your images in a new light. This quick visual feedback loop is incredibly powerful for breaking through creative ruts.
5. Enhancing Brand Identity
For photographers who run a business, a distinct visual brand is paramount. Your editing style is as much a part of your brand as your logo or website design. Developing or purchasing a signature set of Lightroom presets allows you to imbue all your client work with that unique brand identity. This reinforces your professional image and ensures that everything you deliver, from a quick social media sneak peek to a full client gallery, speaks with a consistent voice. It’s a powerful differentiator in a crowded market.
Acquiring Lightroom Presets: Where to Find Your Perfect Match
So, you’re convinced. You want to start using presets. But where do you get them?
1. Creating Your Own Presets
This is often the most satisfying route. Once you’ve manually edited an image to perfection, simply go to the Develop module, then to the Presets panel on the left. Click the ‘+’ icon and choose ‘Create Preset’. You’ll be presented with a dialog box where you can select which settings you want to include in your preset. Give it a descriptive name and save it. This is how you build a custom library tailored specifically to your style and needs. It’s an excellent way to consolidate your unique editing recipes. editing apps you'll enjoy offers useful background here.
2. Free Presets
A quick Google search will reveal a plethora of websites offering free Lightroom presets. These can be a great starting point for experimentation. Many photography blogs, online magazines, and even some photographers offer freebies as a way to introduce their work. While quality can vary, you can often find some gems. Just be mindful of where you download from to avoid malware or low-quality files.
3. Purchasing Professional Presets
This is where many photographers invest. Professional preset packs are developed by experienced photographers and retouchers, often based on years of refining their own styles. They typically offer a cohesive collection designed for specific genres (e.g., portrait, landscape, wedding, fashion, street) or moods (e.g., moody, bright & airy, cinematic, vintage). While they come with a cost, the quality, consistency, and time savings they offer can easily justify the investment. Renowned creators like Mastin Labs, VSCO (though more known for mobile now), and countless independent photographers sell excellent preset collections. When buying, look for reviews, before-and-after examples, and compatibility with your version of Lightroom.
Installing Lightroom Presets: A Quick How-To
Once you’ve acquired presets, installing them is straightforward, though the exact method can vary slightly depending on your Lightroom version (Lightroom Classic vs. Lightroom CC) and the file type.
For Lightroom Classic (Desktop Version):
- Open Lightroom Classic.
- Go to the ‘Develop’ module.
- In the ‘Presets’ panel on the left, click the ‘+’ icon.
- Select ‘Import Presets…’.
- Navigate to the folder where you saved your downloaded presets (they often come in .XMP format).
- Select the presets and click ‘Import’.
- Your new presets will now appear in the Presets panel, usually grouped under a folder name provided by the creator.
For Lightroom CC (Cloud-based Desktop & Mobile):
Lightroom CC handles presets a bit differently, often syncing them across devices.
- Open Lightroom CC on your desktop.
- Click on the ‘Presets’ icon in the right-hand panel (it looks like two overlapping circles).
- Click the three dots (…) at the top right of the Presets panel.
- Select ‘Import Presets’.
- Navigate to your preset files (again, typically .XMP).
- Select and import. They will then sync to your mobile Lightroom app as well, which is incredibly convenient for on-the-go editing.
Always check the instructions provided by the preset creator, as they might have specific recommendations or bundled profiles that need to be installed alongside the presets for optimal performance.
Practical Application: Making Lightroom Presets Work for You
Simply applying a preset isn’t always the end of the editing process. Think of it as a powerful starting point, not necessarily the final destination. Here’s how to integrate them effectively: (See: Research on image processing techniques.)
First, always start with a well-exposed, in-focus image. Presets can enhance, but they can’t fix fundamentally flawed photography. A good base image is crucial.
Once you apply a preset, don’t be afraid to tweak it. Very rarely will a preset be a one-click wonder for every single image, especially if your lighting conditions or subject matter vary. Use the sliders in the Develop module to fine-tune:
- Exposure: This is almost always the first adjustment. Presets are developed on certain exposure levels, and your image might be brighter or darker.
- White Balance: While some presets include white balance adjustments, you might need to warm or cool the image to match your specific scene or desired mood.
- Contrast: Adjust to add punch or soften the look.
- Highlights & Shadows: Recover detail in blown-out highlights or lift shadows if they’re too dark.
- Color Adjustments (HSL): Sometimes a preset makes a particular color (like skin tones or greens) look unnatural. Use the HSL panel to adjust the hue, saturation, and luminance of specific colors.
- Grain/Vignetting: If a preset adds grain or a vignette, you might want to reduce or remove it depending on your preference.
The key is to use the preset as a foundation and then personalize it to your image and vision. Over time, you’ll develop an intuition for which adjustments are typically needed after applying certain presets. You can even save your tweaked version as a new, personalized preset! There’s a fuller look at favorite photography apps.
Optimizing Your Workflow with Presets: Smart Strategies
Beyond simply applying and tweaking, there are several advanced strategies to maximize the utility of Lightroom presets.
Batch Processing and Synchronization
This is where presets truly shine for efficiency. If you’ve shot a series of photos under similar lighting conditions (e.g., a portrait session, an event, a set of landscape shots from the same location), you can apply a preset to one image, fine-tune it, and then synchronize those adjustments across all selected images. This means you can edit hundreds of photos with a consistent look in a fraction of the time. In Lightroom Classic, select the edited image, then select all other images you want to apply the settings to (hold Shift and click). Then, click the ‘Sync Settings…’ button on the bottom right, choose which settings to synchronize (usually all of them), and hit ‘Synchronize’.
Using Adaptive Presets (AI-Powered)
Newer versions of Lightroom have introduced adaptive presets that leverage AI. These are presets that can intelligently apply adjustments based on the content of your image. For example, an adaptive preset might automatically select and enhance the sky, or brighten a subject’s eyes. These are still evolving, but they represent an exciting frontier in automated, intelligent editing and can further refine your one-click solutions.
Building a Curated Preset Library
Don’t just collect every free preset you find. Over time, you’ll accumulate many. It’s crucial to curate your library. Delete presets you never use, organize them into folders (e.g., ‘Portraits – Warm,’ ‘Landscapes – Moody,’ ‘My Custom Looks’), and give them descriptive names. A streamlined, organized preset panel makes your workflow much faster and less overwhelming.
Combining Presets with Local Adjustments
While presets apply global adjustments, don’t forget Lightroom’s powerful local adjustment tools: the Adjustment Brush, Radial Filter, and Graduated Filter. After applying a preset, you can use these tools to make targeted enhancements – perhaps brightening a face, darkening a sky, or adding clarity to a specific object. This combination of global presets and precise local adjustments gives you ultimate control and truly professional results.
The Future of Presets and AI in Photography
The landscape of photo editing is constantly evolving, and Lightroom presets are evolving with it. We’re already seeing more intelligent, AI-driven presets that can analyze an image and suggest the most appropriate adjustments or even apply selective edits. As machine learning advances, we might see presets that adapt not just to content, but to your personal editing style over time, learning your preferences and offering even more tailored starting points. (See: Understanding the impact of presets.)
Furthermore, the integration of presets across different platforms is becoming seamless. With cloud-based Lightroom CC, your presets sync automatically between desktop, mobile, and web versions, ensuring a consistent editing experience no matter where you are. This ‘edit anywhere’ flexibility further cements presets as an indispensable tool for the modern photographer.
Common Misconceptions About Lightroom Presets
Despite their widespread use, some myths persist about presets that can deter photographers from embracing them.
Myth 1: Presets are ‘Cheating’
This is perhaps the most common misconception. Some photographers feel that using a preset is somehow less ‘artistic’ or an unfair shortcut. This couldn’t be further from the truth. Presets are a tool, just like a specific lens, a tripod, or a camera setting. They allow artists to achieve their vision more efficiently, freeing them up to focus on composition, lighting, and storytelling. Great painters didn’t mix every single color from scratch for every stroke; they used pre-prepared pigments. Presets are no different. They accelerate the technical process so you can dedicate more energy to the creative aspects.
Myth 2: One Preset Fits All
While a good preset can be versatile, no single preset will magically make every photo perfect. As discussed, they are starting points. Different lighting conditions, subjects, and moods require different approaches. A preset designed for bright, airy portraits won’t look great on a moody, low-light landscape. Having a diverse library and knowing how to tweak them is key.
Myth 3: Presets Replace Skill
Absolutely not. Presets are an enhancement to skill, not a replacement. You still need to understand exposure, composition, color theory, and how light works. You still need to know when to apply a preset, which one to choose, and how to fine-tune it. A bad photo, no matter how many presets you throw at it, will still be a bad photo. Presets empower skilled photographers; they don’t create them.
Embracing the Power of Presets
So, can you use presets in Lightroom? Without a doubt. And if you’re serious about your photography, you really should be. They are not merely a convenience; they are a transformative tool that can significantly enhance your workflow, elevate your creative output, and help you establish a distinctive visual identity. From saving precious hours to providing a powerful educational avenue, Lightroom presets offer an unparalleled blend of efficiency and creative potential.
Don’t let any lingering doubts or misconceptions hold you back. Start experimenting, create your own, download some free ones, or invest in a professional pack. You’ll quickly discover that these little bundles of saved settings can unlock a whole new dimension in your post-processing, allowing you to spend less time on repetitive tasks and more time on the artistry that truly matters.
Trending Now
Frequently Asked Questions
Can I use presets in Lightroom?
Yes, you can use presets in Lightroom, and it's highly recommended for both beginners and experienced photographers. Presets allow you to apply a set of pre-configured adjustments to your photos with just one click, saving time and ensuring consistency across your images.
What are Lightroom presets used for?
Lightroom presets are used to quickly apply specific adjustments to your photos, such as exposure, contrast, and color settings. They streamline the editing process, allowing photographers to achieve a desired look efficiently and consistently across multiple images.
How do I install presets in Lightroom?
To install presets in Lightroom, download the preset files, open Lightroom, navigate to the Develop module, and find the Presets panel. Click the '+' icon to import the presets, select the files, and click 'Import'. Your presets will now be available for use in your editing workflow.
Are Lightroom presets worth it?
Yes, Lightroom presets are worth it as they enhance editing efficiency and help achieve a professional look with minimal effort. They are especially useful for photographers dealing with large volumes of images, ensuring consistency and saving time during the editing process.
Can I create my own presets in Lightroom?
Absolutely! You can create your own presets in Lightroom by adjusting the sliders to achieve your desired look and then saving those settings as a preset. This customizes your editing workflow and allows you to replicate your unique style across different photos.
What did we miss? Let us know in the comments and join the conversation.