Can I use multiple monitors with Remote Desktop?
In our increasingly distributed world, the ability to work from virtually anywhere has become less a luxury and more a fundamental expectation. Whether you’re a remote employee connecting to your office PC, a system administrator managing servers, or a developer accessing a powerful workstation, the tools that bridge the geographical gap are critical. One such stalwart is Microsoft’s Remote Desktop Protocol (RDP), a technology that’s been around for decades, quietly powering countless remote connections.
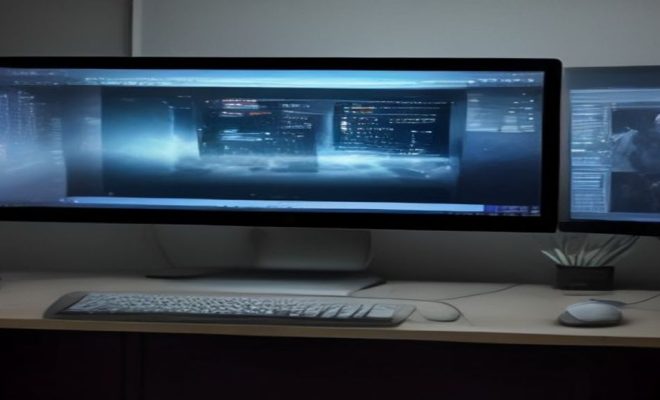
But let’s be honest: for many of us, the shift to remote work wasn’t just about logging in from home; it was about replicating our office setup as closely as possible. And for a significant chunk of the professional world, that means one thing above all else: multiple monitors. The idea of juggling complex applications, research documents, and communication tools all on a single screen often feels like trying to run a marathon in a phone booth. It’s simply not efficient. So, the burning question that frequently arises is, “Can I use multiple monitors with Remote Desktop?” The answer, thankfully, is a resounding yes, and understanding how to set it up properly can be a game-changer for your productivity.
Before we dive into the nitty-gritty of configuration, it’s worth appreciating why this capability is so crucial. Think about a financial analyst tracking multiple stock tickers and news feeds, a graphic designer comparing different versions of a design, or a programmer debugging code while referencing documentation. These aren’t niche use cases; they’re everyday scenarios for millions. The ability to span your remote desktop across several physical monitors on your local machine fundamentally transforms the remote work experience from a cramped compromise into a genuinely productive environment. It’s about bringing the expansive feel of your physical workspace to your virtual one, and RDP, with the right tweaks, absolutely delivers.
Understanding the Core Technology: Remote Desktop Protocol (RDP)
To truly appreciate the power of multiple monitors with Remote Desktop, it helps to grasp what RDP is doing under the hood. Developed by Microsoft, RDP is a proprietary protocol that allows a user to graphically control another computer over a network connection. Essentially, it transmits the display output of the remote machine to your local screen and sends your keyboard and mouse inputs back to the remote machine. It’s like having a virtual window into a distant computer, but instead of just viewing it, you’re actively interacting with it.
RDP operates by sending highly compressed bitmap images of the remote desktop to your client. It also intelligently detects changes on the remote screen and only transmits the updated pixels, minimizing bandwidth usage. Over the years, RDP has evolved significantly, incorporating features like audio redirection, printer redirection, clipboard sharing, and, crucially for our discussion, display configuration options that support multiple monitors. This continuous development has made it a robust and reliable tool for remote access, even over less-than-perfect internet connections.
The magic for multiple monitor support lies in how RDP interprets your local display configuration and communicates it to the remote machine. When configured correctly, the remote desktop session doesn’t just treat your multiple screens as one giant, contiguous display. Instead, it recognizes them as distinct monitors, allowing you to drag windows between them, maximize applications to individual screens, and generally interact with the remote desktop as if you were sitting directly in front of it with your multi-monitor setup. This distinction is vital; it’s not just a stretched image, but a truly integrated experience.
The Prerequisites: What You Need for Multiple Monitors Remote Desktop
Before you can bask in the glory of a multi-monitor remote session, you need to ensure a few fundamental components are in place. These aren’t complex requirements, but overlooking them can lead to frustration.
First and foremost, you need a local machine with multiple monitors connected and configured correctly. This might seem obvious, but it’s the foundation. Your local operating system (Windows, macOS, Linux) needs to recognize and extend your desktop across all the screens you intend to use for the remote session. If your local setup isn’t working as expected, your remote session certainly won’t magically fix it. Take a moment to test your local multi-monitor arrangement by dragging windows between screens and ensuring everything is aligned correctly.
Secondly, the remote machine must be running a version of Windows that supports incoming RDP connections. This typically means Windows Professional, Enterprise, or Server editions. Home editions of Windows, for instance, can *initiate* RDP connections but cannot *receive* them. So, if you’re trying to connect to a Windows 10 Home machine, you’ll hit a roadblock right away, regardless of your monitor setup. Verify the remote OS version and ensure Remote Desktop is enabled in its system settings.
Lastly, and perhaps most critically for performance, a stable and reasonably fast internet connection is essential. While RDP is efficient, pushing multiple full-resolution desktop streams over a slow or intermittent connection will inevitably lead to lag, pixelation, and a generally miserable user experience. Consider both download and upload speeds, especially if you’re working with graphically intensive applications on the remote end. A fiber connection or a robust cable internet plan is ideal, but even a solid DSL line can work for basic productivity tasks if the bandwidth is sufficient.
Enabling Multi-Monitor Support in the Remote Desktop Client
This is where the rubber meets the road. Microsoft’s Remote Desktop Connection client, often simply called MSTSC (Microsoft Terminal Services Client), is your gateway to remote productivity. Fortunately, enabling multiple monitors with Remote Desktop through this client is straightforward, though easily missed if you don’t know where to look.
When you open the Remote Desktop Connection client (you can find it by typing ‘mstsc’ into the Windows search bar), you’ll initially see a compact window. To access the multi-monitor settings, you need to click on ‘Show Options’ in the bottom-left corner. This expands the client window, revealing several tabs: General, Display, Local Resources, Experience, and Advanced. (See: Remote Desktop Protocol overview.)
The ‘Display’ tab is where the magic happens. Here, you’ll see a section titled ‘Display configuration’. There are two primary ways to enable multi-monitor support:
-
Use all my monitors for the remote session: This is the simplest and most common option. Just check the box next to ‘Use all my monitors for the remote session’. When you connect, the RDP client will automatically detect your local monitor configuration and attempt to span the remote desktop across all of them. This means if you have two 1920×1080 monitors locally, your remote session will effectively create a single virtual desktop of 3840×1080 and stretch it across your screens, allowing windows to move seamlessly between them. This is the preferred method for most users seeking a true multi-monitor experience.
-
Manual Configuration: Below the ‘Use all my monitors’ checkbox, you’ll find a slider to adjust the remote desktop resolution. If you uncheck the ‘Use all my monitors’ option, you can manually set a custom resolution. While this doesn’t directly enable multi-monitor support in the same way, you could, theoretically, set a very wide resolution (e.g., 5760×1080 for three monitors) and then stretch that single, massive remote desktop across your physical screens. However, this approach often leads to issues with window snapping, maximization, and general usability, as the remote OS still perceives it as one giant display rather than distinct monitors. Stick with the ‘Use all my monitors’ checkbox for the best experience.
Once you’ve checked the ‘Use all my monitors for the remote session’ box, go back to the ‘General’ tab, enter the remote computer’s IP address or hostname, and then click ‘Connect’. The RDP client will now attempt to establish the connection and present the remote desktop across your chosen local monitors.
Saving Your Configuration for Future Use
Nobody wants to reconfigure these settings every single time they connect. On the ‘General’ tab, after you’ve entered your remote computer’s details and adjusted your display settings, you’ll see an option to ‘Save As…’. This allows you to save your entire connection configuration (including display settings, credentials, and other preferences) into an RDP file (.RDP extension). Double-clicking this file in the future will launch the Remote Desktop connection with all your pre-configured settings, including your multiple monitors Remote Desktop setup, saving you valuable time and hassle.
Advanced Multi-Monitor Scenarios and Troubleshooting
While the ‘Use all my monitors’ checkbox handles most situations gracefully, there are times when you might need more granular control or encounter a hiccup. Understanding these advanced scenarios and common troubleshooting steps can save you a lot of head-scratching.
Selecting Specific Monitors (Advanced Users)
What if you have three monitors locally but only want to use two for your multiple monitors Remote Desktop session? The standard RDP client doesn’t offer a direct way to pick and choose which specific monitors it uses from your local setup. It’s an all-or-nothing approach with the ‘Use all my monitors’ checkbox. However, there’s a workaround for advanced users involving editing the RDP file directly.
After saving your RDP connection file (as described above), you can open it with a text editor like Notepad. Look for lines like:
use multimon:i:1
selectedmonitors:s:0,1
The use multimon:i:1 line enables multi-monitor support. The selectedmonitors:s: line is the key. The numbers after s: represent the indices of your local monitors, starting from 0. So, 0,1 would mean your first and second monitors. If you have three monitors (0, 1, 2) but only want to use monitors 0 and 2, you’d change it to selectedmonitors:s:0,2. Save the RDP file, and when you launch it, the session should only span those specific screens. This level of customization is incredibly powerful for niche setups.
Common Troubleshooting Steps
-
Remote Desktop Not Spanning: If you’ve checked ‘Use all my monitors’ but the remote session still only appears on one screen, first double-check that your local monitors are correctly set up and extended (not duplicated). Sometimes, a simple reboot of your local machine can resolve display driver quirks. Also, ensure your RDP client is up to date.
-
Lag or Poor Performance: This is almost always a network issue. Try reducing the display resolution on the remote machine if possible, or adjust the ‘Experience’ tab settings in the RDP client to disable features like desktop background, font smoothing, and visual styles. Lowering the color depth can also help. If you’re on Wi-Fi, try a wired Ethernet connection for maximum stability and speed.
-
Black Screen on Connect: This can be frustrating. Ensure the remote machine is not in a sleep state or hibernating. Also, check firewall settings on both the local and remote machines; sometimes, a firewall can block the RDP connection or specific display components. Occasionally, restarting the Remote Desktop Services on the remote machine can resolve this (if you have administrative access).
-
Cursor Issues or Incorrect Scaling: If your mouse cursor behaves strangely or elements appear disproportionately sized, it might be a DPI scaling mismatch. Ensure that the display scaling settings on your local machine and the remote machine are compatible, or try setting both to 100% for testing purposes. Windows 10 and 11 have improved high-DPI support, but older RDP versions or specific application combinations can still struggle.
The Impact of Network Speed on Multiple Monitors Remote Desktop Performance
We touched on this briefly, but it deserves its own dedicated discussion because network performance is arguably the single biggest factor influencing your experience with multiple monitors Remote Desktop. It’s the silent killer of productivity if not adequately addressed. (See: CDC on telework and remote work.)
Think of each monitor as a separate video stream. Even if RDP is highly optimized, transmitting two or three full HD or 4K streams simultaneously requires significant bandwidth. Every pixel change, every window movement, every scroll event has to be transmitted from the remote server to your local machine. If your internet connection is a narrow pipe, trying to push all that data through it is like trying to force an elephant through a keyhole – it’s just not going to happen smoothly.
Latency, the time it takes for data to travel from one point to another, is also a critical factor. High latency manifests as a noticeable delay between your mouse movement or keypress and the corresponding action on the remote screen. This ‘input lag’ can make working remotely incredibly frustrating, especially for tasks requiring precision or rapid interaction. Even with ample bandwidth, high latency can cripple the user experience.
So, what can you do? Prioritize a wired Ethernet connection over Wi-Fi whenever possible. Wi-Fi introduces more variables, including interference, signal strength fluctuations, and higher inherent latency. If Wi-Fi is your only option, ensure you’re using a modern standard (Wi-Fi 5 or 6) with a strong signal and minimal competing traffic. On the ‘Experience’ tab of the RDP client, you can also select your connection speed (e.g., ‘LAN (10 Mbps or higher)’ or ‘Low-speed broadband’). While this doesn’t magically increase your actual speed, it tells RDP to adjust its compression and feature set to optimize for that estimated bandwidth, potentially improving responsiveness by disabling visual frills.
Security Considerations for Remote Desktop Connections
While convenience and productivity are paramount, security should never be an afterthought, especially when dealing with remote access. An improperly secured RDP connection is a gaping vulnerability for any network. This holds true whether you’re using one monitor or a dozen.
The most critical step is to use strong, complex passwords for all user accounts that have RDP access. Brute-force attacks against RDP are incredibly common, with attackers attempting to guess weak passwords. Multi-Factor Authentication (MFA) is the gold standard here. If your remote environment supports it (e.g., via a VPN gateway or specific RDP security solutions), enable MFA immediately. This adds a crucial second layer of verification, making it exponentially harder for attackers to gain access even if they somehow compromise a password.
Secondly, avoid exposing RDP directly to the internet. Port 3389, the default RDP port, is constantly scanned by malicious actors. Instead, use a Virtual Private Network (VPN) to establish a secure, encrypted tunnel to your remote network first, and then connect via RDP. This keeps your RDP port hidden from the public internet. If a VPN isn’t feasible, consider changing the default RDP port to a non-standard one (though this is more of a minor deterrent than a security solution) and implement strict firewall rules to only allow RDP connections from specific, trusted IP addresses.
Finally, keep both your local and remote operating systems, including the RDP client, fully patched and updated. Microsoft regularly releases security updates for RDP to address newly discovered vulnerabilities. Neglecting updates is an open invitation for exploits. Regularly review RDP logs on the remote machine for unusual activity, and consider implementing account lockout policies to prevent repeated brute-force attempts.
Alternatives and Enhancements: Beyond Basic RDP
While the native RDP client is powerful and widely used, the landscape of remote access is broad. Depending on your specific needs, you might find alternatives or enhancements that offer even more robust multiple monitors Remote Desktop experiences or additional features.
Microsoft Remote Desktop App (Store Version)
For Windows 10/11 users, there’s a modern UWP (Universal Windows Platform) ‘Microsoft Remote Desktop’ app available from the Microsoft Store. This app often provides a smoother, more integrated experience with modern Windows features, including better high-DPI scaling and support for Windows Hello for authentication. It also offers excellent multi-monitor support, often with a more intuitive interface for managing connections and display settings compared to the classic MSTSC client.
Remote Desktop Gateway
For organizations, a Remote Desktop Gateway (RD Gateway) provides a secure way to allow remote users to connect to internal network resources over HTTPS, without exposing internal servers directly to the internet. This acts as a proxy, enhancing security and often simplifying firewall configurations. It works seamlessly with the standard RDP client and multi-monitor setups, providing a more enterprise-grade solution.
Third-Party Remote Access Tools
Many third-party solutions offer remote access, often with advanced features beyond RDP. Tools like AnyDesk, TeamViewer, Chrome Remote Desktop, and VNC (Virtual Network Computing) offer cross-platform compatibility, file transfer, session recording, and often very good multi-monitor support. While they might use different underlying protocols, their goal is the same: to provide a seamless remote experience. The choice often comes down to specific feature sets, pricing models, and organizational preferences. For instance, some users find AnyDesk to be exceptionally fast for graphical applications, while TeamViewer is known for its ease of setup for non-technical users. (See: New York Times on multiple monitors.)
Virtual Desktop Infrastructure (VDI)
In a large enterprise context, Virtual Desktop Infrastructure (VDI) solutions (like Citrix Virtual Apps and Desktops or VMware Horizon) take remote access to the next level. Instead of connecting to a single physical PC, users connect to a virtual machine hosted in a data center. These solutions are designed from the ground up to support complex multi-monitor configurations, offer advanced resource management, and provide a highly scalable and secure environment for remote work. While significantly more complex to deploy, they offer unparalleled flexibility and control for large organizations.
Optimizing Your Multiple Monitors Remote Desktop Environment
Beyond the basic setup, there are several ways to fine-tune your multiple monitors Remote Desktop experience to maximize productivity and minimize frustration. These optimizations focus on both the remote session’s performance and your personal workflow.
Remote Desktop Experience Settings
In the ‘Experience’ tab of the RDP client, you can adjust several visual settings that directly impact performance. If you’re on a slower connection, disabling options like ‘Desktop background’, ‘Font smoothing’, ‘Show window contents while dragging’, ‘Menu and window animation’, and ‘Visual styles’ can significantly reduce the amount of data transmitted, leading to a snappier experience. While the remote desktop might look a bit less polished, the gain in responsiveness is often well worth it.
Local Resources Redirection
On the ‘Local Resources’ tab, you can configure what local resources are redirected to the remote session. This includes printers, clipboard, smart cards, and drives. For example, if you need to print a document from the remote session to your local printer, ensure ‘Printers’ is checked. Similarly, enabling ‘Clipboard’ allows you to copy and paste between your local and remote desktops, an absolute must-have for most users. Redirecting local drives can be useful for transferring files, but use it judiciously, as it can sometimes impact performance or raise security concerns depending on the data being accessed.
Keyboard Shortcuts and Window Management
Familiarize yourself with Windows keyboard shortcuts, which often behave identically in a remote session. For example, Win + Left/Right Arrow still snaps windows to halves of the screen, and Win + Shift + Left/Right Arrow moves a window between monitors. These shortcuts are invaluable for efficient window management, especially when you’re juggling applications across multiple remote screens. Learning these can save you countless mouse clicks and drags, making your multiple monitors Remote Desktop setup feel truly seamless.
The Future of Multi-Monitor Remote Work
The trajectory of remote work and the technologies that support it point towards even more sophisticated multi-monitor capabilities. As display technologies advance – think ultra-wide curved monitors, higher refresh rates, and even mixed reality interfaces – remote desktop protocols will need to keep pace. We’re likely to see continued improvements in compression algorithms, adaptive streaming technologies, and GPU acceleration to handle these increasingly demanding visual environments.
The integration of AI and machine learning could also play a role, perhaps by intelligently predicting user interactions to pre-render parts of the screen or dynamically adjusting bandwidth usage based on activity. Imagine a remote session that automatically prioritizes the active window’s fidelity while slightly reducing the quality of background screens, all without you noticing.
Furthermore, as cloud computing becomes even more ubiquitous, the lines between local and remote computing will continue to blur. Services like Windows 365 Cloud PC are essentially RDP on steroids, offering a fully managed, persistent Windows desktop experience from the cloud, inherently designed for modern multi-monitor setups. This shift means that the expectation for a flawless multi-monitor remote desktop experience will only grow, pushing technology providers to innovate further.
Ultimately, the ability to effectively use multiple monitors with Remote Desktop isn’t just a technical feature; it’s a productivity enhancer, a quality-of-life improvement, and a cornerstone of effective remote work. By understanding the underlying technology, configuring your client correctly, and paying attention to network and security best practices, you can transform your remote workspace into a highly efficient, multi-screen powerhouse, proving that distance is no barrier to productivity.
Trending Now
Frequently Asked Questions
Can I use multiple monitors with Remote Desktop?
Yes, you can use multiple monitors with Remote Desktop. By configuring your Remote Desktop settings, you can span your remote session across several physical monitors, enhancing your productivity and replicating your office setup.
How do I set up multiple monitors in Remote Desktop?
To set up multiple monitors in Remote Desktop, open the Remote Desktop Connection client, click on 'Show Options', go to the 'Display' tab, and check the box for 'Use all my monitors for the remote session'. This will allow you to utilize all connected monitors during your remote session.
What are the benefits of using multiple monitors with Remote Desktop?
Using multiple monitors with Remote Desktop allows for a more efficient workflow, enabling users to view and manage multiple applications simultaneously. This setup is particularly beneficial for roles that require multitasking, such as financial analysts, graphic designers, and programmers.
Do I need special software for multiple monitors on Remote Desktop?
No special software is required to use multiple monitors with Remote Desktop. The built-in Remote Desktop Protocol (RDP) supports multi-monitor setups, provided your local machine has multiple monitors connected and configured correctly.
What is Remote Desktop Protocol (RDP)?
Remote Desktop Protocol (RDP) is a proprietary protocol developed by Microsoft that allows users to connect to and control a remote computer over a network connection. It enables remote access to applications and desktops, making it a vital tool for remote work.
What did we miss? Let us know in the comments and join the conversation.