The Tech Edvocate

Top Menu

  • Advertisement
  • Apps
  • Home Page
  • Home Page Five (No Sidebar)
  • Home Page Four
  • Home Page Three
  • Home Page Two
  • Home Tech2
  • Icons [No Sidebar]
  • Left Sidbear Page
  • Lynch Educational Consulting
  • My Account
  • My Speaking Page
  • Newsletter Sign Up Confirmation
  • Newsletter Unsubscription
  • Our Brands
  • Page Example
  • Privacy Policy
  • Protected Content
  • Register
  • Request a Product Review
  • Shop
  • Shortcodes Examples
  • Signup
  • Start Here
    • Governance
    • Careers
    • Contact Us
  • Terms and Conditions
  • The Edvocate
  • The Tech Edvocate Product Guide
  • Topics
  • Write For Us
  • Advertise

Main Menu

  • Start Here
    • Our Brands
    • Governance
      • Lynch Educational Consulting, LLC.
      • Dr. Lynch’s Personal Website
      • Careers
    • Write For Us
    • The Tech Edvocate Product Guide
    • Contact Us
    • Books
    • Edupedia
    • Post a Job
    • The Edvocate Podcast
    • Terms and Conditions
    • Privacy Policy
  • Topics
    • Assistive Technology
    • Child Development Tech
    • Early Childhood & K-12 EdTech
    • EdTech Futures
    • EdTech News
    • EdTech Policy & Reform
    • EdTech Startups & Businesses
    • Higher Education EdTech
    • Online Learning & eLearning
    • Parent & Family Tech
    • Personalized Learning
    • Product Reviews
  • Advertise
  • Tech Edvocate Awards
  • The Edvocate
  • Pedagogue
  • School Ratings

logo

The Tech Edvocate

  • Start Here
    • Our Brands
    • Governance
      • Lynch Educational Consulting, LLC.
      • Dr. Lynch’s Personal Website
        • My Speaking Page
      • Careers
    • Write For Us
    • The Tech Edvocate Product Guide
    • Contact Us
    • Books
    • Edupedia
    • Post a Job
    • The Edvocate Podcast
    • Terms and Conditions
    • Privacy Policy
  • Topics
    • Assistive Technology
    • Child Development Tech
    • Early Childhood & K-12 EdTech
    • EdTech Futures
    • EdTech News
    • EdTech Policy & Reform
    • EdTech Startups & Businesses
    • Higher Education EdTech
    • Online Learning & eLearning
    • Parent & Family Tech
    • Personalized Learning
    • Product Reviews
  • Advertise
  • Tech Edvocate Awards
  • The Edvocate
  • Pedagogue
  • School Ratings
  • Când ecranul devine salon: atmosfera cazinoului online

  • 100 Best Performance Optimization Apps

  • LG’s Shocking Privacy Scandal: Why Is Apple Partnering on a Smart Doorbell Anyway?

  • The Astonishing New Weight Loss Drugs 2023 Set to Transform Everything

  • The Staggering Cost of Bad Actors: Honest DeFi Protocols Foot the Bill

  • OpenAI’s Secret Weapon: The Screenless AI Device That Could Kill Your iPhone

  • Why These 7 Esports Stocks Could Explode Your Portfolio by 2027

  • The Quiet Revolution: How AI Finance Tools 2026 Are Taking Over Your Money

  • Your Money, AI’s Brain: Why 7 in 10 Americans Are Ready for the Robot Revolution in Finance

  • The Staggering Truth About Student Loan Forgiveness Delays You Won’t Believe

Tech Advice
Home›Tech Advice›Turn an Old Monitor into a Wall Display with a Raspberry Pi

Turn an Old Monitor into a Wall Display with a Raspberry Pi
By Matthew Lynch
July 10, 2023
0
Spread the love

Introduction:

A wall display is an attractive and practical addition to any room, but purchasing one can be quite expensive. Luckily, there is a cost-effective alternative: turn an old computer monitor into a wall display with a Raspberry Pi! In this article, we will guide you through the process of creating your own custom wall display using a Raspberry Pi and an old monitor.

Materials Needed:

1. An old computer monitor (preferably with an HDMI input)
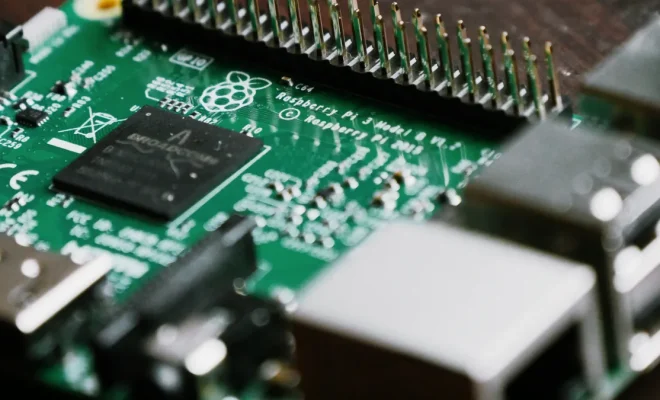
2. A Raspberry Pi (any model will work, but a Raspberry Pi 3 or 4 is recommended for better performance)
3. Micro SD card (at least 8GB)
4. HDMI cable
5. USB keyboard and mouse
6. Power supply for the Raspberry Pi
7. Optional: VESA mount for attaching the monitor to the wall
8. Optional: slim HDMI adapter or cable

Step-by-Step Guide:

1. Prepare the monitor:

– Disconnect any cables from the monitor and clean it thoroughly.
– If you want to hang the monitor on the wall, attach a VESA mount to the back of the monitor following the manufacturer’s instructions.

2. Set up your Raspberry Pi:

– Download the Raspberry Pi OS (formerly Raspbian) from the official website and write it onto your micro SD card using a tool like Etcher.
– Insert the micro SD card into your Raspberry Pi.
– Connect your USB keyboard and mouse to the Raspberry Pi.
– Plug in your power supply to turn on your Raspberry Pi.

3. Connect your Raspberry Pi to the monitor:

– Use an HDMI cable to connect your Raspberry Pi to your monitor’s HDMI port.
– If space is tight behind your setup, use a slim HDMI adapter or cable.

4. Configure your Raspberry Pi:

– Once connected, you should see the desktop on your monitor. Follow the setup prompts to configure your Raspberry Pi with your preferred keyboard layout and timezone.
– Update your Raspberry Pi by opening the terminal and typing the following commands:
sudo apt-get update
sudo apt-get upgrade

5. Customize your display:

– To add content to your wall display, you can install a variety of apps and tools depending on your preferences.
– For weather updates, install a weather app like “Weather-Desklet” or “Conky.”
– For news feeds or social media updates, use RSS feed readers like “Newsboat” or “Liferea.”
– You can also display calendars, photos, and other custom content with various tools available for Raspberry Pi.

6. Optional: Set up an auto-start for your display:

– To have your Raspberry Pi automatically start displaying content when it powers on, you can edit the configuration file. In the terminal, type:
cd /home/pi/.config/lxsession/LXDE/
sudo nano autostart
– Add the following line to the end of the file:
@chromium-browser –kiosk –incognito [URL of preferred content]
– Replace [URL of preferred content] with a link to a webpage featuring your desired content.

7. Enjoy your new wall display!

– With everything set up and configured, enjoy your new wall display that provides useful information at a glance!

Conclusion:

Creating a custom wall display with a Raspberry Pi is both a practical and cost-effective
alternative to commercial displays. The versatility of a Raspberry Pi allows you to personalize and customize the content to suit your needs and preferences. So why not transform that old computer monitor into a sleek, modern wall display today?


Previous Article

Turn an Old Liquor Bottle into a ...

Next Article

Ultimate Alexa Command Guide: 200+ Voice Commands ...

Matthew Lynch

Related articles More from author

  • Tech Advice

    How Do Inverse ETFs Work? An In-Depth Guide

    September 7, 2023
    By Matthew Lynch
  • Tech Advice

    Samsung Tuscan Stainless Steel Kitchen Appliances – Enhancing Modern Kitchens

    July 9, 2023
    By Matthew Lynch
  • Tech Advice

    What to Do if You Can’t Afford Your Mortgage’s Closing Costs

    September 7, 2023
    By Matthew Lynch
  • Tech Advice

    The iPhone app that lets you see your friends naked

    July 6, 2023
    By Matthew Lynch
  • Tech Advice

    Top Ways to Fix Spotify Keeps Pausing on Android and iPhone

    April 14, 2023
    By Matthew Lynch
  • Tech Advice

    6 Best Fidget Toys for Anxiety

    July 7, 2023
    By Matthew Lynch

Search

Login & Registration

  • Log in
  • Entries feed
  • Comments feed
  • WordPress.org

Newsletter

Signup for The Tech Edvocate Newsletter and have the latest in EdTech news and opinion delivered to your email address!

About Us

Since technology is not going anywhere and does more good than harm, adapting is the best course of action. That is where The Tech Edvocate comes in. We plan to cover the PreK-12 and Higher Education EdTech sectors and provide our readers with the latest news and opinion on the subject. From time to time, I will invite other voices to weigh in on important issues in EdTech. We hope to provide a well-rounded, multi-faceted look at the past, present, the future of EdTech in the US and internationally.

We started this journey back in June 2016, and we plan to continue it for many more years to come. I hope that you will join us in this discussion of the past, present and future of EdTech and lend your own insight to the issues that are discussed.

Newsletter

Signup for The Tech Edvocate Newsletter and have the latest in EdTech news and opinion delivered to your email address!

Contact Us

The Tech Edvocate
910 Goddin Street
Richmond, VA 23231
(601) 630-5238
[email protected]

Copyright © 2026 Matthew Lynch. All rights reserved.