MIDI Controllers You Can Build With an Arduino
If you’re a musician or a music producer, you’re probably familiar with MIDI controllers. MIDI stands for Musical Instrument Digital Interface, and it’s a protocol that allows electronic instruments, computers, and other music equipment to communicate with each other. A MIDI controller is a device that you can use to send MIDI data to a MIDI-enabled device, such as a synthesizer or a drum machine. There are hundreds of MIDI controllers available on the market, but did you know you could make your own with an Arduino?
What is Arduino?
Arduino is an open-source electronics platform based on easy-to-use hardware and software. It’s a popular tool for makers, hobbyists, and professionals who want to build electronic projects. You don’t need to be an electronics expert to use Arduino—its programming language is based on C++, which is easy to learn for beginners.
What Can You Build With an Arduino?
Arduino is a versatile platform, and you can use it to build all sorts of projects, including MIDI controllers. A MIDI controller made with Arduino can have various controls, such as buttons, knobs, sliders, and switches, that can send different MIDI messages, such as notes, pitch bend, modulation, and more.
Here are some MIDI controllers you can build with an Arduino:
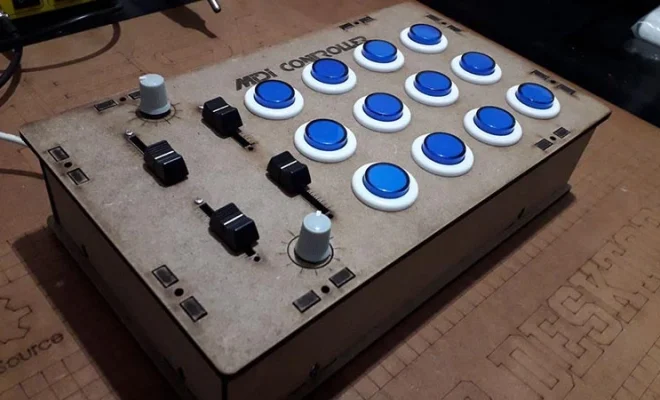
1. Button Box
A button box is a simple MIDI controller that consists of several buttons that can send MIDI notes or other MIDI messages. You can use it to trigger samples, play chords, or control effects. A button box is a handy tool for live performances or studio work.
2. Knob Box
A knob box is a MIDI controller that has several knobs that can send MIDI messages such as CC (control change) or NRPN (non-registered parameter number). You can use a knob box to control parameters such as volume, pan, filter, and more. A knob box is a great tool for tweaking sounds and effects in real-time.
3. Fader Box
A fader box is a MIDI controller that has several faders that can send MIDI messages such as CC or NRPN. You can use a fader box to control parameters such as volume, expression, or filter cutoff. A fader box is a classic tool for mixing and mastering.
4. Drum Pad
A drum pad is a MIDI controller that consists of several pads that can send MIDI notes or CC messages. You can use a drum pad to play drum sounds, trigger samples, or control effects. A drum pad is a useful tool for electronic music production.
5. Arcade Controller
An arcade controller is a MIDI controller that uses arcade buttons and joystick to send MIDI messages. You can use an arcade controller to play retro-style video game sounds, trigger samples, or control effects. An arcade controller is a fun tool for music production and live performances.
How to Build a MIDI Controller with an Arduino?
Building a MIDI controller with an Arduino is a fun and rewarding project that you can do at home. Here are the basic steps to build a MIDI controller:
1. Choose the hardware: You’ll need an Arduino board, some buttons, knobs, faders, or other controls, some wires, and a MIDI interface.
2. Choose the software: You’ll need to write a program for the Arduino that reads the inputs from the buttons, knobs or faders, and sends MIDI messages to the MIDI interface.
3. Build the controller: Connect the buttons, knobs or faders to the Arduino board and the MIDI interface, following the wiring diagram.
4. Program the controller: Write the code for the Arduino using the Arduino IDE, upload it to the board, and test it.
5. Customize the controller: You can add LEDs, displays, or other features to your MIDI controller depending on your needs.
Conclusion
MIDI controllers are essential tools for musicians and music producers, and building one with an Arduino is a fun and accessible project that anyone can do. With a few simple components and some programming skills, you can create a customized MIDI controller that suits your needs and preferences. So why not give it a try and see what you can make?