The Tech Edvocate

Top Menu

  • Advertisement
  • Apps
  • Home Page
  • Home Page Five (No Sidebar)
  • Home Page Four
  • Home Page Three
  • Home Page Two
  • Home Tech2
  • Icons [No Sidebar]
  • Left Sidbear Page
  • Lynch Educational Consulting
  • My Account
  • My Speaking Page
  • Newsletter Sign Up Confirmation
  • Newsletter Unsubscription
  • Our Brands
  • Page Example
  • Privacy Policy
  • Protected Content
  • Register
  • Request a Product Review
  • Shop
  • Shortcodes Examples
  • Signup
  • Start Here
    • Governance
    • Careers
    • Contact Us
  • Terms and Conditions
  • The Edvocate
  • The Tech Edvocate Product Guide
  • Topics
  • Write For Us
  • Advertise

Main Menu

  • Start Here
    • Our Brands
    • Governance
      • Lynch Educational Consulting, LLC.
      • Dr. Lynch’s Personal Website
      • Careers
    • Write For Us
    • The Tech Edvocate Product Guide
    • Contact Us
    • Books
    • Edupedia
    • Post a Job
    • The Edvocate Podcast
    • Terms and Conditions
    • Privacy Policy
  • Topics
    • Assistive Technology
    • Child Development Tech
    • Early Childhood & K-12 EdTech
    • EdTech Futures
    • EdTech News
    • EdTech Policy & Reform
    • EdTech Startups & Businesses
    • Higher Education EdTech
    • Online Learning & eLearning
    • Parent & Family Tech
    • Personalized Learning
    • Product Reviews
  • Advertise
  • Tech Edvocate Awards
  • The Edvocate
  • Pedagogue
  • School Ratings

logo

The Tech Edvocate

  • Start Here
    • Our Brands
    • Governance
      • Lynch Educational Consulting, LLC.
      • Dr. Lynch’s Personal Website
        • My Speaking Page
      • Careers
    • Write For Us
    • The Tech Edvocate Product Guide
    • Contact Us
    • Books
    • Edupedia
    • Post a Job
    • The Edvocate Podcast
    • Terms and Conditions
    • Privacy Policy
  • Topics
    • Assistive Technology
    • Child Development Tech
    • Early Childhood & K-12 EdTech
    • EdTech Futures
    • EdTech News
    • EdTech Policy & Reform
    • EdTech Startups & Businesses
    • Higher Education EdTech
    • Online Learning & eLearning
    • Parent & Family Tech
    • Personalized Learning
    • Product Reviews
  • Advertise
  • Tech Edvocate Awards
  • The Edvocate
  • Pedagogue
  • School Ratings
  • Your Home Insurance Bill Just Exploded: 5 Reasons Why — And What Comes Next

  • Your Home Insurance Premiums Are Skyrocketing: Is Your State On This List?

  • The Brutal Truth: Why 30-Year vs. 15-Year Fixed Mortgage Rates in 2026 Could CRUSH Your Homeownership Dreams

  • 7 Things First-Time Homebuyers MUST Know About the New 6.89% Mortgage Rates

  • Your Dream Home Just Got Pricier: Why Mortgage Rates 2026 Are Soaring Toward 7%

  • Unbelievable: The True Cost of CRISPR Anti-Aging Will Absolutely Shock You

  • Your Genes Hold The Key: How CRISPR Could Restore Youthful Function

  • The Mind-Blowing Way CRISPR Could End Aging As We Know It

  • Why Millions Are Rushing to Install Home Battery Storage Now

  • Google’s €13 Billion Bet: The Unseen Renewable Energy Funds Quietly Reshaping Your Portfolio

How To
Home›How To›How to Use Shutterfly

How to Use Shutterfly
By Matthew Lynch
April 1, 2024
0
Spread the love

Shutterfly is an excellent platform for creating and sharing personalized photo products. With a user-friendly interface and a vast array of options, Shutterfly is the go-to service for millions of people looking to preserve their memories in beautiful and creative ways. In this article, we will walk you through the process of using Shutterfly to help you make the most of this fantastic platform.

1. Register or Sign In:

To begin, you must first create an account on the Shutterfly website (https://www.shutterfly.com/). This will provide access to all features available and allow you to store your photos and projects safely online. Once you’ve created an account, sign in using your email address and password.

2. Upload Your Photos:

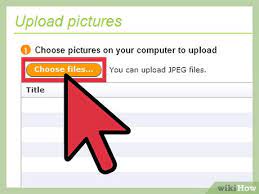
After signing into your account, start by uploading the photos you want to use in your project. Do this by clicking on “+New” at the top left-hand corner of the screen and selecting “Upload Photos.” Choose the photos from your device that you’d like to upload, or import them from social media or cloud services.

3. Organize Your Photos:

To make things easier when creating your project, it’s essential to organize your uploaded photos properly. On the main screen under “My Photos,” albums can be created by clicking on “Create Album.” To add images to albums or move them between folders, simply click on each photo and drag it into the desired location.

4. Choose Your Product:

Now that your photos are uploaded and organized, it’s time to choose from the many available products on Shutterfly’s homepage. You’ll find options ranging from photo books and calendars to home décor items and gifts.

5. Customize Your Product:

Once you’ve selected a product, choose from various customization options available on the product page. These may include altering dimensions or personalizing designs with themes such as holidays, travel, or celebrations. To make your project unique, take advantage of Shutterfly’s extensive library of backgrounds, layouts, and stickers.

6. Arrange Your Photos:

After customizing your project, add your photos to it by dragging them from the “My Photos” tab or by selecting “Add Photos” within the project. Adjust the layout by dragging images and swapping them out until you are satisfied with the configuration. If you’re unsure how to arrange everything, Shutterfly offers an “Autofill” feature that will arrange the photos for you.

7. Edit Your Photos:

To fine-tune any photo in your project, click on the image to open the editing tools. You can crop, rotate, adjust brightness and contrast or even apply various filters to enhance your pictures.

8. Save and Review Your Project:

Remember to save your progress frequently while working on your project by clicking “Save” at the upper right-hand corner of the screen. Once you’ve completed your design, select “Preview” to do a final review to ensure everything looks perfect and ready for printing.

9. Place Your Order:

If you’re happy with how your project looks, click on “Add To Cart” and follow the steps provided for shipping and payment options. Shutterfly will email you a receipt and order confirmation once everything is complete.

10. Share Your Creations:

Finally, after creating your personalized projects using Shutterfly, share them with friends and family online over social media or email by using the built-in sharing options.

By following these steps, you can harness the power of Shutterfly to turn your cherished memories into beautiful products that last a lifetime!

Previous Article

How to Set Hair

Next Article

4 Ways to Become an Elite Member ...

Matthew Lynch

Related articles More from author

  • How To

    How to Play Baseball Darts: 7 Steps

    April 6, 2024
    By Matthew Lynch
  • How To

    13 Simple Ways to Use Cinnamon Sticks

    December 23, 2023
    By Matthew Lynch
  • How To

    3 Ways to Get Rid of a Sore Throat

    October 5, 2023
    By Matthew Lynch
  • How To

    3 Simple Ways to Open RTF Files

    February 12, 2024
    By Matthew Lynch
  • How To

    How to Crimp RJ45: 14 Steps

    December 16, 2023
    By Matthew Lynch
  • How To

    3 Ways to Remove Mildew Smell from Clothing

    October 10, 2023
    By Matthew Lynch

Search

Login & Registration

  • Log in
  • Entries feed
  • Comments feed
  • WordPress.org

Newsletter

Signup for The Tech Edvocate Newsletter and have the latest in EdTech news and opinion delivered to your email address!

About Us

Since technology is not going anywhere and does more good than harm, adapting is the best course of action. That is where The Tech Edvocate comes in. We plan to cover the PreK-12 and Higher Education EdTech sectors and provide our readers with the latest news and opinion on the subject. From time to time, I will invite other voices to weigh in on important issues in EdTech. We hope to provide a well-rounded, multi-faceted look at the past, present, the future of EdTech in the US and internationally.

We started this journey back in June 2016, and we plan to continue it for many more years to come. I hope that you will join us in this discussion of the past, present and future of EdTech and lend your own insight to the issues that are discussed.

Newsletter

Signup for The Tech Edvocate Newsletter and have the latest in EdTech news and opinion delivered to your email address!

Contact Us

The Tech Edvocate
910 Goddin Street
Richmond, VA 23231
(601) 630-5238
[email protected]

Copyright © 2026 Matthew Lynch. All rights reserved.