How to use dispersion effect in PicsArt
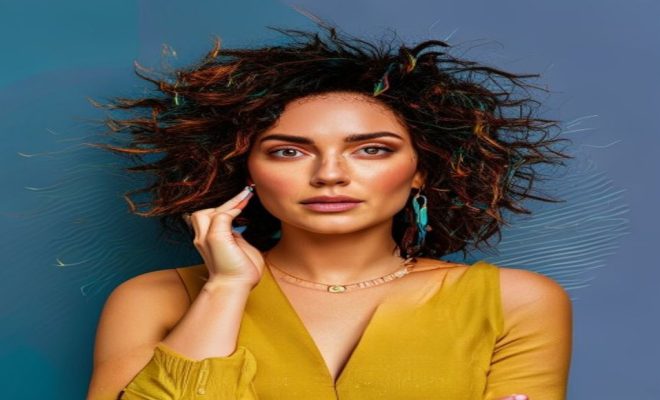
Ever scrolled through Instagram and stopped dead in your tracks, mesmerized by a photo that seems to be literally disintegrating into a flurry of tiny particles? You know the one – a person’s silhouette shattering, or an object dissolving into a beautiful, abstract explosion of color. That, my friend, is the magic of the dispersion effect, and if you’ve been wondering how those digital wizards pull it off, you’re in the right place. Specifically, we’re talking about how to achieve this captivating look using one of the most popular and accessible photo editing apps out there: PicsArt.
The dispersion effect PicsArt offers isn’t just a fleeting trend; it’s a powerful tool for artistic expression. It allows you to take an ordinary photograph and transform it into something dynamic, surreal, and deeply engaging. It adds a sense of motion, a hint of the ephemeral, and a touch of the extraordinary that can make your images truly stand out. Whether you’re a budding photographer, a social media influencer, or just someone who loves to play around with digital art, mastering this effect will open up a whole new world of creative possibilities. Let’s dive into the core steps and some advanced techniques to make your photos truly pop.
1. Understanding the Dispersion Effect PicsArt Offers: The Basics
Before we get our hands dirty with the actual steps, it’s crucial to grasp what the dispersion effect truly is. Imagine an object, or even a person, breaking apart as if subjected to an invisible force, scattering into numerous smaller fragments. This isn’t just a simple blur; it’s a controlled disintegration, creating a dramatic visual narrative. The ‘dispersion’ part refers to the scattering of these pixels or particles, giving the impression that your subject is either dissolving or exploding.
In PicsArt, this effect is surprisingly easy to achieve, thanks to its intuitive interface and dedicated tools. You don’t need to be a Photoshop guru or a graphic design professional to make your photos look like they belong in a modern art gallery. The app streamlines complex processes, allowing even beginners to create sophisticated edits. It’s all about selecting your subject, defining the direction of the ‘scatter,’ and then refining the details to perfection. This effect can convey a range of emotions, from dynamic energy to a sense of fading away, making it incredibly versatile for storytelling.
2. Selecting the Right Image: The Foundation of a Great Dispersion Effect
Not every photo is a candidate for a stunning dispersion effect. The success of your edit heavily relies on the initial image. What should you look for? First and foremost, a clear subject with good contrast against its background is essential. This makes the selection process much easier and cleaner. Think about a person standing against a plain wall, or an object sharply defined against a simple backdrop.
Secondly, consider the pose or orientation of your subject. The dispersion effect works best when there’s a natural direction for the particles to fly. For instance, if you have a person leaping, having the particles fly in the direction of their jump can amplify the sense of motion. While you can certainly apply the effect to any photo, choosing an image where the subject is well-defined and isolated will yield the most professional and impactful results. A busy background can make the effect look cluttered and less distinct, so aim for simplicity in your initial shot.
3. Isolating Your Subject: The Crucial First Step in PicsArt
Once you’ve opened your chosen image in PicsArt, the very first critical step to achieving a clean dispersion effect is to accurately isolate your subject. This means separating it from the background so that only the subject will be affected by the dispersion. Navigate to the ‘Tools’ menu within PicsArt and select ‘Dispersion.’ The app will then prompt you to draw over the area you want to apply the effect to.
Use your finger or a stylus to carefully brush over your subject. Don’t worry too much about absolute perfection at this stage; you can refine your selection. PicsArt’s smart selection tools are quite good, but a manual touch often ensures the best outcome. The goal here is to create a mask that tells the app, “Hey, this is the part I want to break apart.” A precise selection will prevent the background from inadvertently dispersing, which would ruin the illusion.
4. Refining Your Selection Mask: Precision is Key
After your initial broad selection, you’ll inevitably find areas that need tweaking. Maybe you accidentally included a bit of the background, or perhaps you missed a small part of your subject. This is where the ‘Erase’ and ‘Restore’ brushes come in handy. Within the dispersion tool, you’ll see options to fine-tune your mask. Use the ‘Erase’ brush to remove any unwanted selected areas and the ‘Restore’ brush to bring back parts of your subject you might have overlooked.
Zooming in is incredibly helpful during this stage. Pinch with two fingers to get a closer look at edges, hair, or intricate details. The more precise your selection, the more realistic and impactful the dispersion effect PicsArt generates will be. Think of it as carefully carving out your subject from its environment. Taking your time here will pay dividends in the final output, ensuring a clean break between your subject and the scattering particles. (See: Understanding photo editing techniques.)
5. Setting the Dispersion Direction: Guiding the Particles
Now for the fun part: dictating where your subject’s particles will fly! After you’ve finalized your selection, PicsArt will present you with an arrow or directional tool. This is where you decide the trajectory of the dispersing elements. Do you want them to fly upwards, downwards, to the left, or to the right? The direction you choose will dramatically influence the mood and dynamic of your image.
Consider the natural motion or energy of your subject. If it’s a dancer, perhaps particles scattering upwards from their leap would be fitting. If it’s an object being hit, a horizontal scatter might convey impact. Drag the arrow in the desired direction. You can often adjust the angle and even the intensity of this initial scatter. Experiment with different directions to see how they alter the visual narrative of your photo. This step is crucial for adding a sense of movement and drama to the dispersion effect PicsArt produces.
6. Adjusting the Stretch and Size: Customizing the Particle Flow
Once you’ve set the general direction, it’s time to refine the appearance of the scattered particles themselves. PicsArt typically offers sliders for ‘Stretch’ and ‘Size.’ The ‘Stretch’ slider controls how elongated or compressed the dispersed particles appear. A higher stretch will make the particles look like streaks, emphasizing speed and motion, almost like light trails. A lower stretch will make them appear more like distinct, individual fragments.
The ‘Size’ slider, as you might guess, dictates how large or small these individual particles are. Smaller particles create a finer, more ethereal dust-like effect, while larger particles give a more dramatic, fragmented appearance. Playing with these two sliders in conjunction with the direction allows for immense customization. You can create anything from a subtle shimmer to an explosive burst, all within the dispersion effect PicsArt tools provide. Don’t be afraid to push the sliders to their extremes to understand their full range of impact.
7. Fading and Blending: Adding Realism and Depth
A truly convincing dispersion effect isn’t just about scattering particles; it’s also about seamlessly blending them into the existing image and creating a sense of depth. Many PicsArt users overlook the importance of the ‘Fade’ and ‘Blend’ options, but they are vital for a professional finish. ‘Fade’ often refers to the opacity of the dispersed particles, allowing you to make them more translucent or solid. A slight fade can make the effect feel more integrated and less like an overlay.
The ‘Blend’ mode determines how the dispersed particles interact with the underlying layers of your photo. Options like ‘Screen,’ ‘Overlay,’ or ‘Multiply’ can dramatically change the color and luminosity of the particles, making them appear to glow, darken, or merge with the background in interesting ways. Experimenting with different blend modes can add surprising depth and realism, making the particles feel like they truly belong within the image rather than just being stuck on top. This subtle refinement elevates the dispersion effect PicsArt offers from good to great.
8. Applying Additional Effects and Filters: Enhancing the Mood
While the dispersion effect itself is powerful, combining it with other PicsArt tools can elevate your image to another level. After you’ve finalized your dispersion, consider adding a complementary filter or an artistic effect. For instance, a subtle vintage filter can give the dispersed image a dreamy, nostalgic quality, while a dramatic black and white conversion can enhance the graphic impact and emotional intensity.
You might also explore adding light leaks, bokeh effects, or even subtle textures to the overall image. These can help tie the dispersed elements more cohesively into the scene and further define the mood you’re trying to convey. Don’t overdo it, though; the dispersion effect should remain the star. The goal is to enhance, not to overshadow. Think of these extra touches as the finishing polish that makes your artwork shine.
9. Creative Applications of the Dispersion Effect PicsArt Provides: Beyond the Obvious
The dispersion effect isn’t just for making people or objects shatter. Think outside the box! You can use it on landscapes to make mountains dissolve into the sky, or on still life photography to create an illusion of decay or transformation. Imagine a flower dispersing into petals, or a splash of water breaking into countless droplets. The possibilities are genuinely endless.
You can also use the effect subtly, applying it to only a small portion of your subject to create a more abstract or ethereal look rather than a full-blown disintegration. Consider duplicating your subject, applying dispersion to one layer, and then blending it back with the original for a layered, complex effect. The key is experimentation and not being afraid to try unconventional approaches. The dispersion effect PicsArt offers is a versatile tool, and its true potential lies in your imagination.
10. Saving and Sharing Your Masterpiece: Showcase Your Art
Once you’re completely satisfied with your dispersed creation, it’s time to save and share it with the world. PicsArt offers various options for saving your edited image. You can save it directly to your device’s gallery, or instantly share it to popular social media platforms like Instagram, Facebook, or Pinterest. When sharing, consider adding a relevant hashtag like #PicsArt #dispersioneffect #digitalart to connect with other artists and enthusiasts. (See: Insights on popular photo editing apps.)
Don’t forget to pay attention to the resolution and file format when saving. For online sharing, a high-quality JPEG is usually sufficient, but if you plan on printing your artwork, you might want to consider saving in a higher resolution or even a PNG format to preserve maximum detail. Getting your art out there is just as important as creating it, and seeing the reactions to your unique dispersion effect PicsArt creations can be incredibly rewarding. Keep practicing, keep experimenting, and you’ll be creating stunning, eye-catching images in no time.
11. The Psychology Behind the Dispersion Effect: Why We Love It
It’s interesting to consider why the dispersion effect, particularly the dispersion effect PicsArt helps us create, resonates so strongly with viewers. It’s not just a cool visual trick; there’s a deeper psychological element at play. For one, it evokes a sense of transformation and impermanence. We’re used to seeing solid objects, and the act of something breaking apart, yet remaining beautiful, can be quite thought-provoking. It taps into our understanding of change and the fleeting nature of existence, sometimes in a dramatic, other times in a subtle, poetic way.
There’s also the element of mystery and the surreal. The effect creates something that doesn’t exist in reality, pushing the boundaries of what’s possible in a photograph. This unexpected visual can grab attention instantly because it challenges our visual expectations. It often implies a story – what force is causing this disintegration? What is the subject becoming, or what is it leaving behind? This narrative potential is a huge part of its appeal, turning a static image into a dynamic moment of transition.
Furthermore, the aesthetic appeal of scattered particles often mirrors natural phenomena like dust motes in sunlight, dandelion seeds blowing in the wind, or even stardust. Our brains are wired to find patterns and beauty in these natural occurrences, and the dispersion effect cleverly leverages these ingrained preferences, making something artificial feel organic and captivating.
12. Comparing Dispersion Effects: PicsArt vs. Other Platforms
While PicsArt makes the dispersion effect incredibly accessible, it’s worth briefly touching on how it compares to other photo editing software. Professional tools like Adobe Photoshop certainly offer more granular control and advanced customization options. In Photoshop, you’d typically achieve this effect by duplicating layers, creating a mask, applying a “Shatter” or “Fragment” filter, and then using motion blur and brush tools to sculpt the particles precisely. This method offers unparalleled control over particle shape, density, and interaction with the background, but it comes with a steep learning curve and a higher price tag.
Other mobile apps might offer similar “scatter” or “shatter” effects, but the dispersion effect PicsArt provides stands out for its balance of power and simplicity. It streamlines a complex process into a few intuitive taps and sliders, making it perfect for quick, impactful edits on the go. While you might not have the same level of individual particle manipulation as in Photoshop, PicsArt’s rendition is robust enough for most artistic applications and social media sharing. It strikes a sweet spot, empowering casual users to create professional-looking results without needing extensive graphic design knowledge.
13. Troubleshooting Common Dispersion Effect Issues
Even with PicsArt’s user-friendly interface, you might run into a few hiccups. Here are some common problems and how to solve them:
- Messy Edges/Background Dispersion: This almost always comes down to an imprecise initial selection. Go back to step 4, ‘Refining Your Selection Mask.’ Zoom in very closely and use the ‘Erase’ and ‘Restore’ brushes diligently. A clean mask is fundamental.
- Particles Look Unnatural/Flat: If your particles seem to just sit on top of the image, revisit ‘Fading and Blending’ (step 7). Experiment with different blend modes (Screen, Overlay, Multiply) and adjust the ‘Fade’ slider. Adding a subtle shadow or glow effect to the subject *before* dispersion can also help ground the effect.
- Effect is Too Subtle or Too Intense: This is where ‘Stretch’ and ‘Size’ (step 6) come into play. If it’s too subtle, increase particle size and stretch. If it’s too intense, reduce them. Also, remember the directional arrow in step 5; a more defined direction can make the effect pop.
- App Crashes or Lags: Dispersion effects are resource-intensive. If your device is older or has many apps running in the background, close unnecessary apps. Also, ensure your PicsArt app is updated to the latest version. Sometimes, exporting the image at a slightly lower resolution for initial drafts can help, then re-edit at full resolution once you’re happy with the settings.
- Inconsistent Color of Particles: The particles typically derive their color from the area of the subject they originate from. If you want a more uniform particle color, you might need to adjust the overall saturation or hue of the dispersed layer after the effect has been applied, using PicsArt’s general adjustment tools.
14. The Future of Dispersion: AI and Advanced Techniques
As technology continues to evolve, so too will photo editing effects like dispersion. We’re already seeing artificial intelligence play a bigger role in image manipulation. Future iterations of the dispersion effect PicsArt and similar apps offer might include even smarter object selection, where AI automatically detects and masks complex subjects with incredible accuracy. Imagine simply tapping on a person, and the AI perfectly outlines them, ready for dispersion.
We could also see more advanced physics-based dispersion, where particles react more realistically to simulated forces like wind, gravity, or even collisions with other elements in the photo. Dynamic particle animation for video edits is another exciting frontier. Instead of a static image, imagine a short video clip where a subject slowly dissolves, with particles swirling and dissipating in a truly lifelike manner. As mobile device processing power increases, these more complex, real-time effects will become increasingly common and accessible, pushing the boundaries of digital art even further.
Frequently Asked Questions about the Dispersion Effect PicsArt Provides
Q1: Is the dispersion effect available in the free version of PicsArt?
Yes, the core dispersion effect tool is generally available in the free version of PicsArt. However, some advanced features, specific brushes, or blend modes might be exclusive to PicsArt Gold subscribers. The basic functionality to select, disperse, and adjust particles is usually free to use. (See: The impact of digital art on creativity.)
Q2: Can I choose the color of the dispersed particles?
The particles’ colors are typically sampled directly from the area of your subject where they originate. This helps them blend naturally. While PicsArt doesn’t usually have a dedicated ‘particle color picker’ for the dispersion tool itself, you can adjust the hue, saturation, or color balance of the entire image or specific layers after applying the dispersion to change the overall color palette, including the particles.
Q3: How do I undo a mistake during the dispersion process?
PicsArt has a universal undo button (usually a curved arrow icon) at the top of the screen. You can tap this repeatedly to go back through your editing steps. When you’re in the dispersion tool specifically, there are ‘Erase’ and ‘Restore’ brushes to refine your selection mask, which act as a local undo/redo for the mask itself.
Q4: Can I apply the dispersion effect to only a part of my subject?
Absolutely! When you’re in step 3, ‘Isolating Your Subject,’ you only need to brush over the specific area of your subject that you want to disperse. For example, you could just select an arm or a leg to make only that part shatter, leaving the rest of the subject intact. This is a great way to create more nuanced and artistic effects.
Q5: My dispersed particles look pixelated. How can I fix this?
Pixelation can occur if your original image has a low resolution, or if you’re trying to create very large particles from a small subject area. Ensure you’re starting with a high-resolution image. Also, zooming in too much during the editing process might make it appear pixelated, but the final saved image might look fine. If the final output is still pixelated, try reducing the ‘Size’ of the particles in step 6; smaller particles tend to look smoother.
Q6: Can I save my dispersion effect as a GIF or animated image?
PicsArt primarily focuses on static image editing. While you can save your final dispersed image, the built-in dispersion effect itself doesn’t create animated GIFs or videos where the particles are actively moving. You would need separate video editing software to animate the effect, often requiring more advanced techniques like motion graphics.
Q7: What kind of images work best with the dispersion effect?
Images with a clear, well-defined subject against a relatively simple or contrasting background work best. Action shots, portraits with strong poses, or objects with interesting silhouettes are ideal. The clearer the separation between your subject and its background, the easier and more effective the dispersion will be.
Q8: Are there any alternatives to PicsArt for the dispersion effect?
Yes, many other apps and software offer similar effects. Adobe Photoshop is the professional standard, offering the most control. Other mobile apps like Photopea (a web-based Photoshop alternative), Snapseed (though less direct for dispersion), and various specialized “shatter” or “fragment” effect apps also exist. However, the dispersion effect PicsArt provides is widely regarded for its ease of use and quality on mobile.
Trending Now
Frequently Asked Questions
What is the dispersion effect in PicsArt?
The dispersion effect in PicsArt creates a mesmerizing visual where an object or person appears to disintegrate into tiny particles or fragments. This technique adds a sense of motion and drama to photos, transforming ordinary images into dynamic pieces of art.
How can I create a dispersion effect in PicsArt?
To create a dispersion effect in PicsArt, start by selecting your photo, then use the dispersion tool to choose the area you want to affect. Adjust the settings to control the intensity and direction of the dispersion, allowing you to achieve a stunning and surreal look.
Is the dispersion effect easy to use in PicsArt?
Yes, the dispersion effect in PicsArt is user-friendly and accessible, even for beginners. The app's intuitive interface and dedicated tools make it simple to apply the effect without needing advanced graphic design skills.
What types of images work best with the dispersion effect?
The dispersion effect works best with images that have clear subjects, such as portraits or objects with defined edges. These types of images allow the effect to create striking contrasts and dynamic visuals, enhancing the overall artistic impact.
Can I use the dispersion effect for social media posts?
Absolutely! The dispersion effect is perfect for social media posts, as it helps your images stand out and capture attention. This artistic technique can enhance your photography, making it more engaging for your audience on platforms like Instagram.
What's your take on this? Share your thoughts in the comments below — we read every one.