How to Use an Excel Timeline Template
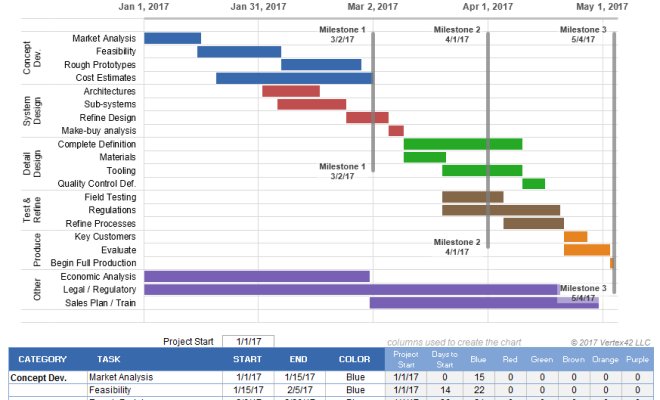
Excel timeline templates are a great way to visualize project schedules, milestones, and deadlines. With an Excel timeline template, you can easily track progress, identify delays, and communicate project status to team members and stakeholders. Here’s how to use an Excel timeline template:
Choose a template:
There are many Excel timeline templates available online, both free and paid. Choose one that suits your project needs and download it to your computer.
Open the template:
Open the Excel timeline template in Excel. The template will likely have a set of pre-defined columns and rows that you can customize to fit your project needs.
Customize the timeline:
The template will likely have a timeline and milestones already defined. You can customize the timeline by adjusting the start and end dates, and adding or removing milestones as needed.
Add project tasks:
Add project tasks to the timeline by entering the task name, start date, and end date in the appropriate columns. You can also add notes, assign tasks to team members, and set task status.
Format the timeline:
Format the timeline to make it more visually appealing and easy to read. You can adjust the font size, color, and style, and add borders or shading to highlight important milestones.
Track progress:
As you work on your project, update the timeline with actual start and end dates for tasks. This will help you track progress and identify delays.
Share with stakeholders:
Once you’ve completed the timeline, share it with team members and stakeholders. You can save it as a PDF or image file and include it in project reports or presentations.
By using an Excel timeline template, you can save time and effort in creating a project timeline from scratch. With just a few clicks, you can customize the template to fit your project needs and track progress throughout the project lifecycle.