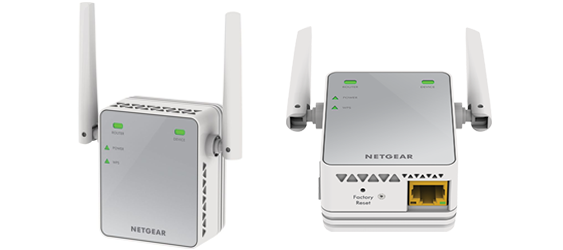
How to Setup a Netgear Extender

In today’s world, having a strong Wi-Fi signal throughout your home or office is essential. A weak signal can affect your ability to work, stream videos, and stay connected with friends and family. If you’re facing this issue, a Netgear Extender could be the perfect solution to boost your Wi-Fi signal and cover those hard-to-reach areas.
This article will guide you through the process of setting up a Netgear Extender step by step, ensuring your home or office has strong Wi-Fi coverage.
1. Unbox and Position Your Extender
Take the Netgear Extender out of the box and find a suitable location for it. Ideally, place it halfway between your main router and the area where you want to boost the Wi-Fi signal. Ensure that it’s placed in an open space away from any obstructions or electronic devices that could interfere with the signal.
2. Connect to Power
Plug your extender into an electrical outlet; ensure the power LED turns green, indicating that it’s powered on. If this LED doesn’t light up, press the power button on the side of the extender.
3. Establish a Connection with Your Router
There are two methods for connecting your extender to your home’s Wi-Fi network: WPS setup or manual setup.
– WPS Setup: Press and hold the WPS button on your extender for a few seconds until the WPS LED starts blinking amber. Within two minutes, press the WPS button on your existing router as well. The connection is successful when the extender’s WPS LED turns solid green.
– Manual Setup: Using a computer or mobile device, connect to your extender’s temporary Wi-Fi network named “NETGEAR_EXT.” Launch a web browser and enter “mywifiext.net” in the address bar (for Windows users) or “mywifiext.local” (for Mac users). Follow the on-screen instructions to create an account and connect your extender to your existing Wi-Fi network.
4. Relocate the Extender (if necessary)
Once connected, check the Router Link LED on your extender. A solid green light indicates the best connection, amber suggests a good connection, and red indicates a weak connection. If the LED is red, move the extender closer to your router and try again until you achieve a solid green or amber light.
5. Connect Your Devices
Now that your Netgear Extender is up and running, connect all devices to the new extended Wi-Fi network. The network name (SSID) should resemble your existing Wi-Fi network with an “_EXT” suffix, e.g., “YourNetwork_EXT.” Use the same Wi-Fi password as your main network.
6. Secure Your Extender
It’s crucial to keep your extender secure by changing its default settings. Log in to the extender interface (using “mywifiext.net” or “mywifiext.local”) and change the default login credentials. You can also update your extender’s firmware through the interface for additional security and performance improvements.
In Conclusion:
Setting up a Netgear Extender is an effective way to improve Wi-Fi coverage in your home or office. Following these simple steps will ensure a successful setup and help you enjoy a reliable wireless signal wherever you need it most.


