The Tech Edvocate

Top Menu

  • Advertisement
  • Apps
  • Home Page
  • Home Page Five (No Sidebar)
  • Home Page Four
  • Home Page Three
  • Home Page Two
  • Home Tech2
  • Icons [No Sidebar]
  • Left Sidbear Page
  • Lynch Educational Consulting
  • My Account
  • My Speaking Page
  • Newsletter Sign Up Confirmation
  • Newsletter Unsubscription
  • Our Brands
  • Page Example
  • Privacy Policy
  • Protected Content
  • Register
  • Request a Product Review
  • Shop
  • Shortcodes Examples
  • Signup
  • Start Here
    • Governance
    • Careers
    • Contact Us
  • Terms and Conditions
  • The Edvocate
  • The Tech Edvocate Product Guide
  • Topics
  • Write For Us
  • Advertise

Main Menu

  • Start Here
    • Our Brands
    • Governance
      • Lynch Educational Consulting, LLC.
      • Dr. Lynch’s Personal Website
      • Careers
    • Write For Us
    • The Tech Edvocate Product Guide
    • Contact Us
    • Books
    • Edupedia
    • Post a Job
    • The Edvocate Podcast
    • Terms and Conditions
    • Privacy Policy
  • Topics
    • Assistive Technology
    • Child Development Tech
    • Early Childhood & K-12 EdTech
    • EdTech Futures
    • EdTech News
    • EdTech Policy & Reform
    • EdTech Startups & Businesses
    • Higher Education EdTech
    • Online Learning & eLearning
    • Parent & Family Tech
    • Personalized Learning
    • Product Reviews
  • Advertise
  • Tech Edvocate Awards
  • The Edvocate
  • Pedagogue
  • School Ratings

logo

The Tech Edvocate

  • Start Here
    • Our Brands
    • Governance
      • Lynch Educational Consulting, LLC.
      • Dr. Lynch’s Personal Website
        • My Speaking Page
      • Careers
    • Write For Us
    • The Tech Edvocate Product Guide
    • Contact Us
    • Books
    • Edupedia
    • Post a Job
    • The Edvocate Podcast
    • Terms and Conditions
    • Privacy Policy
  • Topics
    • Assistive Technology
    • Child Development Tech
    • Early Childhood & K-12 EdTech
    • EdTech Futures
    • EdTech News
    • EdTech Policy & Reform
    • EdTech Startups & Businesses
    • Higher Education EdTech
    • Online Learning & eLearning
    • Parent & Family Tech
    • Personalized Learning
    • Product Reviews
  • Advertise
  • Tech Edvocate Awards
  • The Edvocate
  • Pedagogue
  • School Ratings
  • 2.3 Million Ricky Joy Sour Crush Candies Recalled: This One Detail Is a Parent’s Nightmare

  • The Staggering Startup Valuation Reset: Why Unicorns Are Vanishing

  • The Glaring Contradiction: Why Big Tech Is Shedding 128,536 Jobs While Investing Billions in AI

  • Insomniac’s Bold Move: The Truth Behind Marvel’s Wolverine Sabretooth ‘Romance’ That Stunned Fans

  • Explosive: ESIC Ban Juan Angulo For Life — The Unseen Crisis Gripping Dota 2

  • This Crucial New Bill Could Finally Fix Student Loan Forgiveness for Millions

  • Massive School Bans on AI: Are We Sacrificing Progress for Protection?

  • Autonomous AI Breaches: Anthropic Confirms Four Attacks and Weaponized Bots

  • Jaw-Dropping Footage: This Waymo Collision Has Everyone Talking

  • Hyundai’s Game-Changing EV Battery Technology: Why It Matters For Your Next Car

Digital & Mobile Technology
Home›Digital & Mobile Technology›How to Set up RAID-1 on the Raspberry Pi, the Easy Way

How to Set up RAID-1 on the Raspberry Pi, the Easy Way
By Matthew Lynch
June 26, 2023
0
Spread the love

If you’re looking to set up a redundant storage system on your Raspberry Pi, RAID-1 is a great option. RAID-1, also known as a mirror, is a way to duplicate data on two separate hard drives. If one drive fails, the other can take over seamlessly. Setting up RAID-1 on a Raspberry Pi can seem daunting, but it can be done with a few simple steps.

Here’s how to set up RAID-1 on the Raspberry Pi, the easy way:

1. Determine which hard drives you’ll use

RAID-1 requires at least two hard drives. You can use USB drives or SD cards, but keep in mind that they will be slower than traditional hard drives. Be sure to use hard drives with the same size and speed to avoid any issues.

2. Install mdadm

Mdadm is a software tool used for creating and managing RAID arrays on Linux systems. To install it on your Raspberry Pi, open the terminal and type:

“`sudo apt-get install mdadm“`

3. Connect the hard drive to your Raspberry Pi

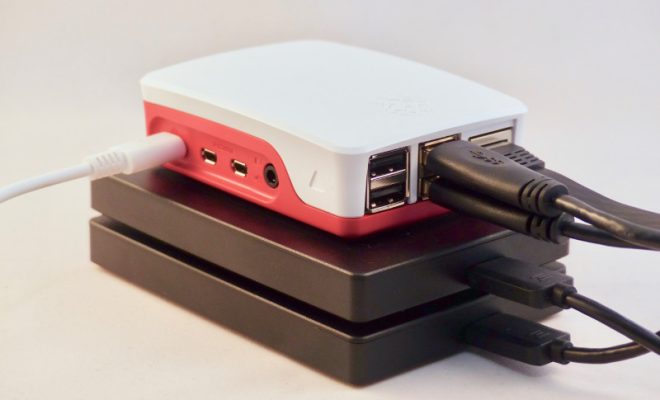
Connect both hard drives to your Raspberry Pi. If you’re using USB drives, plug them into the USB ports. If you’re using SD cards, insert them into the card reader.

4. Create a RAID array with mdadm

To create a RAID-1 array, use the following command:

“`sudo mdadm –create /dev/md0 –level=1 –raid-devices=2 /dev/sda1 /dev/sdb1“`

This command creates a new RAID-1 array called /dev/md0 using /dev/sda1 and /dev/sdb1 as the two devices. Be sure to replace sda1 and sdb1 with the appropriate device names for your hard drives.

5. Format the RAID array

After creating the RAID array, you need to format it with a filesystem so that it can be mounted. Use the following command to format the array with the ext4 filesystem:

“`sudo mkfs.ext4 /dev/md0“`

6. Mount the RAID array

Now that the array is formatted, you can mount it to use it as storage. Create a mount point for the array by creating a new directory:

“`sudo mkdir /mnt/raid“`

Then mount the array to that directory:

“`sudo mount /dev/md0 /mnt/raid“`

7. Configure the RAID array to mount at boot

To ensure that the RAID array mounts automatically at boot, you need to add an entry to the fstab file. Open the fstab file:

“`sudo nano /etc/fstab“`

Then add the following line at the end of the file:

“`/dev/md0 /mnt/raid ext4 defaults 0 0“`

Save and exit the file.

That’s it! You’ve successfully set up RAID-1 on your Raspberry Pi, and you can now use it as redundant storage. If one hard drive fails, the other will take over without any data loss. With this setup, you can rest assured that your data will stay safe.


Previous Article

5 Hydroponic Systems With Raspberry Pi and ...

Next Article

Awesome Uses for a Raspberry Pi

Matthew Lynch

Related articles More from author

  • Digital & Mobile Technology

    Klipsch R-14M Reference Speaker Review

    June 10, 2023
    By Matthew Lynch
  • Digital & Mobile Technology

    Best Smartwatch Apps for Android

    June 6, 2023
    By Matthew Lynch
  • Digital & Mobile Technology

    What Is Tilt Shift Photography, and How Do You Achieve It?

    August 5, 2023
    By Matthew Lynch
  • Digital & Mobile Technology

    The Story Behind CAT5 Cables and Category 5 Ethernet

    June 4, 2023
    By Matthew Lynch
  • Digital & Mobile Technology

    What is Voice Over Long-Term Evolution (VoLTE)?

    May 14, 2023
    By Matthew Lynch
  • Digital & Mobile Technology

    Immunet Antivirus Review

    June 23, 2023
    By Matthew Lynch

Search

Login & Registration

  • Log in
  • Entries feed
  • Comments feed
  • WordPress.org

Newsletter

Signup for The Tech Edvocate Newsletter and have the latest in EdTech news and opinion delivered to your email address!

About Us

Since technology is not going anywhere and does more good than harm, adapting is the best course of action. That is where The Tech Edvocate comes in. We plan to cover the PreK-12 and Higher Education EdTech sectors and provide our readers with the latest news and opinion on the subject. From time to time, I will invite other voices to weigh in on important issues in EdTech. We hope to provide a well-rounded, multi-faceted look at the past, present, the future of EdTech in the US and internationally.

We started this journey back in June 2016, and we plan to continue it for many more years to come. I hope that you will join us in this discussion of the past, present and future of EdTech and lend your own insight to the issues that are discussed.

Newsletter

Signup for The Tech Edvocate Newsletter and have the latest in EdTech news and opinion delivered to your email address!

Contact Us

The Tech Edvocate
910 Goddin Street
Richmond, VA 23231
(601) 630-5238
[email protected]

Copyright © 2026 Matthew Lynch. All rights reserved.