How to set up fan curves
“`html
Setting your PC up for optimal performance involves a lot more than just choosing the right components. One crucial yet often overlooked aspect is the fan curve setup. Properly configured fan curves can significantly enhance cooling efficiency, reduce noise, and prolong the lifespan of your hardware. In this comprehensive guide, we’ll explore what fan curves are, why they matter, and how to set them up effectively.
1. Understanding Fan Curves
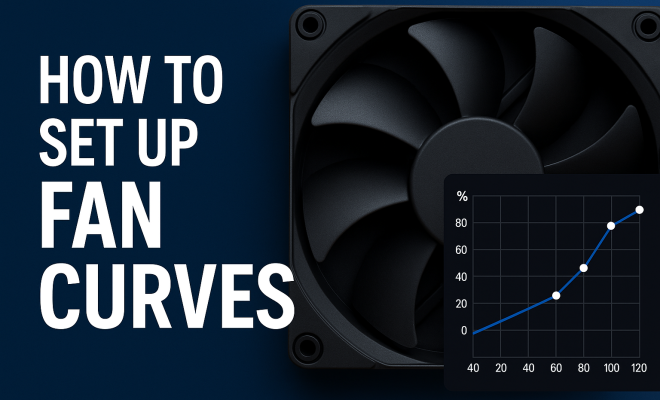
At its core, a fan curve is a graphical representation of how a fan’s speed responds to changes in temperature. Typically, this curve is displayed on a graph, with the X-axis representing temperature and the Y-axis representing fan speed. The result is a curve that illustrates the relationship between temperature and fan speed, allowing you to fine-tune your system’s cooling performance.
Fan curves can be linear, logarithmic, or custom-designed based on your preferences. A linear fan curve increases fan speed at a consistent rate as temperature rises. In contrast, a logarithmic curve ramps up slowly at lower temperatures and increases more steeply at higher temperatures, which can help balance noise levels and cooling efficiency.
2. Why Fan Curve Setup Matters
The importance of a well-planned fan curve setup cannot be overstated. First and foremost, effective fan curves help maintain optimal temperatures for your CPU and GPU, particularly during demanding tasks like gaming or 3D rendering. By automatically adjusting fan speeds based on real-time temperatures, you can prevent overheating and potential hardware damage.
Another critical benefit is noise management. Many users prefer quiet systems, and fan curves allow you to find the sweet spot between cooling performance and noise levels. With a properly configured fan curve, you can minimize fan noise during low-load scenarios while still ensuring adequate cooling under heavy loads.
3. Tools You’ll Need for Fan Curve Setup
To successfully create a fan curve, you’ll need several tools and software. Most motherboards come with built-in fan control utilities accessible via BIOS. However, for more advanced customization, software like MSI Afterburner, Corsair iCUE, or ASUS AI Suite can provide greater control and flexibility.
Additionally, ensure your temperature monitoring software is reliable. You can use programs like HWMonitor or Core Temp to get real-time temperature readings of your components, which is crucial for setting accurate fan curves.
4. Accessing BIOS for Basic Fan Curve Setup
One straightforward method for configuring fan curves is through the BIOS. To access it, reboot your PC and press the designated key (often Delete or F2) during startup. Once in the BIOS menu, navigate to the ‘Hardware Monitor’ or ‘Fan Control’ section.
From here, you can adjust the fan curve settings directly. Look for options to modify fan speed based on temperature thresholds. You can set specific RPM targets for various temperature points, ensuring that fans ramp up appropriately as your system heats up. This basic setup is a great start for users who prefer simplicity.
5. Customizing Fan Curves with Software
If you want more control than the BIOS offers, consider using software for a detailed fan curve setup. Tools like MSI Afterburner allow you to create custom fan curves and provide a live graph of your fan speeds versus temperatures.
In MSI Afterburner, navigate to the ‘Fan’ section, where you can enable the fan curve. You’ll see a graph where you can click to create points. Setting a point at 30°C for 30% fan speed, 50°C for 70%, and 80°C for 100% is a standard strategy. This approach allows for fine-tuning to suit your specific cooling needs.
6. Best Practices for Fan Curve Setup
When designing your fan curve, consider several best practices. First, start with a balanced approach where fans are not too aggressive at low temperatures to avoid unnecessary noise. A gradual ramp-up to higher speeds at elevated temperatures can keep your system cool without being obnoxious. (See: importance of PC cooling systems.)
Secondly, observe your system under various workloads after setting up your fan curve. If the temperatures are consistently low, you might want to relax the curve further. Conversely, if temperatures spike, adding more aggressive points to your fan curve may be necessary.
7. Testing and Monitoring Your Setup
Once you’ve set up your fan curve, it’s critical to thoroughly test your configuration. Monitor your CPU and GPU temperatures under various loads—idle, during gaming, and while running stress tests. Pay attention to how quickly the fans respond to temperature increases.
Tools like HWMonitor or GPU-Z can provide real-time temperature data, while software like MSI Afterburner shows the fan speed in real time. If you notice your components are still running hot, consider adjusting your fan curve to make it more aggressive or check for other airflow issues within your case.
8. Common Mistakes to Avoid
In the pursuit of the perfect fan curve setup, several common mistakes can lead to suboptimal results. One frequent error is setting fan speeds too low at lower temperatures, which can lead to overheating under load. Ensure that your fans are ramped up adequately from the start.
Another mistake is overcomplicating the fan curve. While it might be tempting to create intricate curves with multiple points, simpler curves are often more effective. A straightforward fan curve can provide sufficient cooling without becoming overly noisy, which is ideal for most users.
9. Keeping Your System Cool with Advanced Techniques
Beyond fan curves, consider additional cooling techniques to enhance your system’s performance. Positive air pressure setups, where intake fans outnumber exhaust fans, can help reduce dust buildup and improve cooling efficiency.
Also, consider hardware upgrades like aftermarket CPU coolers or case fans that offer better performance. High-efficiency fans with features like PWM (Pulse Width Modulation) support can give you better control over fan speeds and cooling performance.
10. Understanding Different Fan Types
When it comes to fan curve setup, not all fans are created equal. Understanding the different types of fans available can help you make informed decisions about your cooling solutions. Common types include DC fans, PWM fans, and hydraulic bearing fans.
DC fans are typically the most basic and can vary their speed based on the voltage supplied. PWM fans, however, offer greater control as they can maintain optimal speeds by receiving a pulse-width modulated signal, making them ideal for customizable fan curves. Hydraulic bearing fans are designed for quieter operation and longer lifespans, which can be great for users who prioritize noise reduction.
11. Fan Curve Setup for Different Use Cases
Different users have varying needs when it comes to fan curve setups. For instance, gamers might prioritize peak cooling performance during intense gaming sessions, while someone using their PC for light tasks might prefer a quieter operation.
If you’re a gamer, you may want to set a more aggressive fan curve that ramps up quickly under load to keep temperatures down during heavy gaming. A good starting point could be a curve that reaches 100% fan speed at around 75°C. On the other hand, if your PC is used for tasks like web browsing or office work, a more relaxed curve that keeps fan speeds lower during idle periods will help maintain a quieter environment.
12. Real-World Examples of Fan Curve Configurations
To give you a better idea of how fan curves can be configured, let’s look at a few real-world examples. A common configuration for a mid-range gaming setup might look like this:
- 30°C: 30% fan speed
- 45°C: 50% fan speed
- 60°C: 75% fan speed
- 75°C: 100% fan speed
This setup provides a balance between noise and cooling, ramping up to full speed only when absolutely needed. In comparison, a high-performance workstation might have a more aggressive configuration: (See: fan curve analysis in electronics.)
- 35°C: 40% fan speed
- 50°C: 70% fan speed
- 70°C: 100% fan speed
This configuration ensures that the system remains cool under intense workloads like video editing or 3D rendering, where temperatures can rise rapidly.
13. Statistics on Cooling Efficiency
Research into PC cooling has shown that effective fan curves can lead to significant differences in temperature management. According to a study by PC Gamer, systems with well-tuned fan curves can operate up to 20% cooler than systems with default settings, which can translate into improved performance and longer component lifespans.
Furthermore, systems designed with optimal airflow and fan curve setups can reduce overall noise levels by as much as 30%, making for a more enjoyable user experience. This is especially relevant for users who game or work in quiet environments.
14. FAQ: Common Questions About Fan Curve Setup
Q1: How do I know if my fan curve is set correctly?
A1: Monitoring your CPU and GPU temperatures during various workloads is crucial. If they stay within safe limits and the fans respond appropriately, your fan curve is likely set correctly.
Q2: Can I set up different fan curves for different applications?
A2: Yes, some software solutions allow you to create multiple profiles for different tasks, enabling you to switch between fan curves depending on your workload.
Q3: Will a more aggressive fan curve always mean louder fans?
A3: Not necessarily. Using PWM fans can help maintain lower noise levels even at higher speeds, allowing you to keep your system cool without significant noise increases.
Q4: How often should I adjust my fan curves?
A4: It’s a good idea to revisit your fan curve settings occasionally, especially after significant hardware changes or if you notice temperature fluctuations that seem abnormal.
15. Advanced Fan Curve Strategies
Once you’re comfortable with the basics of fan curve setup, you might want to explore advanced strategies that can provide even greater efficiency and control. One popular method is implementing a dual-curve system. This involves creating separate curves for different fan groups: intake fans and exhaust fans. By customizing each group to respond to temperatures in specific parts of your case, you can optimize airflow and cooling performance.
For example, you might set your intake fans to ramp up quickly when temperatures near the CPU rise, while your exhaust fans could be set to respond more slowly, ensuring that the air is being pushed out effectively without creating unnecessary noise. This two-pronged approach can help maintain a stable internal temperature while maximizing efficiency.
16. Monitoring Tools and Their Impact
As technology evolves, so do the tools we use to monitor our systems. Software like MSI Afterburner not only allows for fan curve tweaking but also provides real-time monitoring of all crucial parameters like temperature, voltage, and even FPS in games. Integrating performance monitoring can give you a clearer picture of how your fan curves are impacting your overall system performance.
Additionally, some users employ external temperature sensors that can be strategically placed inside their cases. These sensors can provide even more accurate temperature readings, allowing for improved adjustments to your fan curves. With this level of monitoring, you can respond to changes in load and temperature more dynamically, adjusting your setup as needed. (See: research on thermal management.)
17. Impact of Ambient Temperature on Fan Curves
Ambient temperature can play a significant role in your fan curve’s effectiveness. If you live in a hotter climate or if your PC is in a poorly ventilated area, the fan curve you initially set might not be as effective during peak summer months. To adapt, keep a close eye on your internal temperatures during different seasons and adjust your fan curves accordingly.
For example, you might find that during warmer months, your system needs to ramp up fan speeds at lower temperatures than it would in the cooler months. Seasonal adjustments can make a noticeable difference in maintaining optimal cooling conditions throughout the year.
18. The Role of Case Design in Fan Curve Performance
The design and layout of your PC case can significantly influence the effectiveness of your fan curve setup. Cases with poor airflow can hinder your fans’ ability to cool effectively, leading to higher temperatures overall, regardless of how well your fan curves are configured.
When setting up your case, ensure that there is clear airflow from the front to the back, minimizing obstructions. Some cases even feature mesh designs that promote better airflow, making it easier for fans to work efficiently. When you improve the case design, even a basic fan curve can provide substantial cooling benefits.
19. Future Trends in Fan Curve Technology
As technology continues to evolve, the future of fan control and cooling solutions looks promising. Innovations in AI-driven cooling software are starting to emerge, utilizing machine learning to adapt fan curves based on usage patterns and thermal behavior over time. These intelligent systems can predict thermal spikes and adjust fan speeds proactively, potentially eliminating overheating issues before they even occur.
Additionally, the integration of smart home technology into PC cooling is becoming increasingly popular. Imagine adjusting your fan curves via a smartphone app or integrating them into your smart home system, allowing for more seamless management of your entire environment, including PC cooling.
20. Conclusion: Your Path to Optimal Cooling
In summary, mastering fan curve setup is vital for any PC enthusiast looking to maintain optimal performance and longevity for their components. By understanding fan curves, employing the right tools, and following best practices, you can create a customized fan curve that perfectly balances cooling and noise levels.
Whether you’re gaming, rendering, or simply browsing, a well-tuned fan curve can make all the difference. With advancements in technology and the right knowledge, you can ensure your system remains cool and quiet for years to come. So, take the time to explore and adjust your settings—your PC will thank you for it!
“`
Trending Now
Frequently Asked Questions
What is a fan curve in a PC?
A fan curve is a graphical representation that shows how a fan's speed changes in response to temperature variations. It helps optimize cooling efficiency by adjusting fan speeds based on real-time temperatures, ensuring your components stay cool and perform well.
Why is setting up fan curves important?
Setting up fan curves is crucial for maintaining optimal CPU and GPU temperatures, especially during demanding tasks. Proper fan curves prevent overheating and potential hardware damage while also managing noise levels, allowing for a quieter computing experience.
How do I create a fan curve?
To create a fan curve, you can use software tools that allow you to customize the relationship between temperature and fan speed. You can set linear or logarithmic curves based on your preferences, adjusting fan speeds to balance cooling performance and noise levels.
What tools do I need to set up fan curves?
To set up fan curves, you typically need software that can control fan speeds, such as BIOS settings or third-party applications like MSI Afterburner or SpeedFan. These tools allow you to visualize and customize your fan curves effectively.
Can fan curves reduce noise in a PC?
Yes, properly configured fan curves can significantly reduce noise levels in a PC. By adjusting fan speeds to ramp up only when necessary, you can minimize noise during low-load scenarios while ensuring adequate cooling during high-demand tasks.
Have you experienced this yourself? We’d love to hear your story in the comments.