How to set up audio interface
“`html
A well-functioning audio interface is crucial for any musician, podcaster, or content creator. Whether you’re recording your first song or producing a podcast episode, understanding how to set up an audio interface can drastically improve your sound quality. In this guide, we’ll walk you through the seven essential steps for a perfect audio interface setup, helping you achieve professional results from the comfort of your home.
1. Understanding What an Audio Interface Is
Before diving into the setup process, let’s clarify what an audio interface actually is. Simply put, an audio interface is a device that connects your computer to external audio equipment, like microphones and instruments. It converts analog signals into digital data that your computer can understand and vice versa. This conversion is vital for high-quality audio recording and playback.
Most audio interfaces come with built-in preamps, which boost the signal from microphones to a usable level, and digital-to-analog converters (DACs), which ensure the sound you hear is as close to the original source as possible. Understanding these components will help you appreciate the importance of a good audio interface setup.
2. Choosing the Right Audio Interface for Your Needs
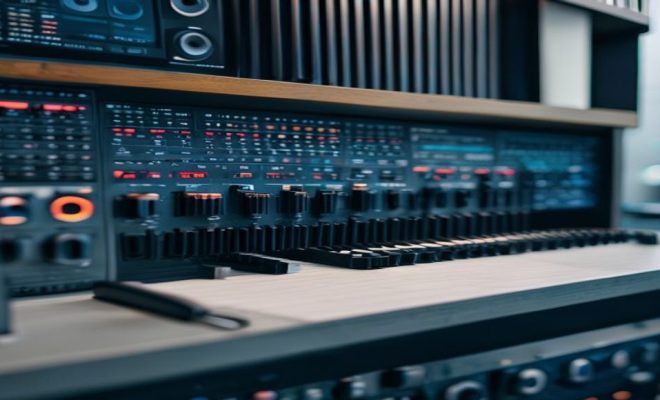
Selecting the right audio interface is the first step toward a successful setup. The market offers a variety of interfaces tailored to different needs and budgets. For beginners, options like the Focusrite Scarlett series or PreSonus AudioBox are widely recommended. They’re user-friendly and offer excellent performance for the price.
Consider the number of inputs and outputs (I/O) you’ll need. If you’re planning to record multiple instruments or vocals simultaneously, an interface with at least four inputs will serve you well. Additionally, check for features like MIDI connections if you use electronic instruments, or onboard DSP for real-time effects processing.
For advanced users, options like the Universal Audio Apollo or the RME Fireface series provide superior sound quality and more extensive features. These interfaces often come with multiple preamp options, enhanced AD/DA conversion, and robust software bundles. Assessing your long-term needs and growth in your audio journey can help guide your choice.
3. Gathering Necessary Equipment
Once you’ve chosen your audio interface, it’s time to gather the necessary equipment for the setup. You’ll need a few essentials: a computer with a compatible operating system (Windows or Mac), digital audio workstation (DAW) software, microphones, cables, and headphones or studio monitors for playback.
Make sure to have high-quality XLR cables for microphones, and if you’re using instruments, consider instrument cables as well. Investing in solid cables can significantly affect your sound quality by minimizing noise and interference during recordings.
Beyond the basics, think about additional gear that can enhance your setup. A pop filter can improve vocal recordings by reducing plosive sounds, and an isolation shield can help minimize room noise. If you’re serious about achieving top-notch sound, consider acoustic treatment for your recording space as well.
4. Connecting the Audio Interface
Now comes the hands-on part: connecting your audio interface to your computer. Most modern interfaces connect via USB, although some may use Thunderbolt or FireWire for faster data transfer. To get started, simply plug the interface into a USB port, and your computer should recognize it automatically.
After connecting, install any necessary drivers or software that came with your interface. This step ensures your computer can communicate effectively with the hardware. Once everything is installed, you can start setting up your audio interface in your DAW. (See: Understanding audio interfaces.)
It’s also worth checking if your audio interface has its own software control panel. This panel can provide additional settings for adjusting latencies, gain, and other parameters that can optimize your workflow and sound quality.
5. Configuring Your DAW Settings
Your digital audio workstation is where the magic happens, so configuring it correctly is critical for an effective audio interface setup. Open your DAW and navigate to the audio settings. From there, select your audio interface as the primary input and output device.
Next, adjust the sample rate and buffer size. A common sample rate is 44.1 kHz, which offers good quality for most applications. The buffer size determines latency; smaller buffer sizes reduce latency but can cause audio dropouts if set too low. Experiment with different settings to find the right balance for your needs.
Additionally, familiarize yourself with your DAW’s routing options. Knowing how to route audio correctly can help you create complex setups, like recording a full band or using multiple effects chains. Each DAW has different capabilities, so read up on manuals or tutorials specific to your software.
6. Setting Up Inputs and Outputs
With your audio interface connected and your DAW configured, it’s time to set up your inputs and outputs. Each input on your interface corresponds to a channel in your DAW. If you’re using a microphone, plug it into an XLR input, and make sure to engage the phantom power if you’re using a condenser mic.
For output, ensure that your studio monitors or headphones are connected to the correct outputs on your audio interface. Adjust the gain levels for each input to avoid clipping and ensure clean sound capture. A good rule of thumb is to keep levels peaking around -6 dB to -3 dB for optimal recording quality.
Also, take the time to label your inputs and outputs in your DAW. This practice can save you a lot of confusion later on when you’re juggling multiple tracks and devices. If you plan to integrate a MIDI controller, make sure to set that up in a similar way for a seamless workflow.
7. Testing and Troubleshooting Your Setup
Once everything is connected and configured, it’s crucial to test your setup before diving into a recording session. Play your instruments or speak into the microphone to check if the audio is coming through clearly in your DAW. Look for any signs of distortion or unexpected noise, which may indicate issues with gain levels or cable connections.
If you encounter problems, don’t panic. Check your connections, ensure all drivers are up to date, and confirm that the correct input/output devices are selected in your DAW settings. Many common issues can be resolved by simply rechecking these fundamental aspects.
It might also help to use a sound meter or software within your DAW to analyze the levels and ensure everything is balanced. Watching for peaks in real-time can help you adjust before recording, saving you post-production headaches.
8. Common Audio Interface Setup Issues and Solutions
Even with careful setup, you might run into some common issues. Here are a few frequent problems and simple solutions:
- No sound: Check your output settings in both your DAW and your operating system. Make sure the correct output device is selected, and check cables for any defects.
- Latency issues: If you experience a delay between playing a note and hearing it, try lowering the buffer size in your DAW settings.
- Distorted audio: This can be due to gain levels being too high. Lower the gain on the interface and ensure your levels peak at the recommended range.
- Software not recognizing the interface: Ensure drivers are properly installed, and try unplugging and reconnecting the device. Sometimes a restart of the DAW or even the computer is necessary.
9. Expert Tips for Optimal Audio Interface Setup
To really get the most out of your audio interface, consider these expert tips:
- Keep your workspace organized: A tidy workspace can minimize noise and create a more efficient workflow. Organize cables to prevent tangling and interference.
- Use high-quality plugins: Once your audio is captured, using quality plugins in your DAW can enhance your sound further. Look for reputable brands or free alternatives that offer solid performance.
- Monitor your recordings: Always use quality headphones or monitors to ensure you’re hearing an accurate representation of your audio. This helps in mixing and mastering effectively.
- Stay updated: Regularly check for firmware updates for your audio interface. Manufacturers often release updates that can improve performance and compatibility.
10. Frequently Asked Questions (FAQ)
What is the difference between an audio interface and a sound card?
An audio interface offers higher-quality audio input and output options compared to standard sound cards. They provide better preamps, converters, and often additional features like MIDI connectivity. (See: Impact of sound quality on health.)
Do I need an audio interface if I have a USB microphone?
Not necessarily. USB microphones can connect directly to your computer without needing an interface. However, an audio interface can still enhance your recording quality if you plan to expand your setup in the future.
How much should I spend on an audio interface?
Prices can vary greatly, from around $100 for basic models to several thousand for professional-grade units. Determine your budget based on your needs and future plans for your audio work.
Can I use multiple audio interfaces at once?
Yes, it’s possible to use multiple audio interfaces simultaneously, but it can be complicated. You’ll need to configure your DAW correctly and ensure that your computer can handle multiple input sources without causing latency issues.
What are gain levels and why are they important?
Gain levels control the amount of signal that is sent to your audio interface. Proper gain settings ensure that your recordings are clear and free of distortion, while also providing enough signal for your DAW to work with.
11. Advanced Audio Interface Setup Techniques
Once you’re comfortable with the basic setup, explore some advanced techniques to enhance your recordings:
Utilizing Loopback Functionality: Some audio interfaces come with loopback functionality, allowing you to record system audio, like sounds from a video or an application, alongside your microphone input. This can be especially useful for podcasters and streamers. Check if your interface supports this and how to enable it.
Implementing External Effects: If your interface has send/return options, you can route audio through external effects processors. Set these up within your DAW to add additional sound shaping capabilities to your recordings.
Creating Custom Presets: If your interface or DAW allows it, create custom presets for different recording situations. This can save time during sessions, letting you focus on the creative process instead of setup.
Integrating with MIDI Gear: If you have MIDI instruments or controllers, connect them to your interface. Set up your DAW to receive MIDI signals, enabling you to record and manipulate MIDI data alongside audio tracks seamlessly.
12. Choosing Between USB and Thunderbolt Interfaces
When selecting an audio interface, one key decision is whether to go with a USB or Thunderbolt connection. USB interfaces are generally more common and compatible with most computers, making them a solid choice for beginners. They are usually more affordable and offer a wide variety of options. (See: Guide to choosing audio interfaces.)
Thunderbolt interfaces, on the other hand, provide faster transfer speeds, which can be beneficial for higher track counts and lower latency. If you’re working with high-resolution audio or planning to integrate multiple devices, investing in a Thunderbolt interface might be worthwhile. Just ensure your computer has Thunderbolt ports to take advantage of this technology.
Ultimately, the choice between USB and Thunderbolt should be guided by your specific needs and the capabilities of your computer.
13. Understanding Sample Rates and Bit Depth
Sample rates and bit depth are crucial for audio quality. The sample rate defines how often the audio signal is sampled per second. Common sample rates include 44.1 kHz, 48 kHz, and high-definition rates of 96 kHz and 192 kHz. Higher sample rates can capture more detail, but they also require more processing power and storage space.
Bit depth, on the other hand, affects the dynamic range of your recordings. A standard bit depth is 16 bits, which is sufficient for CD-quality audio. However, recording at 24 bits provides a greater dynamic range, allowing for more detail in both quiet and loud parts of your audio. For most home studios, using a sample rate of 44.1 kHz and a bit depth of 24 bits strikes a good balance between quality and performance.
14. Setting Up a Mobile Audio Interface
For those looking to record on the go, a mobile audio interface can be a game-changer. Many portable interfaces are designed for easy transport and can connect directly to tablets or smartphones. When setting up a mobile audio interface, consider features like battery power options, size, and ease of use.
For example, the IK Multimedia iRig series or the Zoom U-22 are compact and offer solid performance for mobile recording. Always check compatibility with your device’s operating system, and consider investing in a good carrying case to protect your gear while traveling.
Before starting your mobile recording session, ensure that you have all necessary cables and adapters, and test your setup in advance to troubleshoot any potential issues. This preparation will help you capture high-quality audio, regardless of where you are.
15. Conclusion
Setting up your audio interface is a fundamental skill every musician or content creator should master. With a solid understanding of what an audio interface is, how to choose the right one, and the steps to connect, configure, and troubleshoot your equipment, you’ll be well on your way to achieving high-quality audio recordings. Remember, the better your audio interface setup, the better your overall sound quality will be. So take the time to get it right, and enjoy the fruits of your labor!
“`
Trending Now
Frequently Asked Questions
What is an audio interface used for?
An audio interface is used to connect your computer to external audio equipment, such as microphones and instruments. It converts analog signals into digital data for recording and playback, ensuring high-quality sound. This is essential for musicians, podcasters, and content creators looking to enhance their audio quality.
How do I choose the right audio interface?
Choosing the right audio interface involves considering your specific needs, such as the number of inputs and outputs required for your projects. For beginners, user-friendly options like the Focusrite Scarlett series or PreSonus AudioBox are recommended. Think about features like MIDI connections and onboard DSP for advanced usage.
What are the essential components of an audio interface?
The essential components of an audio interface include built-in preamps, which amplify microphone signals, and digital-to-analog converters (DACs), which ensure sound fidelity during playback. Understanding these components helps in appreciating the importance of a quality audio interface setup.
Can I use an audio interface for podcasting?
Yes, an audio interface is ideal for podcasting as it connects microphones and other audio sources to your computer, enhancing sound quality. It allows for better control over audio levels and ensures clear recording, making it a crucial tool for podcasters.
How important is an audio interface for music production?
An audio interface is vital for music production as it improves sound quality by accurately converting audio signals between analog and digital formats. It allows musicians to record multiple instruments and vocals with clarity, making it an essential component for any home studio setup.
Agree or disagree? Drop a comment and tell us what you think.