How to Set Up a Recurve Bow

Introduction:
A recurve bow is an excellent choice for archery enthusiasts, whether they be beginners or experienced archers. Perfect for target shooting and hunting alike, a recurve bow’s unique shape allows for increased accuracy and a smoother shooting experience. In this article, we will guide you through the process of setting up a recurve bow with detailed instructions.
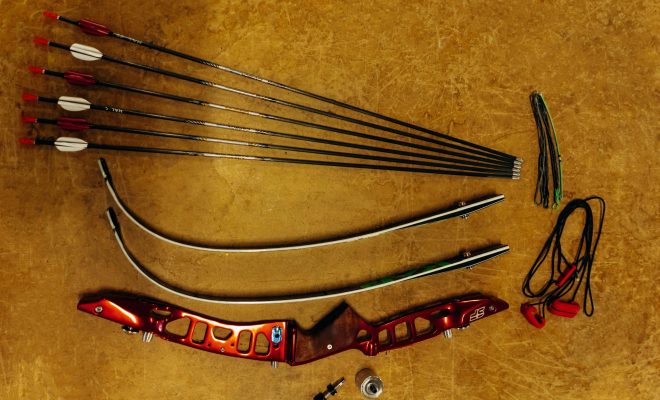
1. Gather Your Equipment
To set up a recurve bow, you will need several items:
– Recurve bow (riser and limbs)
– Bowstring
– Stringer tool
– Nocking points
– Arrow rest
– Bow square
– Allen wrenches
Once you have gathered all the necessary equipment, you can begin assembling your recurve bow.
2. Attach the Limbs
Start by attaching the limbs to the riser. Generally, the limbs have curved ends that hook onto corresponding fittings on the riser. Make sure to align the limbs correctly; the top limb will have a sticker or marking indicating that it is meant for the upper part of the riser. Securely fasten the limbs with the provided bolts using an Allen wrench.
3. Stringing Your Bow
With both limbs attached, it’s time to string your bow. Using a stringer tool is essential for safety and ease in this process.
– First, slide one loop of the bowstring over one limb tip (usually lower limb) and secure it in place.
– Slide the other loop over the other limb tip (upper limb) but only halfway down.
– Attach the stringer tool to both limb tips, making sure it’s secure.
– Step on the stringer tool with both feet while lifting the bow by its grip.
– Slowly raise your bow hand until both limbs flex and slide the upper loop into place.
– Once in position, carefully release tension and remove the stringer tool.
4. Setting Up Nocking Points
Your bow is now strung and ready, but there’s one more important step before shooting: setting up the nocking points. To do this, use a bow square and attach it to the bowstring, resting on the arrow rest. Adjust the nocking point on your string so that it is level with where your arrow will sit on the rest. Attach a second nocking point about 1/4 inch above the first one to prevent the arrow from sliding upwards during shooting.
5. Install Your Arrow Rest
Lastly, install your arrow rest according to the manufacturer’s instructions. Make sure to properly align it with your nocking points for accurate shots.
Conclusion:
With your recurve bow set up and ready to shoot, it’s essential to practice proper shooting techniques and maintain regular maintenance for long-lasting performance. Follow these steps, and you’ll be well on your way to mastering the art of archery with your recurve bow.


