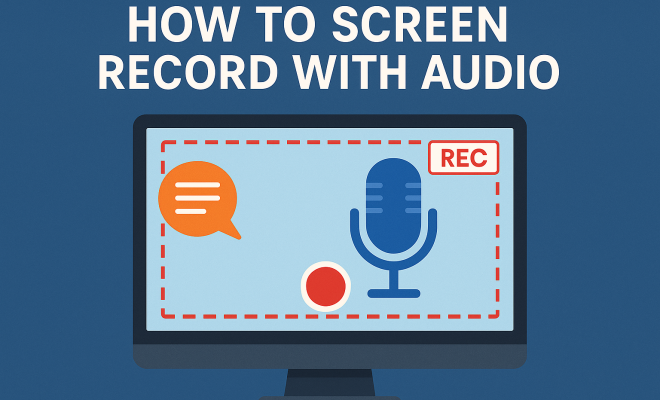
How to screen record with audio
“`html
Screen recording with audio is a powerful technique that has gained traction among content creators, educators, and professionals alike. With the rise of remote work and online learning, the ability to capture your screen along with audio has become essential for effectively communicating ideas, tutorials, and presentations. In this article, we will explore the various methods, tools, and tips to help you screen record with audio seamlessly.
1. Understanding Screen Recording
Before diving into the practical aspects of screen recording, it’s crucial to understand what it entails. Screen recording is the process of capturing the activity on your computer screen, which can include software usage, online browsing, or gameplay. By pairing this visual capture with audio – whether from a microphone or the system itself – you create a comprehensive multimedia output.
There are different reasons why screen recording has become vital. For educators, it allows the creation of engaging instructional videos. For businesses, it facilitates presentations and training materials. Gamers utilize screen recording to share gameplay highlights. With such broad applications, knowing how to effectively screen record with audio is a skill worth mastering.
2. Choosing the Right Tools
Numerous tools are available for screen recording, each offering varying features suited to different needs. Here are some of the most popular options:
- OBS Studio: This is a free, open-source software that allows you to capture high-quality video and audio. It’s especially popular among gamers and streamers due to its advanced features.
- Camtasia: While it’s a paid option, Camtasia comes with robust editing features, making it suitable for creating polished videos.
- Screencast-O-Matic: This user-friendly tool offers both free and paid versions, perfect for quick recordings without a steep learning curve.
- QuickTime Player: If you’re using a Mac, QuickTime offers a straightforward solution for screen recording with audio.
- Snagit: Known for its image and video capturing capabilities, Snagit is another excellent choice for quick screen recording.
When selecting a tool, consider your specific needs, such as whether you require advanced editing capabilities or simply want a straightforward recording solution. The right software can significantly enhance your ability to screen record with audio.
3. Setting Up Your Environment
Once you’ve chosen your screen recording tool, the next step is to prepare your environment. Ensure that your workspace is free from distractions and background noise, which can interfere with the audio quality of your recording. If possible, use a quality microphone to capture clear audio. Headsets with built-in mics are often a good choice for clearer sound.
Additionally, customize your screen to display only the content you want captured. Close unnecessary tabs, applications, and notifications that might pop up during the recording. This preparation is vital to create a professional-looking video that engages your audience.
4. Configuring Audio Settings
When you screen record with audio, configuring your audio settings is just as important as the video settings. Most recording software allows you to select the audio source, which can be your computer’s audio output, a microphone, or both. Consider the following:
- Choosing the Audio Source: Decide whether you want to record system audio, microphone audio, or both. Capturing both is often ideal for tutorials.
- Adjusting Volume Levels: Ensure that the volume levels of your sources are balanced. If your microphone is too loud compared to the system audio, it could distort your recording.
- Testing Your Setup: Before recording your main content, conduct a test recording to check audio quality. This step allows you to make necessary adjustments.
Having the right audio settings can drastically improve the quality of your output, making it crucial to take the time for these adjustments.
5. Recording Your Screen
With everything set up, it’s time to begin recording! Start by opening the application or content you want to showcase. In your chosen screen recording tool, select the recording area: full screen, a specific window, or a designated region. Once you hit the record button, the software will start capturing everything happening on your screen along with your audio input. (See: Understanding screen capture techniques.)
During the recording, keep an eye on your timer to manage the length of your video. If you’re demonstrating software or processes, try to speak clearly and at a steady pace. The more organized your presentation, the easier it will be for viewers to follow along.
6. Editing Your Recording
Once you’ve completed your recording, you may want to edit the footage to enhance the final product. Most screen recording tools offer basic editing features, allowing you to trim, cut, and add annotations or effects. Here are some editing tips:
- Trim Unnecessary Sections: Eliminate long pauses or mistakes to keep your video engaging.
- Add Annotations: Consider adding text overlays or shapes to highlight key points or provide additional context.
- Adjust Audio Levels: Fine-tune your audio for clarity, ensuring that background noise is minimized.
Editing helps polish your video, making it more professional and easier for your audience to understand.
7. Exporting Your Video
After editing, the next step is exporting your video. Different tools have various formats and quality settings, so choose what’s best for your intended use. Common formats include MP4 and MOV, which are widely supported.
Consider the following when exporting:
- File Size: Higher quality often means larger file sizes. Find a balance that ensures good quality without overwhelming storage capacity.
- Resolution: Export in the resolution that suits your audience’s needs; 1080p is generally a safe standard for most platforms.
- Platform Compatibility: If you plan to upload your video online, check the preferred specifications of the platform, whether it’s YouTube, Vimeo, or another service.
By paying attention to these details during the export process, you’ll ensure your video reaches your audience in the best possible condition.
8. Sharing Your Screen Recording
Now that you have your polished screen recording with audio, it’s time to share it with the world. Depending on your target audience, there are various platforms to consider. YouTube is a popular choice for a broad audience, but platforms like Vimeo or educational sites may be more appropriate for niche content.
When sharing, consider optimizing your video title and description with relevant keywords. This practice not only improves discoverability but also helps your audience understand the video’s content better. Don’t forget to promote your video on social media channels to reach a wider audience.
9. Best Practices for Effective Screen Recording
To maximize the impact of your screen recordings, follow these best practices:
- Plan Your Content: Outline what you’re going to say and demonstrate to maintain clarity throughout your video.
- Practice: Run through your presentation a couple of times before the actual recording to reduce mistakes.
- Engage Your Audience: Speak directly to your viewers, asking questions or encouraging them to follow along.
- Keep It Concise: Aim for brevity. Longer videos can lose viewer interest, so try to keep your recordings focused and to the point.
By adhering to these best practices, you can create effective screen recordings that resonate with your audience.
10. Current Trends in Screen Recording
As technology evolves, so do the methods and tools for screen recording. Current trends include increased integration of AI tools that enhance audio and video quality. There’s also a growing focus on interactive elements in videos, such as quizzes and clickable links that promote viewer engagement. (See: CDC's guidelines on multimedia tools.)
Many platforms are also moving towards mobile-friendly formats, recognizing that a large portion of users access content via smartphones and tablets. If you’re looking to stay ahead, keep an eye on these trends and be ready to adapt your screen recording strategies accordingly.
11. Advanced Techniques for Screen Recording
While basic screen recording techniques are sufficient for many users, there are advanced methods you can employ to enhance the effectiveness of your recordings. Here are some techniques to consider:
- Using Picture-in-Picture (PiP): This feature allows you to record yourself in a small window while demonstrating on your screen. This can create a more personal connection with your viewers.
- Adding Background Music: Incorporating subtle background music can elevate the viewer’s experience. Ensure that the music complements your voice and doesn’t overpower your message.
- Creating Chapters: For longer recordings, consider breaking your video into chapters. This can help viewers navigate to the sections that interest them most, improving engagement.
12. Statistics on Screen Recording Usage
Understanding the impact of screen recording can inspire you to create more engaging content. Here are some statistics illustrating its significance:
- According to a study by Wyzowl, 92% of marketers believe that video is an important part of their marketing strategy.
- A survey by TechSmith revealed that 64% of people who watch a video are more likely to buy a product online after watching a video about it.
- The same study found that 94% of marketers say video content has helped increase user understanding of their product or service.
- Videos that contain both visual and audio elements can increase information retention by up to 65% compared to reading text alone.
13. Common Challenges in Screen Recording
While screen recording can be a straightforward process, challenges can arise. Here are some common issues and how to address them:
- Audio Sync Issues: Sometimes, the audio can lag behind the visual elements. To avoid this, ensure that your system resources are not overloaded during recording and test your setup beforehand.
- Large File Sizes: High-quality recordings can lead to large file sizes. Consider adjusting resolution settings before recording to manage file size better.
- Software Crashes: If your recording tool crashes, you risk losing your work. Always save your project frequently and consider using software with auto-save features.
14. FAQ about Screen Recording with Audio
Here are some frequently asked questions regarding screen recording with audio:
What types of audio can I record?
You can record audio from your microphone, system sounds (like music and application sounds), or both. Be sure to choose the right audio sources in your settings for the best results.
Can I edit my screen recordings after recording?
Yes! Most screen recording software includes basic editing tools to trim, cut, and add effects or annotations to your recordings.
What is the best resolution for screen recordings?
1080p (1920×1080) is often the best resolution for most online platforms, providing a high-quality viewing experience without excessively large file sizes.
How long can I record for?
The duration of your recording will depend on your software and available storage. It’s a good practice to keep your videos concise, ideally under 10-20 minutes, to maintain viewer engagement. (See: New York Times on screen recording.)
Are there free options for screen recording with audio?
Yes, many free tools like OBS Studio, Screencast-O-Matic (free version), and QuickTime Player provide excellent screen recording functionalities with audio.
15. Final Thoughts
With a solid understanding of how to screen record with audio, you can produce high-quality videos that effectively communicate your message. Whether you’re creating tutorials, presentations, or gaming content, mastering this skill will undoubtedly enhance your digital communication abilities. By utilizing the tools, techniques, and best practices discussed, you can create engaging content that resonates with your audience and stands out in today’s digital landscape.
16. Exploring Alternative Screen Recording Options
While many users rely on traditional desktop applications for screen recording, there are also alternative options worth considering. Here are a few:
- Browser Extensions: Tools like Loom and Nimbus Screenshot offer in-browser recording options, allowing you to quickly capture content without downloading software. These can be particularly useful for users needing to record straightforward tutorials or presentations.
- Mobile Apps: For on-the-go recording, mobile applications like AZ Screen Recorder for Android or built-in screen recording features on iOS devices are excellent choices. They enable you to quickly capture mobile gameplay or app tutorials without the need for additional equipment.
- Dedicated Capture Cards: For serious gamers or content creators, using a capture card can significantly enhance your recording quality. Devices like Elgato capture cards allow you to record console gameplay with high fidelity while also capturing audio from various sources.
17. Integrating Screen Recording with Other Tools
Combining screen recording with other software can amplify your productivity and creativity. Here are some integrations to consider:
- Presentation Software: If you’re using tools like PowerPoint or Google Slides, consider recording your presentations within these applications. Both have built-in features that allow you to record your screen while narrating, which is ideal for creating instructional content.
- Video Editing Software: After recording, integrating your video with editing software like Adobe Premiere Pro or Final Cut Pro can help you produce more polished content. These tools can add advanced effects, transitions, and even incorporate animations to enhance viewer engagement.
- Project Management Tools: For team collaborations, integrating screen recording with project management software like Trello or Asana can streamline communication. You can create tutorial videos or project updates that can be directly linked into tasks or cards, providing context without requiring lengthy descriptions.
18. Screen Recording for Remote Teams
As remote work becomes increasingly common, screen recording has emerged as a crucial tool for teams. Here’s how:
- Onboarding New Employees: Use screen recordings to create training videos that demonstrate company software, processes, and best practices. This can save time and provide new hires with visual references they can revisit as needed.
- Feedback and Reviews: Screen recording allows team members to provide specific feedback on projects by demonstrating issues or suggesting improvements directly within the context of the work. This can be much more effective than written comments.
- Collaborative Presentations: Teams can record presentations that can be shared asynchronously, allowing for flexibility across different time zones. This method ensures everyone has access to the same information and can refer back to it as needed.
19. Future of Screen Recording Technology
The future of screen recording technology is looking bright, with several innovations on the horizon:
- AI-Driven Enhancements: Future software versions may incorporate AI to improve audio and video quality automatically, adjusting settings based on environment and user behavior.
- VR and AR Integration: Virtual and augmented reality technologies are beginning to find their way into screen recording. Imagine capturing your interactions within a virtual meeting room or an AR application.
- Increased Interactivity: The demand for interactive video content is rising. Future screen recording tools may allow creators to embed interactive elements directly within videos, such as polls, quizzes, or clickable links, making videos more engaging.
20. Conclusion: Mastering Screen Recording
As you can see, the ability to screen record with audio is not just a technical skill but a powerful tool for enhancing communication, engagement, and productivity. Whether for personal projects, educational materials, or professional presentations, mastering this skill can open doors to a wider audience and more impactful content. Stay informed about the latest trends, tools, and techniques to ensure your screen recordings are effective and high-quality. With practice and creativity, you can produce videos that not only convey information but also captivate and inspire your viewers.
“`
Trending Now
Frequently Asked Questions
How do I screen record on my computer with audio?
To screen record with audio on your computer, choose a screen recording tool like OBS Studio, Camtasia, or Screencast-O-Matic. Install the software, select the screen area to capture, and ensure your audio input is set correctly, either from a microphone or the system audio. Start recording to capture both the visual and audio elements.
What tools can I use to record my screen with sound?
You can use various tools to record your screen with sound, including OBS Studio for advanced features, Camtasia for editing capabilities, and Screencast-O-Matic for user-friendly options. QuickTime Player is also available for Mac users, providing a straightforward way to capture screen activity along with audio.
Can I record my screen and audio at the same time?
Yes, you can record your screen and audio simultaneously by using screen recording software that allows audio input selection. Most tools, like OBS Studio and Camtasia, enable you to capture audio from your microphone or system sound while recording your screen.
What is the best software for screen recording with audio?
The best software for screen recording with audio depends on your needs. OBS Studio is great for gamers and streamers due to its advanced features, while Camtasia is ideal for those seeking robust editing options. Screencast-O-Matic is a good choice for quick, user-friendly recordings.
Is it hard to learn how to screen record with audio?
Learning to screen record with audio is generally straightforward, especially with user-friendly tools like Screencast-O-Matic. While software like OBS Studio may have a steeper learning curve due to its advanced features, most programs provide tutorials and guides to help you get started easily.
What’s your take on this? Share your thoughts in the comments below — we read every one.