How to Reset Your Network Settings on Windows 11

Resetting your network settings on Windows 11 can be a useful troubleshooting solution if you’re experiencing connectivity issues or if your network settings have become corrupted. In this article, we’ll walk you through the steps to reset your network settings on Windows 11.
Step 1: Open the Settings app
To begin, open the Settings app by clicking on the Start menu in the bottom left corner of your screen and selecting the gear icon.
Step 2: Click on Network & internet
In the Settings app, click on the Network & internet tab located in the left-hand menu.
Step 3: Scroll down to Advanced network settings
Scroll down to the bottom of the page until you see the Advanced network settings section.
Step 4: Click on Network reset
In the Advanced network settings section, click on the Network reset option.
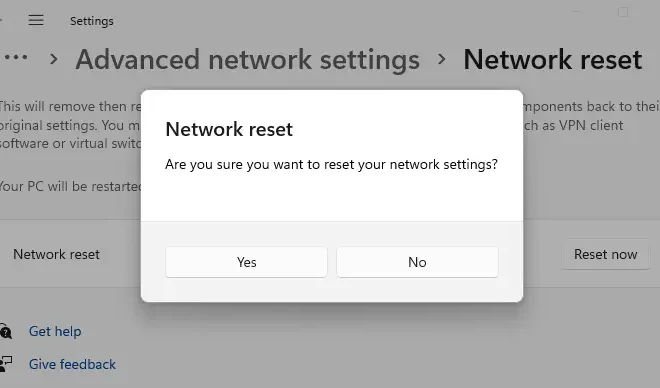
Step 5: Confirm the reset
A pop-up window will appear asking you to confirm the reset. Click on the Reset now button to proceed with the reset.
Step 6: Restart your computer
After you’ve confirmed the network reset, your computer will restart automatically.
Step 7: Reconnect to your network
Once your computer has restarted, you’ll need to reconnect to your Wi-Fi or Ethernet network. Follow the on-screen instructions to re-enter your network credentials and connect to your network.
Conclusion
Resetting your network settings on Windows 11 can be a useful way to fix connectivity issues or corrupted network settings. By following the steps outlined above, you can easily reset your network settings on Windows 11 and get your network connected again.


