How to Replace Ball Joints: A 12-Step Guide

Introduction:
Ball joints are crucial components in your vehicle’s suspension system. They connect the control arms to the steering knuckles and allow for smooth and unrestricted movement while driving. Over time, these components can wear out or become damaged, leading to poor handling, excessive tire wear, and even the risk of losing control of your vehicle. In this article, we’ll guide you through the process of replacing ball joints in a straightforward 12-step method.
Step 1: Gather Your Tools
Before beginning the replacement process, make sure you have the necessary tools at hand. These include:
– Jack and jack stands
– Wheel chocks
– Socket set and ratchet
– Ball joint separator tool (pickle fork or specialty tool)
– Hammer and flathead screwdriver
– New ball joints
– Torque wrench
– Grease gun
Step 2: Secure Your Vehicle
Park your vehicle on a flat surface and engage the parking brake. Use wheel chocks on the wheels that will remain on the ground during the process to prevent any accidental movements.
Step 3: Lift Your Vehicle
Using the jack, carefully lift your vehicle off the ground until it’s high enough for you to safely work underneath it.
Step 4: Support with Jack Stands
Place jack stands under your car’s frame to provide added support. This ensures your safety while working underneath the vehicle.
Step 5: Remove The Wheel
Remove the lug nuts using a socket set and ratchet, then take off the wheel that corresponds with the damaged ball joint.
Step 6: Remove Brake Caliper and Rotor (if necessary)
In some cases, removing the brake caliper and rotor might be necessary to access the ball joint. If so, use a socket set and ratchet again to remove them carefully.
Step 7: Separate Control Arm from the Steering Knuckle
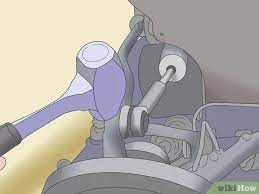
Use the ball joint separator tool to pry the control arm away from the steering knuckle. Remove the cotter pin and castle nut.
Step 8: Remove The Ball Joint
With the control arm separated from the steering knuckle, remove any hardware that secures the old ball joint in place, usually nuts or bolts.
Step 9: Install The New Ball Joint
Position the new ball joint in its place and secure it using the provided hardware (nuts or bolts) as per the manufacturer’s specifications.
Step 10: Reconnect The Control Arm and Steering Knuckle
Place the control arm back into its position and attach it to the steering knuckle. Secure it with the castle nut and insert a new cotter pin.
Step 11: Reinstall Brake Caliper and Rotor (if removed)
If you had to remove them, reinstall your brake caliper and rotor and secure them with their respective bolts or fasteners.
Step 12: Reattach The Wheel
Place your wheel back onto its position, then tighten up those lug nuts. Once completed, slowly lower your vehicle off of the jack stands using your car jack until it’s entirely back on solid ground.
Conclusion:
By following these 12 steps, you should have successfully replaced your vehicle’s ball joints. Remember to take extra care when dealing with your suspension system, as improper installation can result in dangerous consequences while driving. Test drive your vehicle after completing this procedure to ensure smooth handling and proper function of your new ball joints. If you’re unsure about performing this task yourself, always consult with a professional mechanic for assistance.


