How to Outline Text in GIMP 2

Introduction
GIMP (GNU Image Manipulation Program) is a powerful, open-source image editing software that offers various features for designers, photographers, and artists. One of the frequently-used functions in GIMP is adding text to images or designing text-based graphics. In GIMP 2, outlining text can give your project a more professional look and make it stand out. This article will guide you through the process of outlining text in GIMP 2 with ease.
Prerequisites
Before we start, ensure you have GIMP 2 installed on your computer. If not, you can download it for free from the official website:
https://www.gimp.org/downloads/
Step-by-Step Guide to Outline Text in GIMP 2
1. Launch GIMP 2: Begin by opening GIMP 2 on your computer.
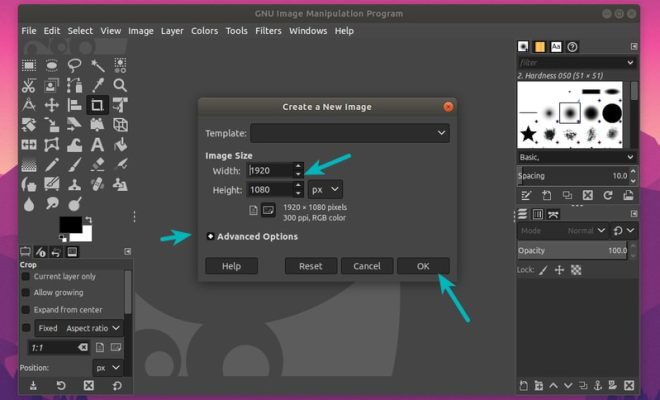
2. Create a new project: Click on ‘File’ at the top left corner and select ‘New.’ A window will pop up where you can customize the canvas size for your project. Adjust the width and height as needed, then click ‘OK.’
3. Choose a background color: In the ‘Layers’ panel on the right side of the screen, select ‘Background’ and then pick a color from the color palette.
4. Add text: Click on the ‘Text Tool’ from the toolbar on the left side (the “A” icon). Click anywhere on the canvas and start typing your text. Adjust font style, size, and other attributes using options available in the Tool Options panel below the toolbar.
5. Create a new layer: Go to the ‘Layers’ panel on the right side of the screen and click on the ‘+’ icon at the bottom to add a new layer above your text layer.
6. Alpha selection: Make sure your new layer is selected in the Layers panel and then go to ‘Select’ in the toolbar at the top. Choose ‘Alpha to Selection’ from the drop-down menu.
7. Expand the selection: Go to ‘Select’ again in the toolbar and choose ‘Grow.’ In the dialog box that appears, enter a value for how many pixels you want your outline to be thick. Click ‘OK.’
8. Fill the outline: Ensure your new layer is still selected, pick a color for your outline using the color palette. Click on the ‘Bucket Fill Tool’ from the left side toolbar (the paint bucket icon), and click within the expanded selection to fill it with your chosen color.
9. Deselect and adjust layers: Go to ‘Select’ in the top toolbar and choose ‘None’ to deselect your text’s outline. In the Layers panel, drag your new layer below the original text layer to reveal the outlined text effect.
10. Save and export: Click on ‘File,’ then select ‘Save As’ or ‘Export As’ to store your project as a GIMP file or export it into another image format, such as JPEG or PNG.
Conclusion
Outlining text in GIMP 2 is a simple yet effective way to enhance your images and designs. By following these steps, you can create stunning visuals that captivate viewers and leave a lasting impression. Explore other GIMP tools and features to unlock even more creativity in your projects!


