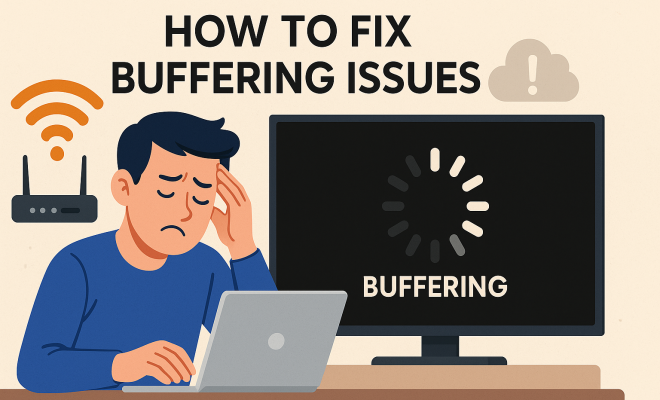
How to optimize OBS settings
“`html
When it comes to live streaming or recording content, OBS (Open Broadcaster Software) has become the go-to choice for many creators. Its flexibility and robust feature set make it a powerful tool in the arsenal of streamers, gamers, and educators alike. However, to truly harness its capabilities, you need to know how to optimize OBS settings. This article will guide you through the best practices to ensure your streams are smooth, high-quality, and engaging for your audience.
1. Understanding OBS: A Brief Overview
Before diving into the nitty-gritty of optimizing OBS settings, it’s crucial to understand what OBS is and what it offers. Open Broadcaster Software is a free and open-source software suite for recording and live streaming. Its versatility allows users to capture desktop screens, webcam footage, and even gameplay, all while providing seamless integration with platforms like Twitch and YouTube.
One of the key advantages of OBS is its modularity. Users can customize the interface, add different sources, and apply filters to enhance video and audio quality. However, these features can overwhelm newcomers, making it essential to learn how to set up and optimize OBS effectively from the start.
2. System Requirements: Ensuring Your Hardware Can Handle It
To optimize OBS settings, first and foremost, you need to ensure your system meets the necessary requirements. OBS can be resource-intensive, especially when streaming at high resolutions. At a minimum, aim for a dual-core processor, 4GB of RAM, and a dedicated graphics card. However, for optimal performance, consider a quad-core processor or better, along with at least 8GB of RAM.
Additionally, an SSD can significantly improve loading times and performance. Streaming at 1080p requires a good internet connection — ideally, an upload speed of at least 5 Mbps. Before you start streaming, run a speed test to ensure your connection is reliable enough for your desired output quality.
3. Setting Up Your Scene: The Foundation of Your Stream
Your OBS scene is where the magic happens; it’s essentially the layout of your stream. To optimize OBS settings, you need to understand how to configure your scene properly. Start by adding sources: these can include your webcam, game capture, window capture, or any other media you want to include in your stream.
Be mindful of how you arrange these sources. Layering is crucial; for instance, if you’re overlaying a webcam feed on top of a game, ensure the game source is below the webcam source in the sources list. This simple setup not only looks professional but also enhances viewer engagement by ensuring key video elements are visible and aesthetically pleasing.
4. Encoding Settings: Finding the Right Balance
Encoding settings play a pivotal role in how your stream is delivered. To optimize OBS settings effectively, you need to choose the right encoder for your needs. OBS allows you to choose between software (x264) and hardware encoders (like NVENC for NVIDIA GPUs or AMF for AMD). Hardware encoders generally perform better and reduce CPU load, allowing for a smoother experience when gaming and streaming simultaneously.
Bitrate is another critical aspect. For 1080p streaming, aim for a bitrate between 4500 to 6000 kbps. If you’re using a lower resolution, you can adjust this value accordingly. Keep in mind that higher bitrates require better upload speeds, so always consider your internet capabilities before setting these values too high.
5. Audio Settings: The Unsung Hero of Streaming
While video quality often steals the spotlight, audio is equally important. To optimize OBS settings for audio, you need to configure both input and output settings. Start by selecting your audio device in OBS under the ‘Audio’ settings section. Make sure you use a high-quality microphone for clear audio, as poor sound quality can drive viewers away.
Adjust audio levels and employ filters to enhance your sound. Adding a noise suppression filter can cut out background noise, while a compressor can help maintain consistent volume levels. Balance your desktop audio and mic levels, ensuring that neither overpowers the other. Testing your audio setup before going live ensures that your audience has an engaging experience. (See: Wikipedia page on Open Broadcaster Software.)
6. Video Settings: Resolution and Frame Rate
Video quality is paramount for maintaining viewer retention. In OBS, you’ll want to configure your output resolution and frame rate carefully. The default settings are often 1920×1080 resolution at 30 frames per second (FPS). However, if your hardware struggles with this, consider lowering the resolution to 1280×720.
Frame rate also plays a critical role in stream smoothness. Aiming for 60 FPS can provide a more fluid viewing experience, especially for fast-paced content like gaming. Keep in mind that higher resolutions and frame rates demand more from your system, so adjust according to your hardware capabilities.
7. Using Scenes and Transitions to Enhance Your Stream
Creating multiple scenes within OBS allows you to switch between different layouts seamlessly. This can range from a starting soon screen to transitioning into gameplay or a be right back screen. To optimize OBS settings, utilize transitions effectively. Simple fades and cuts can add a professional touch without overwhelming your viewers.
Consider using a scene collection for various types of content. For instance, you might have one collection for gaming streams and another for educational content. This organization can help you switch between formats without needing to adjust individual settings every time you go live.
8. Monitoring Performance: Keeping an Eye on Your Stream
Monitoring your stream’s performance is essential for ensuring a high-quality experience. OBS comes with built-in performance metrics that allow you to track CPU usage, dropped frames, and other critical aspects of your stream. Using these metrics can help you identify any issues before they affect your audience.
Consider using a second monitor to keep an eye on these metrics while you stream. Additionally, tools like Streamlabs or Discord can provide integrated chat and alerts, allowing you to engage with your audience while keeping an eye on performance. Regularly review these stats after your streams to identify areas for improvement in your OBS settings.
9. Testing: The Key to a Smooth Experience
Once you’ve configured your settings, the most critical step is testing. Run a private stream to see how everything looks and sounds. This is your chance to make adjustments without the pressure of an audience. Pay attention to video quality, audio levels, and overall performance.
Invite a few friends or fellow streamers to watch your test run, as they can provide valuable feedback. Use this information to fine-tune your OBS settings before going live. Remember, first impressions matter, and a well-optimized stream can set the stage for your success.
10. Staying Updated: Adapting to Changes in Streaming Technology
The world of streaming is ever-evolving. OBS frequently releases updates that can introduce new features, improve performance, and enhance security. To optimize OBS settings effectively, always keep your software updated. Subscribe to forums or follow OBS on social media to stay informed about the latest changes and best practices.
As technology advances, new tools and plugins emerge that can enhance your streaming experience. Explore the use of plugins that can help you manage stream alerts, browser sources, and more. Adapting to these changes can keep your content fresh and engaging for your audience.
11. Advanced OBS Settings: Unlocking Additional Features
Once you’re comfortable with the basics of OBS, it’s time to explore some advanced settings that can take your streaming quality to the next level. Some of these features might seem complex at first, but they offer significant benefits when used correctly.
For example, you can enable the Advanced Encoder Settings and tweak options like “Profile” and “Tune.” Setting the profile to “High” ensures the best quality for your stream. Moreover, if you’re streaming fast-paced games, you can set the “Tune” option to “zerolatency,” which minimizes buffering and lag, ensuring a seamless experience for your viewers.
12. Common Pitfalls: Avoiding Mistakes in OBS
Even seasoned streamers can fall victim to common mistakes when using OBS. One such pitfall is not properly adjusting the resolution and bitrate. Always ensure that your output settings match your hardware capabilities and internet connection speed. A bitrate too high for your upload speed can lead to buffering for your viewers, while low settings can compromise video quality. (See: CDC guidelines on ergonomics.)
Another common issue is neglecting to use the preview feature of OBS. Before going live, use the preview mode to see exactly how your stream will look. This helps catch any visual or audio glitches that could detract from the viewer experience. Take time to familiarize yourself with the various settings and tools available in OBS to avoid these missteps.
13. Stream Interaction: Engaging Your Audience
Engagement is key to building a loyal viewer base. Utilize features like chat overlays to keep your audience involved during streams. OBS allows you to integrate browser sources where chat can be displayed on-screen, making it easy for viewers to see messages even while focusing on the content.
Hosting Q&A sessions or live polls can significantly boost interaction. Use tools like Streamlabs or OBS.Live for additional features that enhance viewer participation. Remember, the more you engage your audience, the more likely they are to return for future streams.
14. Frequently Asked Questions (FAQ) About Optimizing OBS Settings
What is the best resolution for streaming on OBS?
The best resolution generally depends on your hardware and audience. For most, 1080p (1920×1080) at 30 or 60 FPS is ideal, but if you encounter performance issues, 720p (1280×720) is still very good.
How do I test my OBS settings before going live?
To test your settings, you can run a private stream where only you or invited viewers can see it. This lets you examine audio and video quality without the pressure of a live audience.
What bitrate should I use for 1080p streaming?
For 1080p streaming, a bitrate between 4500 to 6000 kbps is recommended. However, always consider your upload speed when setting this value.
Can I use OBS for recording only?
Absolutely! OBS is not just for streaming; it’s a powerful recording tool too. You can configure your settings specifically for high-quality recordings without going live.
Should I use hardware or software encoding?
If you have a dedicated graphics card, hardware encoding (like NVENC for NVIDIA or AMF for AMD) is usually the better choice for performance. If you’re using an older system without a strong GPU, software encoding (x264) may be your only option, but it’s more CPU intensive.
What are some recommended plugins for OBS?
Plugins like OBS.Live, StreamElements, and Streamlabs provide great tools for alerts and overlays. These can help enhance your stream’s interactivity and aesthetics.
How often should I update OBS?
It’s wise to keep OBS updated with the latest versions, as updates often include important security patches and performance improvements. Check for updates frequently or enable auto-updates if possible.
15. Advanced Features and Settings in OBS
In addition to the essential settings, OBS offers advanced features that further enhance the streaming experience. One such feature is the ability to use “Scene Collections,” which allows you to create multiple setups for different types of content. For example, you could have a different collection set up for gaming versus tutorial videos, allowing for a quick switch depending on what you’re doing. (See: New York Times tips for streaming.)
Another advanced feature is “Studio Mode,” which enables you to preview scenes before transitioning them live. This is particularly useful for ensuring everything appears as it should without exposing any errors to your audience. It gives you the chance to adjust settings or fix issues before they become visible to viewers, maintaining a polished stream.
Additionally, utilizing “Hotkeys” can greatly enhance your control over the stream. By assigning specific functions to your keyboard, you can switch scenes, start and stop streaming, and adjust audio levels without needing to navigate through the OBS interface. This can streamline your streaming process, especially during live events or complex broadcasts.
16. Understanding OBS Community Resources
The OBS community is vast and active, providing numerous resources for learning and troubleshooting. Forums, Discord servers, and YouTube channels dedicated to OBS can be invaluable in finding solutions to specific problems or learning new techniques. Engaging with the community can also keep you informed about the latest plugins and updates that can optimize your streaming experience.
Consider visiting the official OBS forums or subreddit, where users share their setups, tips, and tricks. Participating in discussions can provide you with insights that are often not covered in standard guides. Additionally, many experienced streamers post tutorials on platforms like YouTube, making it easier to learn through visual examples.
17. Performance Optimization: Enhancing Your Streaming Setup
Beyond basic optimization, there are additional strategies to improve the overall performance of your OBS setup. One effective approach is to utilize a “Game Mode” on your computer, which prioritizes system resources for your game and OBS. This can help reduce lag and improve stream quality, especially during demanding gaming sessions.
Another tip is to manage your background applications. Close any unnecessary programs running on your computer, as they can consume CPU and RAM, detracting from OBS’s performance. A clean and organized workspace will help ensure that your system runs smoothly during your streams.
Also, consider upgrading your internet connection if you’re frequently experiencing issues. A wired connection is typically more stable than Wi-Fi, reducing latency and packet loss. If your ISP offers higher bandwidth options, upgrading can make a significant difference in your streaming quality.
18. Conclusion: Embrace the Power of OBS
By following these guidelines and continuously refining your approach, you can optimize OBS settings to ensure your streams are of the highest quality. Embrace the flexibility of OBS, stay informed, and most importantly, enjoy the process of creating and sharing your content with the world.
“`
Trending Now
Frequently Asked Questions
What are the best OBS settings for streaming?
The best OBS settings for streaming depend on your hardware and internet speed. Generally, use a resolution of 1920×1080 with a frame rate of 30 or 60 FPS. Ensure your bitrate is set between 2500 to 6000 Kbps, depending on your upload speed, and choose a preset that balances quality and performance.
How do I improve OBS performance?
To improve OBS performance, ensure your system meets minimum requirements, close unnecessary applications, and adjust settings like resolution and bitrate. Using hardware encoding (like NVENC) can offload processing from your CPU, and optimizing your scene layout can also enhance performance.
What are the system requirements for OBS?
The minimum system requirements for OBS include a dual-core processor, 4GB of RAM, and a dedicated graphics card. For optimal performance, a quad-core processor, at least 8GB of RAM, and an SSD for faster loading times are recommended.
How do I set up OBS for high-quality streaming?
To set up OBS for high-quality streaming, start by adjusting your output settings to match your desired resolution and bitrate. Use a reliable internet connection with at least 5 Mbps upload speed, and configure your video settings to ensure smooth performance without sacrificing quality.
Can OBS run on low-end PCs?
Yes, OBS can run on low-end PCs, but performance may be limited. It's essential to lower the resolution and bitrate settings to reduce the load on your system. Additionally, using a dedicated graphics card and ensuring your system meets the minimum requirements will help improve performance.
Agree or disagree? Drop a comment and tell us what you think.